
Many Windows users over the years have complained of crashes or updates ruining something or the other on their Windows machines. Also, for many years, Windows has a built-in tool to prevent this. Windows 10 can even be configured to create automatic System Restore points.
This way you don’t have to remember to manually create restore points. Because really, not enough people use this excellent tool which, figuratively speaking, reverses time.
A Restore Point is kind of a record of your OS at a particular time. Using it, Windows can restore itself to a previous point in time when you didn’t have the problem you’re currently facing.
This is why it’s always ideal to create a system restore point before you install or uninstall something that could potentially cause problems. It might also be a good idea to just create a restore point when things are running all smooth.
Create Windows 10 Restore Points Automatically
Once configured, Windows 10 will create restore points automatically before any big events. Usually, this is done before a new app, driver update or a new driver or a new software update is installed. This way you know you have the latest restore point to go back to if things don’t work out after such an event. To configure automatic system restore points, follow the steps below.
- Press the Windows key and type System Restore.
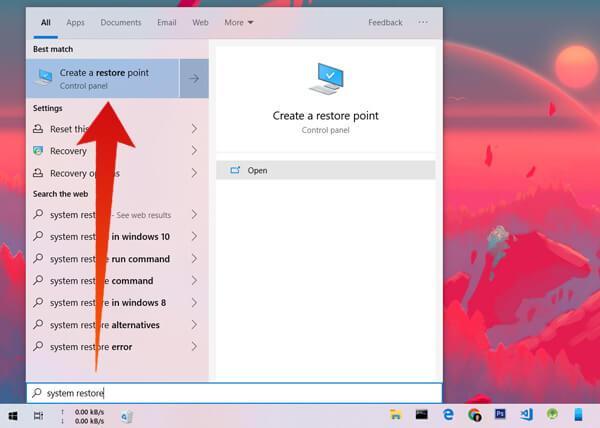
- Click on the first search result, Create a restore point.

- Select the disk on which Windows 10 is installed, usually Local Disk (C:). This is the drive you want to create a system restore point for.
- Click the Configure… button under the System Protection tab.
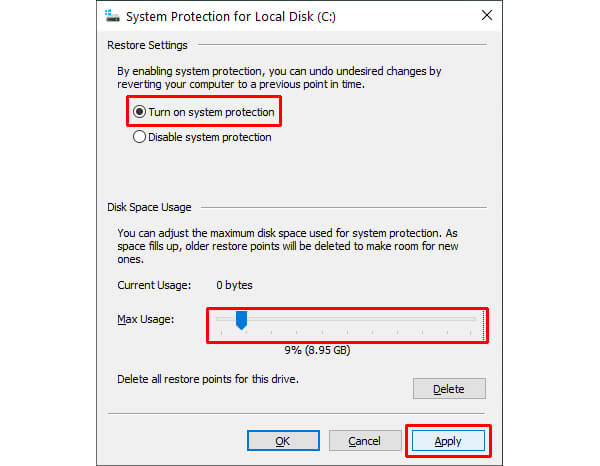
- Select Turn on system protection under Restore Settings.
- Use the slider at the bottom to adjust the amount of space on your disk that you want to allow Windows to use, in order to create automatic system restore points.
- When you’re ready, click Apply or OK.


Also read: How to Get Mac Like Dynamic Desktop on Windows 10
Create Windows 10 Restore Points Manually
On Windows 10, system protection needs to be enabled for a user to be able to create restore points manually. So follow the steps above to turn it on. If you don’t want to have automatic restore points, just allocate 0% space to it.
- Launch the System Properties window as before.
- Click the Create… button under the System Protection tab.
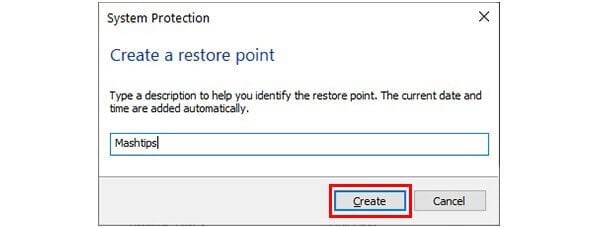
- Give the system restore point a name to identify it and click OK.
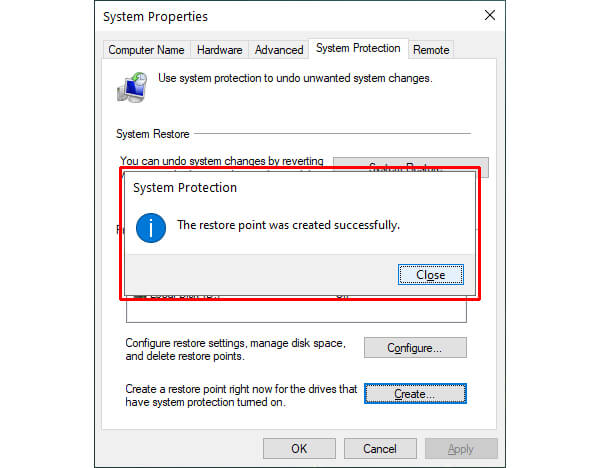
- When it’s done, you’ll see a message confirming the creation of the restore point. Click Close.

Also read: How to Delete Broken Registry Entries in Windows 10
That’s it! Your PC is now safe should things go south in the future. You’ll want to keep creating restore points once or twice a month though so you always have the latest restore point to crash land on.


