
Stock Android has long been hailed as a simple, clean, more desirable version of Android. However, this cleaner version of Android has always been lacking in terms of functionality. At times, it has even been bested by Apple’s iOS in that area. Android’s built-in screenshot functionality is a great example of this. Another example would be a built-in screen recorder. The new Android 11 update finally brings us one. In this article, we’re going to show you how to use the built-in screen recorder to record the screen on Android.
A built-in screen recorder is not a new thing in the Android world. Many OEM skins have already had the feature baked right in for years. That’s usually the case with many Android features, even screenshots. OEMs like OnePlus, Samsung, Huawei, etc. offer scrolling screenshots in their versions of Android. Stock Android, however, only allows a quick share and markup. The new built-in Android 11 screen recorder too, similarly, is pretty barebones in comparison.
How to Use Built-in Screen Recorder on Android
Android 11 does feature a built-in screen recorder. However, it’s not the easiest thing to find if you don’t know where to look for it. The built-in screen recorder on Android 11 is accessible from a quick settings tile. By default, this tile may not be present, however.

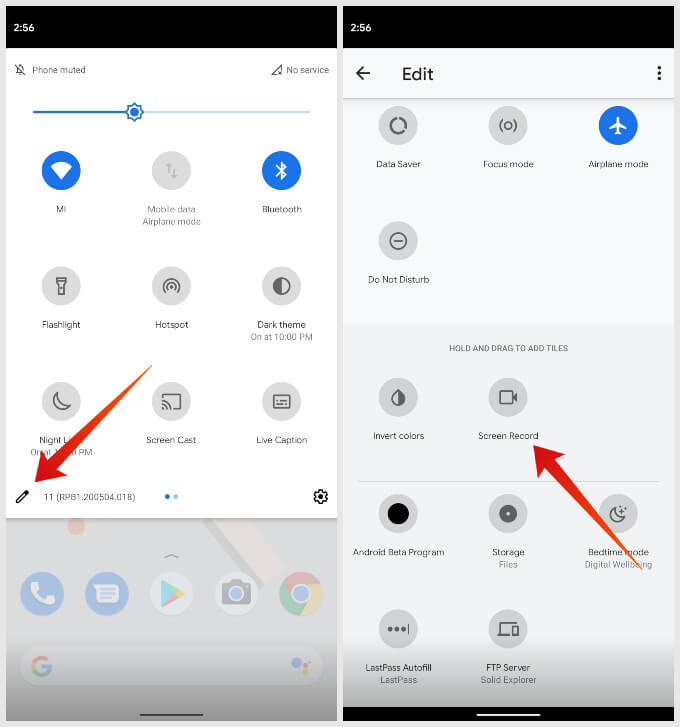
- Swipe down from the top of your screen using two fingers to bring up the quick settings panel.
- Tap on the edit (pencil) icon in the bottom left corner of the quick settings panel.
- Scroll down to find the Screen Record tile.
- Tap and hold to drag and the tile to the upper section of the page and place it wherever you want.
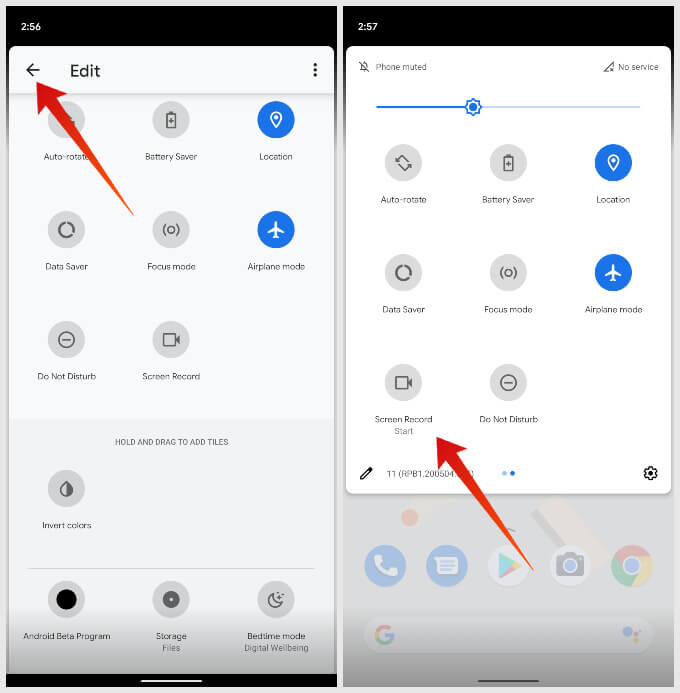
- When done, tap on the back button.
- You should now be able to find the Screen Record tile in the quick settings panel.

How to Record Screen on Android Phone
Now that the Screen Record tool has been added to Android’s quick settings panel, you can easily use it.
- Swipe down from the top of your screen using two fingers to bring up the quick settings panel.
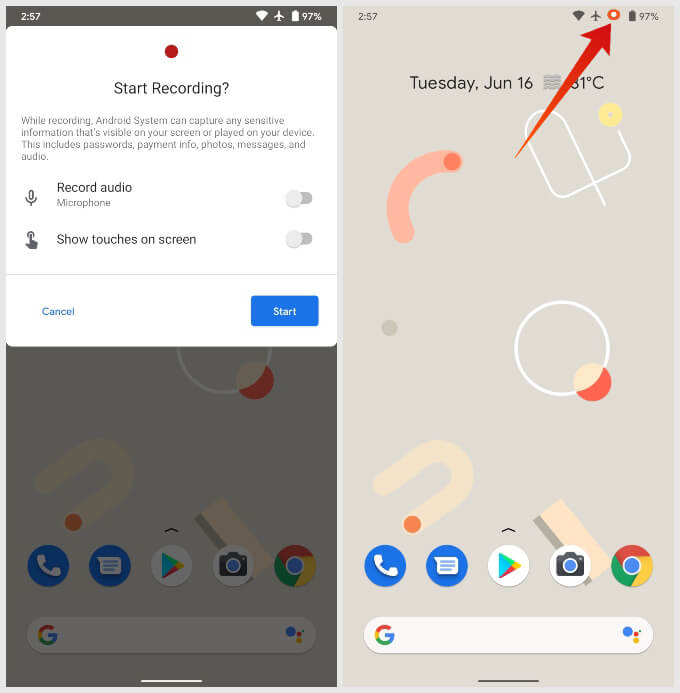
- Tap on the Screen Record tile you’ve just added earlier.
- Toggle the required options on or off and tap on the START button to start recording the screen.
- You will see a countdown timer in the status bar that counts to 3 before the screen is recorded.
- While the recording is on, you will continue to see an icon for it in the status bar.
- To stop the recording, pull down the notification shade and tap on the screen recording notification.
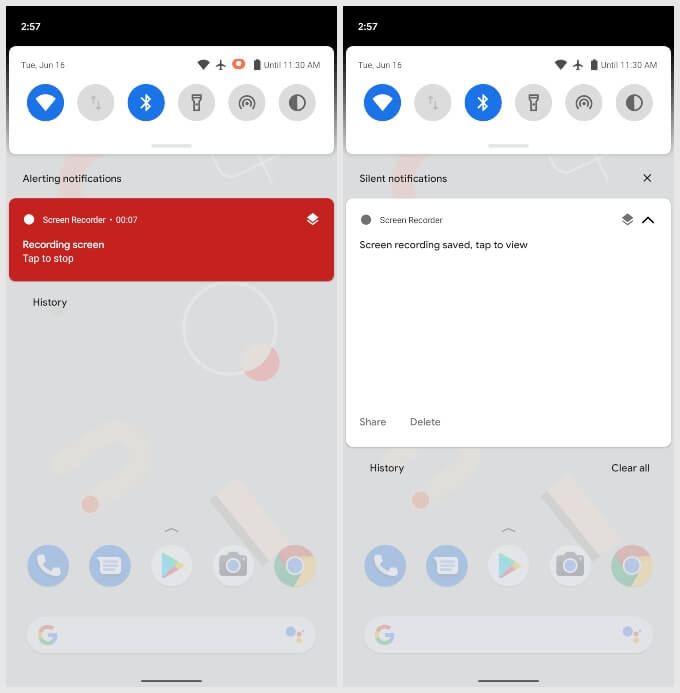
You will also find the option to quickly share or delete the recording in the notification shade. The recording is saved to the Movies folder in the Internal storage.
Not Satisfied with Built-in Screen Recorder?
Fortunately, there are plenty of third-party apps on the Play Store that will give you that and more. You can check out our list of the best screen recorders for Android to learn more.
As mentioned before, the built-in screen recorder on Android 11 is pretty barebones. While it does offer the option to record audio from the mic and show screen touches, it lacks every other feature. For instance, it does not offer a screen resolution choice. That is essential if you’re trying to keep the siz of the recording small.


