
Whatever your reason may be to stop Windows 10 automatic updates, there are a few ways to do this. Microsoft wants users to always be on the latest version of Windows. Therefore, they’ve avoided providing the user any control in this regard. However, Windows 10 is still the legacy Windows OS with all its registries and group policies. After all, people are looking for ways to stop Windows 10 updates. To make matters worse, there’s no switch or toggle to turn off Windows 10 automatic updates.
Let’s exploit a few solutions to stop Windows 10 Auto updates. The solutions to stop auto updates on Windows 10 are applicable from individual users to the enterprise level.
Content
- Method 1: Stop Windows Update Service
- Method 2: Set Up A Metered Connection
- Method 3: Use Windows Registry
- Method 4: Use Group Policy to Stop Update
- Disable/Stop Windows Update Medic Service
Editor’s Note: Update the article with Windows Medic Option. Please follow the steps on Windows Update Medic Service as the last step to stop updating windows 10 automatically.
Method 1: Stop Windows Update Service
Windows Update Service is available in the Windows services list. You can open the update services and disable to stop Windows Auto Updates. This is the easiest solution for non-tech users. Let’s see in detail.
- Press the Windows key.
- Type services to search for it.
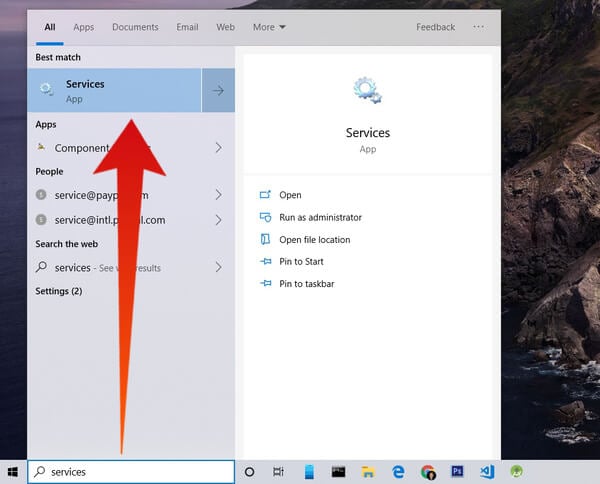
- Click on the first result, Services, to launch it.
- From the services list that appears, scroll down and find the one labeled Windows Update.
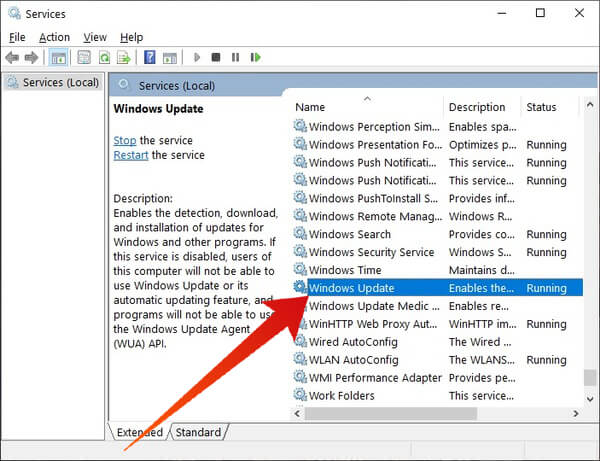
- Double-click on the Windows Update service to open it.
- Select Disabled from the Startup Type drop-down menu under the General tab.
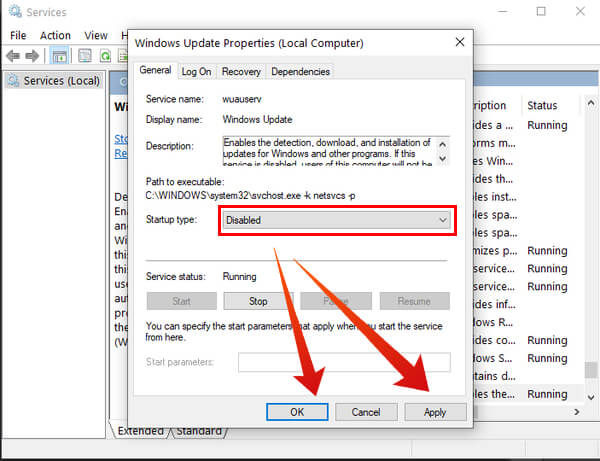
- Click the Apply button.
- Click the OK button.


To re-enable it, just select Automatic from the same drop-down menu.
Method 2: Set Up A Metered Connection
To avoid the wrath of Windows users on limited data connections, Microsoft has implemented a feature called Metered Connections. When a connection is deemed Metered, Windows 10 only installs updates that are considered a ‘Priority’. Although, Microsoft doesn’t clarify which updates are classified as ‘Priority’ updates, setting your Internet connection as a metered connection should block out some Windows updates.
- Go to Settings > Network & Internet > Wi-Fi.
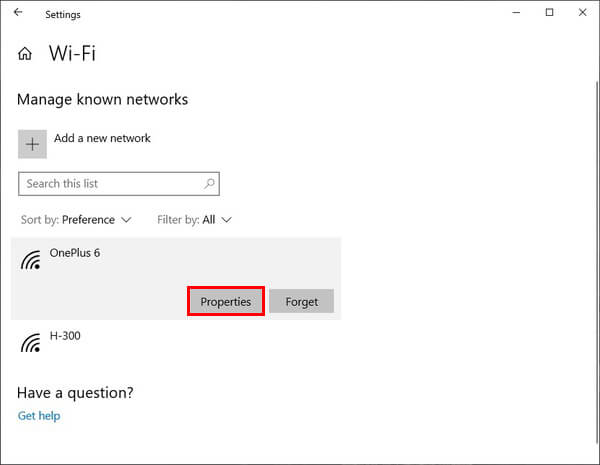
- Click on the Manage known networks link.
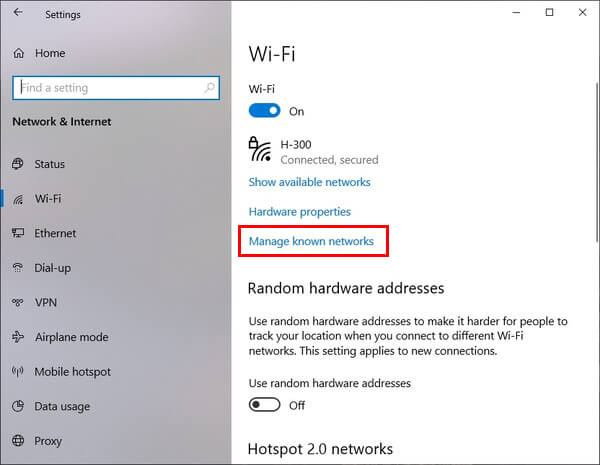
- Click on the network you’re connected to and click on the Properties button.
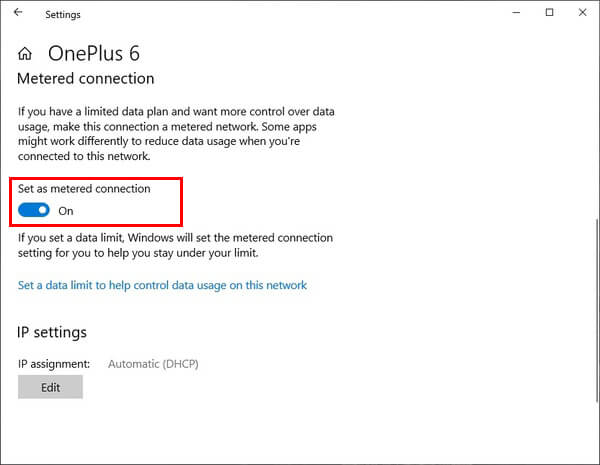
- Scroll down and turn on the toggle labeled Set as metered connection under Metered connection.

Unfortunately, the Metered Connection option only works with Wi-Fi so if your computer uses an Ethernet connection, you’re better off trying any of the three methods above.
Related: Enable Windows Sandbox and Try New Apps in Windows 10 Safely.
Method 3: Use Windows Registry
Editing windows registry is a bit risky for newbies. We recommend to backup Windows registry before doing any editing.
- Press the Windows key.
- Type regedit to search for it.
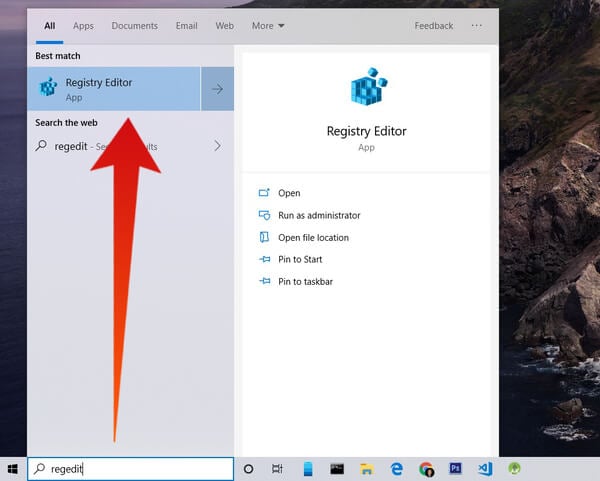
- Click on the first search result, Registry Editor, to launch it.
- From the left column, navigate to the following path.
HKEY_LOCAL_MACHINE\SOFTWARE\Policies\Microsoft\Windows
Alternatively, you can copy and paste the above address in the address bar as well.
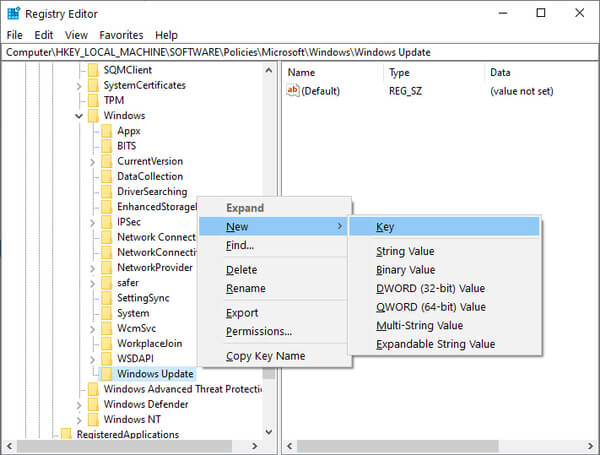
- Right-click on the Windows key and select New > Key.

- Name the newly created key Windows Update and press Enter.
- Now right click on the newly created key and select New > Key.
- Give this key the name AU and press Enter.
- Right-click on the empty space on the right and select New > DWORD (32-bit) Value.
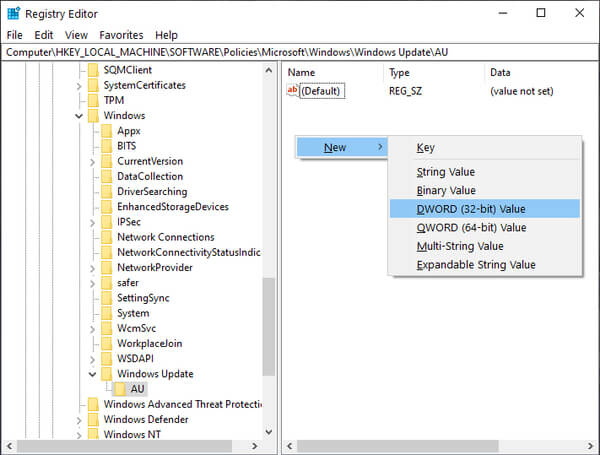
- Name this new value as NoAutoUpdate.
- Now double-click on the newly created DWORD Value and change its value from 0 to 1.
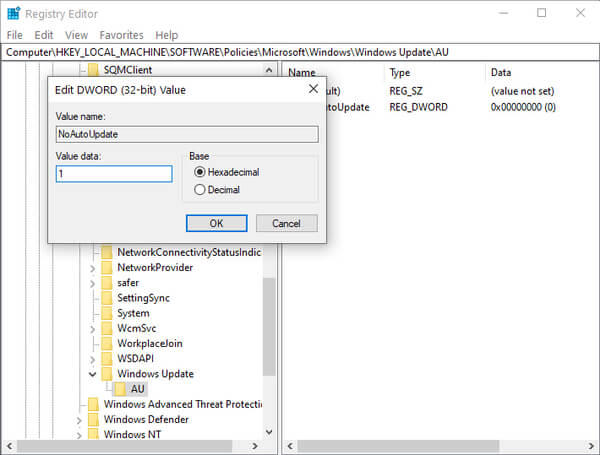
- Click OK.
- Close the Registry Editor and restart your computer.


Related: How to Enable Virtualization on Windows 10
Method 4: Use Group Policy to Stop Update
This method is only applicable to Windows 10 Pro Version because the Local Group Policy Editor is not available on other versions of Windows. This solution is more suitable for enterprise users to apply the group policy at the enterprise level.
- Press the Windows key.
- Type gpedit to search for it.
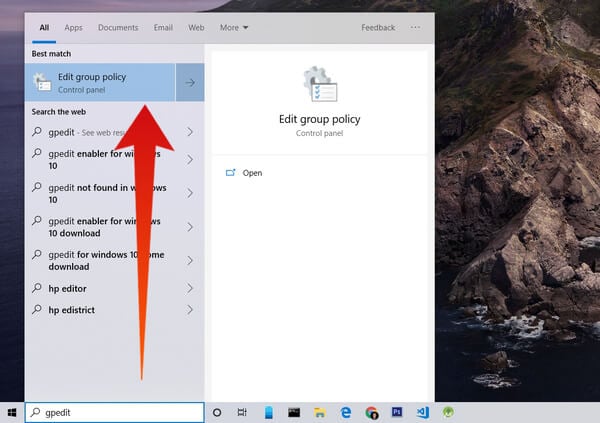
- Click on the first search result (Edit group policy) to launch the Local Group Policy Editor.
- From the left column, navigate to the following path.
Computer Configuration\Administrative Templates\Windows Components\Windows Update
- On the right, find and double-click on Configure Automatic Updates.
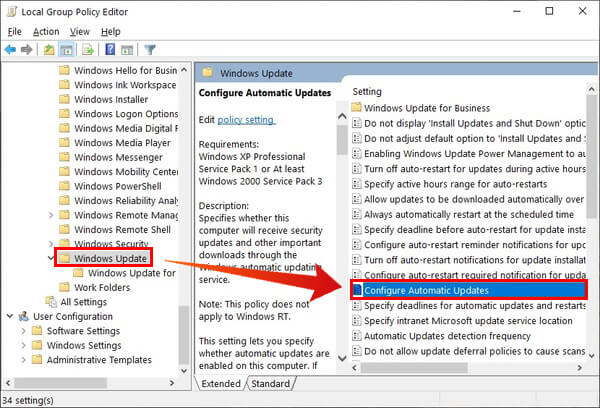
- Select Disabled to stop Windows 10 updates.
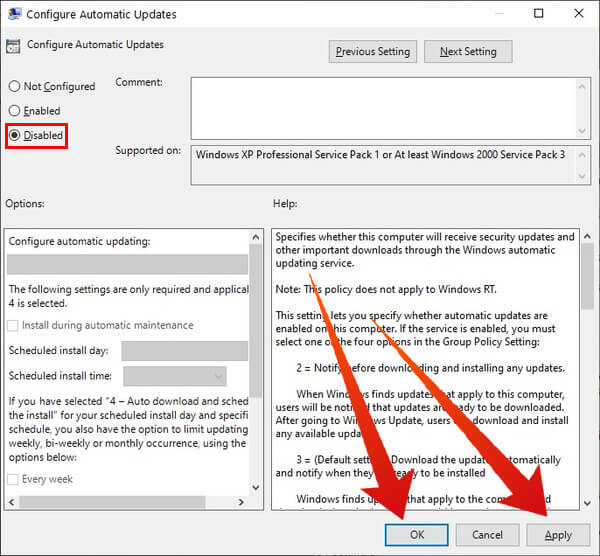
- Click the Apply button.
- Click the OK button.


Once you’re done, Windows 10 will no more check for updates or download and install them automatically. You can still manually download and install updates from Settings > Update & Security > Windows Update by clicking the Check for updates button.
Related: How to View Hidden Files, Folders, and Drives in Windows 10
Disable/Stop Windows Update Medic Service
Whichever method you choose to disable Windows Update, there’s another essential action you’ll need to do. There’s a new service called the Windows Medic Service. It’s meant to fix problems with Windows updates. Essentially, Medic Service will re-enable Windows updates in time if you have disabled them. Therefore, it becomes necessary to disable the Windows Medic Service as well.
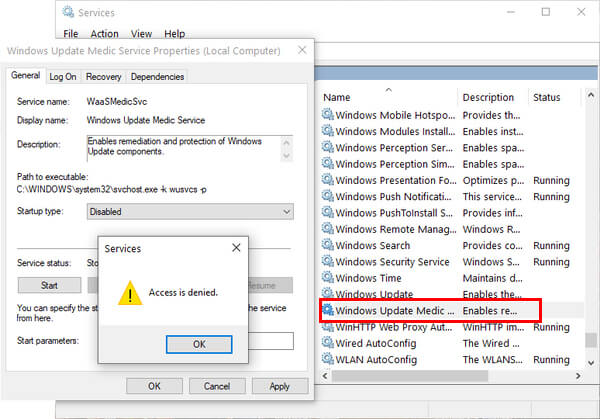

However, if you try to disable this service from the Services manager, you’ll get a prompt saying “Access is denied” as shown above. So follow the steps mentioned below.
- Launch Registry Editor as before.
- Navigate to the following address.
HKEY_LOCAL_MACHINE\SYSTEM\CurrentControlSet\Services\WaaSMedicSvc
- On the right, double-click the Value named Start.
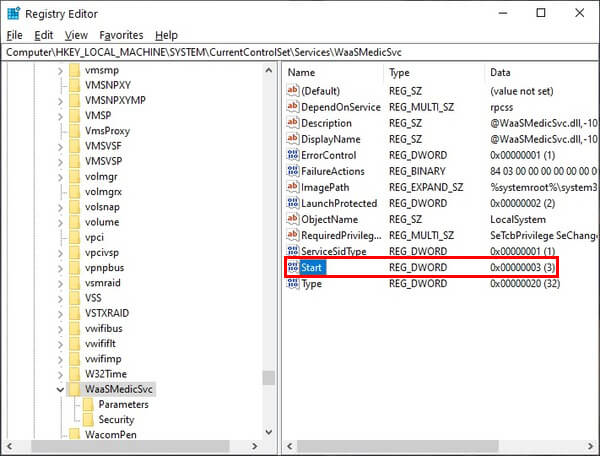
- Set its value to 4 and click OK.


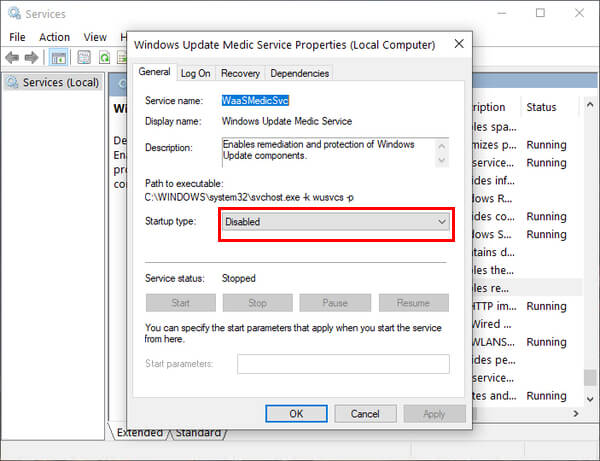
If you check the Windows Update Medic Service in the Services again, you’ll see that it has now been disabled.
OS updates are usually an exciting affair for enthusiastic users. They are supposed to bring improvements and new features. For many Windows users though, updates are a cause for concern.
Also read: The Quick & Easy Method to Install or Upgrade to Windows 10
Unlike most modern operating systems like Chrome OS or even something deemed no-user friendly like Linux, Windows blocks you out while it is installing updates. That’s one cause for concern for many people. Sometimes it takes hours to install those updates. Another is that these updates aren’t always quite bug-free. One doesn’t have to look too far back to find a prime example of this. The October 2018 update did cause a lot of havoc. In some cases, it was reported to have wiped out the entire user data off the disk.


Doesn’t work. Windows update medic service just brings it back on. Another waste of time. Thanks for nothing!
Hi,
Sorry for the inconvenience and thank you for the feedback. The recent update from Microsoft changed the option we explained in the article. We’ve updated the article and added a solution to disable the Windows update medic service. Hope it helps.