
Microsoft 365 is the one plan to rule them all. It is powered by all your favorite apps including Microsoft Word 365. While you may call it just Microsoft Word, users still add ‘365’ to the name to differentiate it from other versions of Word still floating around. New to Word?
Here are some of the best tips and tricks to get you started with Microsoft Word 365.
- How to Delete a Page on Word 365
- How to Remove Page Break in Word 365
- How to Create Table of Content in Word 365
- How to Recover Unsaved Documents in Word 365
- How to Add Page Numbers in Word 365
- How to Insert Checkbox in Word 365
- How to Insert Section Break in Word 365
- How to Change Language in Word 365
- How to Create a Template in Word 365
- Microsoft Word 365 Tips and Tricks
1. How to Delete a Page on Word 365
There are two types of pages in Word. One is a blank page that is often left at the end or sometimes, at the beginning of the document. And the other is a page with text on it.
Microsoft Word includes an end paragraph at the end of the document that often results in a blank page at the end. You can’t delete it but can easily hide it by giving it a 1pt font size.
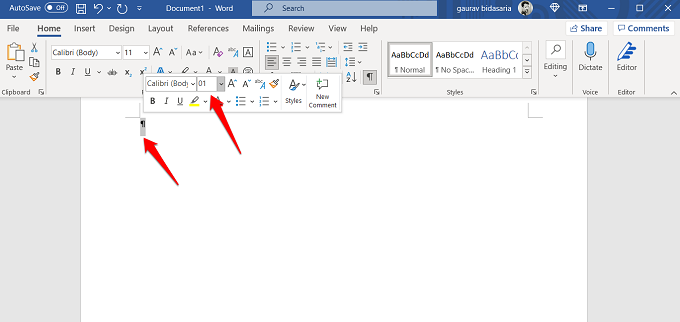
Click anywhere on the blank page and press Ctrl+Shift+8 (Command+8 on Mac) to show paragraph marks. Double-click on the paragraph mark to select it and type 01 in the Font size box and hit Enter.

Deleting a page with content in it is easier. Select all the text on that page and hit the Backspace key. If you find that boring and time-consuming, use the Find and Replace tool.
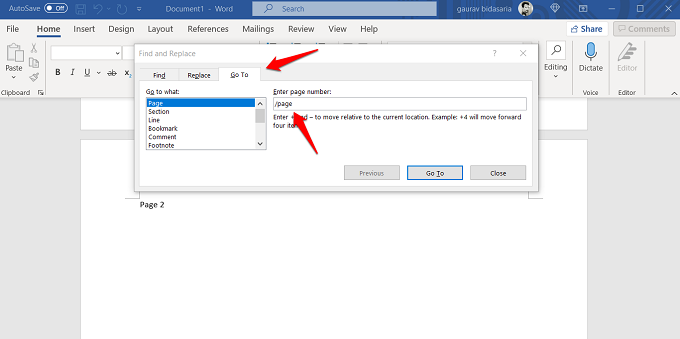
Click anywhere on the page that you want to delete and press Ctrl+G on the keyboard (Option+Command+G on Mac). You should be in the Go To tab of the Find and Replace tool. Type /page in the Enter page number box and click on Go To button at the bottom.

All the text on that page should be selected now. Press the Backspace key now to delete the page.
2. How to Remove Page Break in Word 365
The page breaks are not marked and hence invisible to the naked eye. To reveal all page breaks in a Word document, go to the Home tab and click on the Show/Hide button or press Ctrl+* on the keyboard.

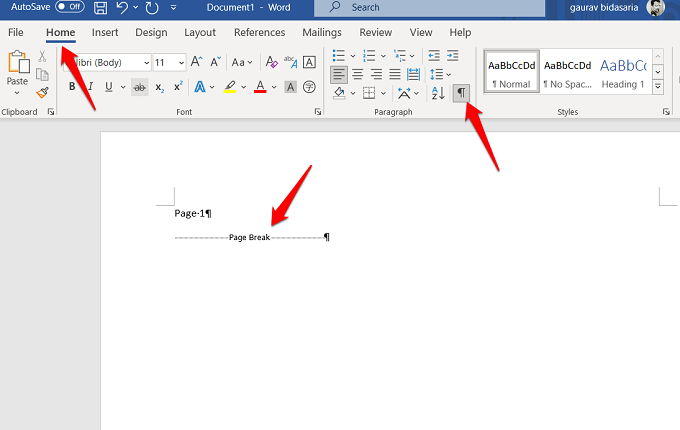
Now double-click to select the Page Break element and press the Delete button to remove the select page break. You will need to repeat the steps for each page break.
Related: 7 Best Word Processor Apps for iPad Users
3. How to Create Table of Content in Word 365
ToC stands for Table of Contents that allow users to get an idea of what’s waiting for them ahead in the document and directly jump back and forth through sections and pages.
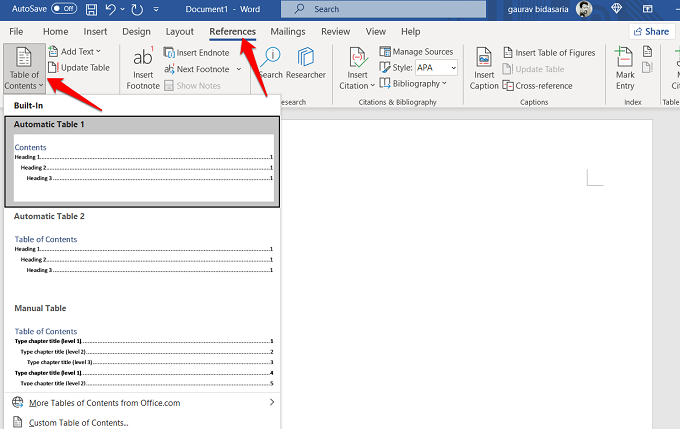
Click on the page where you want to add ToC. Select Table of Contents under the References menu and choose a style of ToC from the drop-down menu.

If you make any changes in the Microsoft Word 365 document after the ToC is created, right-click on the ToC and select Update Field. You can also update it manually.
4. How to Recover Unsaved Documents in Word 365
First of all, there is a button at the top-left corner of the Word app that enables auto-save feature. Make sure it is toggled on to avoid such issues in the future.

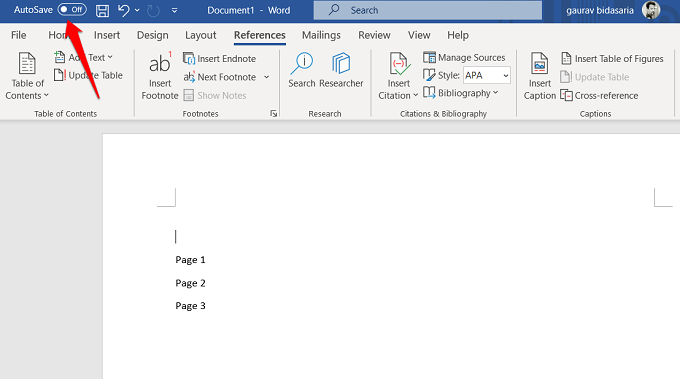
Sometimes, your system may crash or the app may be closed accidentally. But there is a way to recover unsaved documents in Word 365.
Click on the File menu and under the Info tab, click on Manage Document to select Recover Unsaved Documents option.

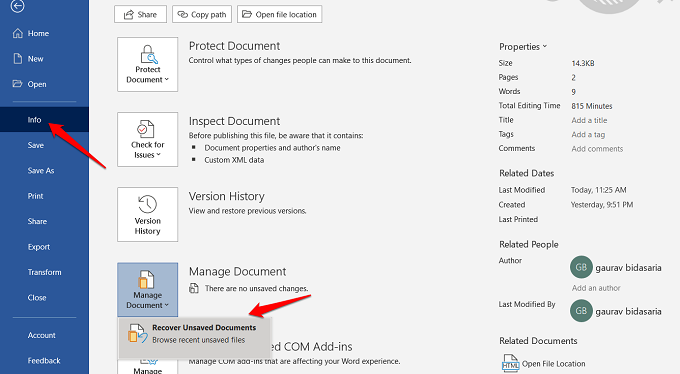
That will open a pop-up window for File Explorer where you will find all unsaved documents that Windows saved when the app or system crashed or closed unexpectedly.
5. How to Add Page Numbers in Word 365
Click on the Insert menu and select Page Number to reveal a drop-down menu.

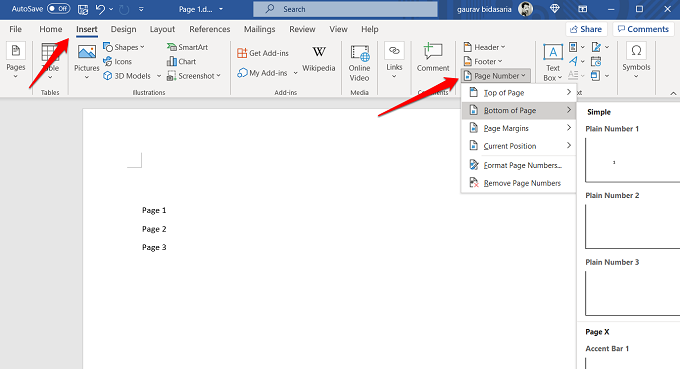
There are a number of positions and formats in which you can add page numbers to your Word document. Play around to find the one that looks good to you.
6. How to Insert Checkbox in Word 365
Adding checkboxes is a good way to drive home a point or allow readers to fill it to provide feedback, for example.
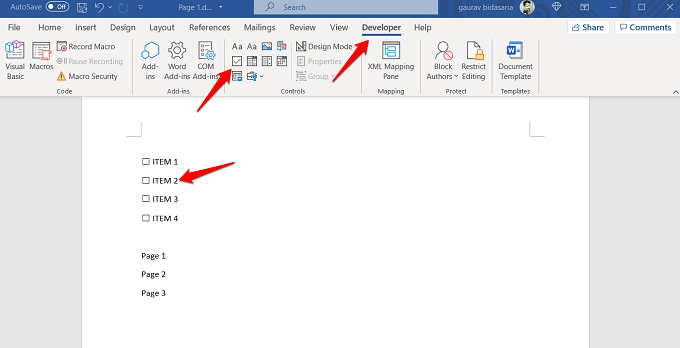
Click anywhere on the page where you want to add checkboxes. Now the option to add checboxes is available under the Developer menu which is hidden by default.
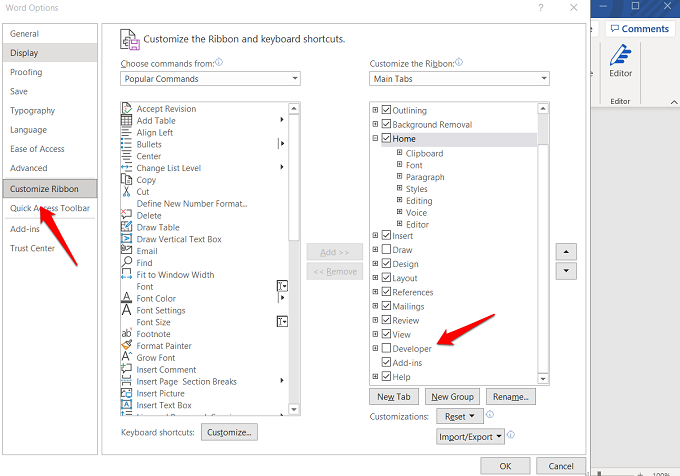
We need to cusomize the Word’s ribbon menu from File > Options > Customize Ribbon.

Under the Customize Ribbon menu, check Developer option and save changes.

You can now add checkboxes anywhere from under the newly added Developer menu.

7. How to Insert Section Break in Word 365
Click on the Layout menu and there you will find the Breaks option which will reveal a drop-down menu.

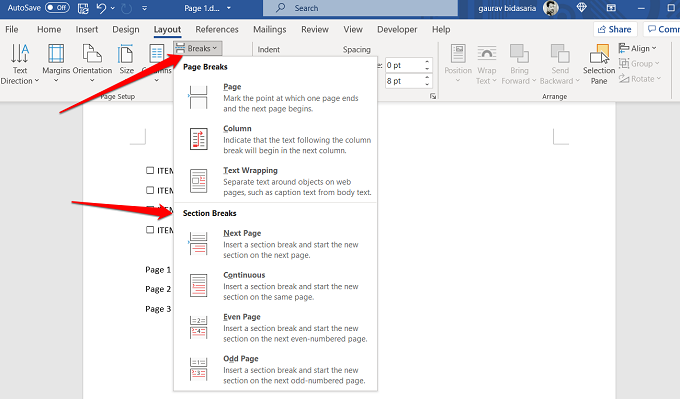
Choose the type of section break that you want to insert. Try out a few if you are unsure. Microsoft has a help page explaining each section break type and what it does in brief.
8. How to Change Language in Word 365
Click on the File menu and go to Options > Language. Click on ‘Install additional display language from Office.com‘ option.

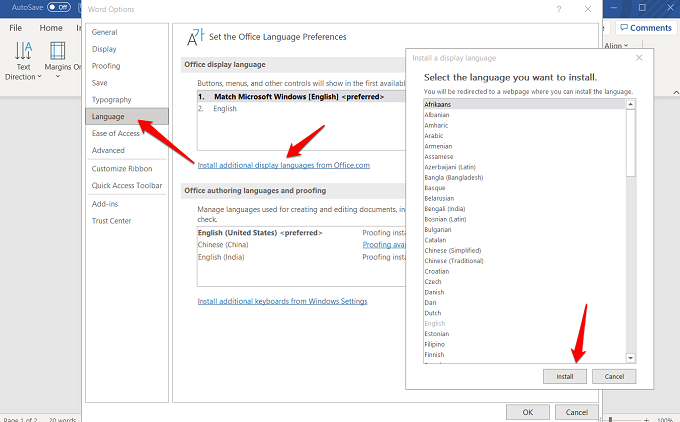
Click on the Install button to open a browser tab where you will need to download the language pack from Microsoft site. Then double-click on the downloaded file to install it. Once installed, the language should appear in the Office display language section.
You have added a display language but not an authoring language. To do that, in the same window, under the ‘Office authoring languages and proofing’ click on Add a language and select the language that you just installed as a display language.

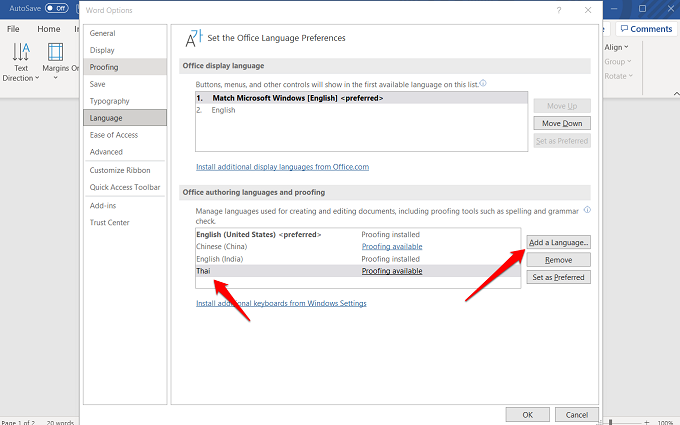
You can also choose a preferred language. Select the language you want to set as the preferred language and click on Set as Preferred button.
9. How to Create a Template in Word 365
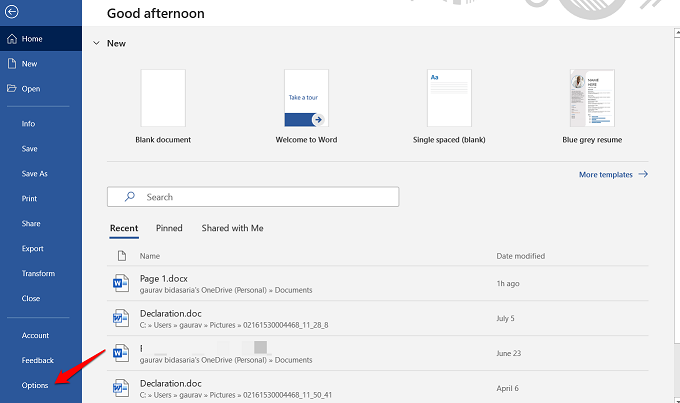
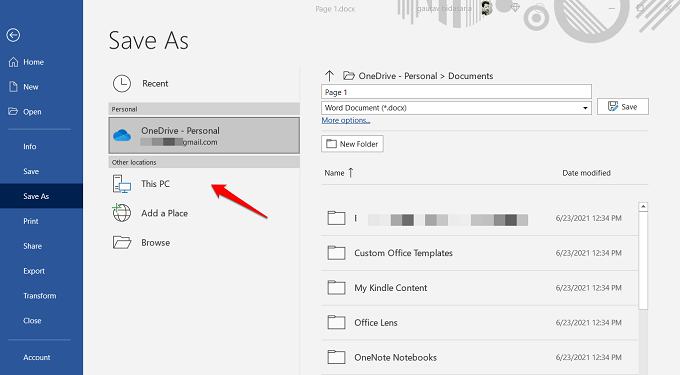
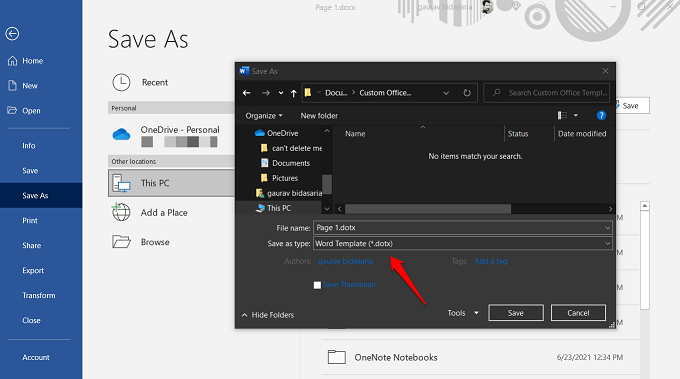
All you have to do is create a new Word document and set it up the way you want for your template. Choose the desired font type, size, color, images, background, etc. Once ready, click on File > Save as and choose a location where you want to save the file to.

Name the template something that makes sense to you. Select ‘Word Template (*.dotx)’ as the file type to save the Word file as a template.
Microsoft Word 365 Tips and Tricks
There are so many other things that you can do with this powerful word processor. We have barely scratched the surface with this starting guide for beginners. Some advanced features were left out so as to keep things simpler for first-time users. But Word is not the only word processor out there. There are plenty of Word alternatives that you can try if you don’t like what you see.


