
xTool recently released their D1 Pro with a 20 Watts blue laser module. We got our hands on this new laser engraver D1 Pro from xTool, which includes a 20 watts Blue Laser Module and an optional Infrared Laser Module. We spent a couple of days with this Laser Engraver, from assembly to the final product engraving. In addition to that, we worked on a few additional XTool Laser accessories, including an air assist and a RA2 Pro Rotary Module.
xTool states this laser machine is ideal for novices and experts, and we are excited to give our opinion based on our hand son experience with this laser unit.
Table of contents
xTool D1 Pro Specification
Before we go into further details and assembly experience, let’s look through the machine specification. The Blue laser diode is powered at 20 Watts, with a wavelength of 455 nm. It can route up to 400mm/s. Here is the detailed specification table for your reference.
| Type | xTool D1 Pro-20W |
|---|---|
| Machine Power | 120W |
| Laser Electric Power | 84W |
| Laser Module Output Power | 20W |
| Wavelength | 455nm |
| Laser Spot | 0.08*0.10 mm |
| Routing Speed | 400 mm/s |
| eWorking Area | 430 * 390 mm (16.93 * 15.35″) |
| Max. Workpiece Height | 50 mm (2″) |
| Max. Workpiece Height with X Risers | 50mm+X*45mm Each set riser height column |
| Materials | Wood, leather, paper, cardboard, acrylic ( black, brown, red, yellow, green), stone, paint glass, paint ceramics, stainless steel, titanium, iron, aluminum oxide. |

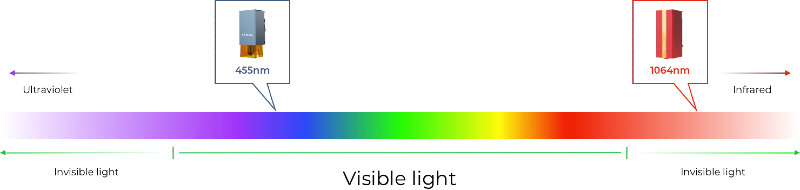
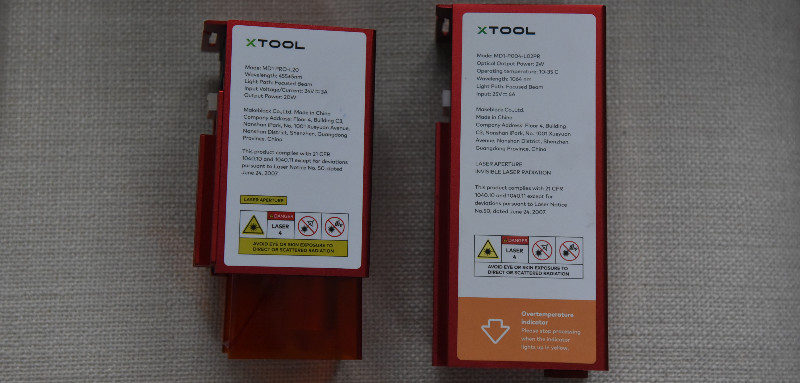
An additional Laser head is recommended for metals attaching to this Laser Engraver. This one comes with 1064nm, ideal for Metal and Plastic material for the best result.
| Type | 1064nm Infrared Laser Module |
|---|---|
| Machine Power | 120W |
| Laser Electric Power | 84W |
| Laser Module Output Power | 2W |
| Wavelength | 1064nm |
| Laser Spot | 0.03*0.03 mm |
| Routing Speed | 400 mm/s |
| Working Area | 430 * 390 mm (16.93 * 15.35″) |
| Max. Workpiece Height | 50 mm (2″) |
| Max. Workpiece Height with X Risers | 50mm+X*45mm Each set riser height column |
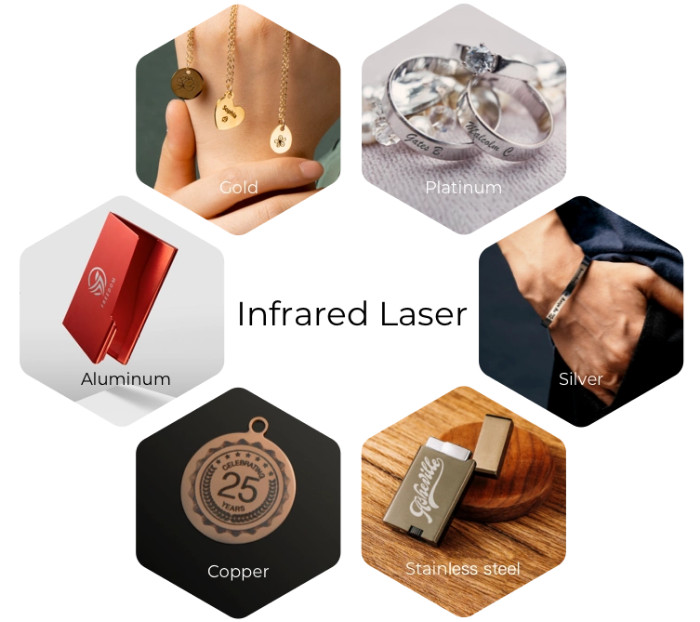
| Materials | All metals (including gold, silver, platinum, copper, aluminum, zinc, titanium, iron, stainless steel, metal oxides and alloy), leather, opaque plastic, black acrylic, stone, paint glass, paint ceramics, circuit board. |
This extra module can be swapped out with the blue laser head on the main unit, and this is completely optional. You need this add-on, only if you are planning to work with metal and plastic materials in your daily routine.
xTool D1 Pro Assembly
Frame Assembly: Honestly, assembling the mechanical part of the machine was way easier than I thought. The manual provided made it very easy to assemble the unit by looking at the pictures, which is very uncommon. I must say, xTools put excellent effort into avoiding preconceptions of a poor assembly manual. Also, the assembly is mostly preassembled, so, as the end user, one has to do only minimal mechanical assembly to put the unit together.
Assembling the frame was a breeze, and I wish the same could be said about connecting a few cable pins.
Cable Assembly: Connecting the cable was more challenging than I imagined. The space inside the controller board cable connections frame might be challenging for some, depending on how big one’s finger is. I spend more time managing and installing the cables than the mechanical assembly of the unit.

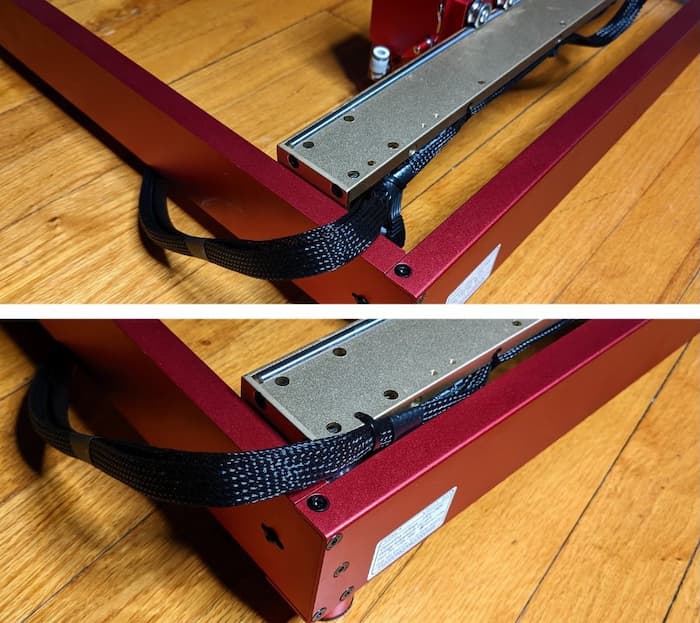
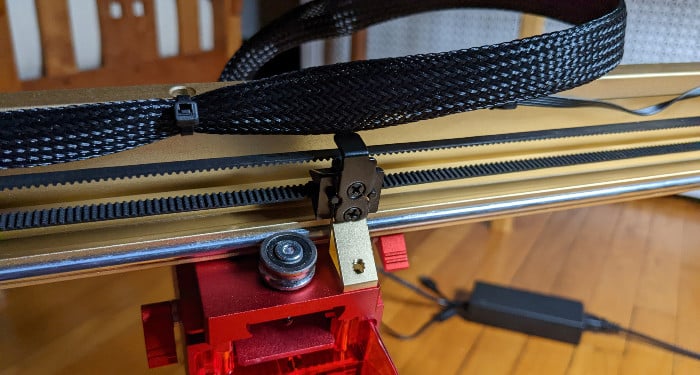
What I had an issue with the assembly was the cable management. One of the pre-assembled wire ties that hold the laser head wire to the axis motor bulged out a bit so that it didn’t allow the axis to travel to the limit switch. This limit switch bracket is not adjustable on the home position, Y-0 position, so the solution was to remove the wire tie from the motor and hold it to the bracket.
Checking Assembly: Moving the module on both axes is a good practice during assembly to ensure the cable is moving smoothly and not getting caught up on anything. In my case, the metal bracket for the limit switch on the X-axis belt was getting caught on the Laser head module cable sleeve. I moved the sleeve on the wire tied slightly, and so this.

Since cable management was one of the challenging parts of the installation, I see a few posts on the Facebook forums of people who installed cable tracks on their D1 Pro. While this is an aftermarket solution, I hope one day tools offers this solution, at least as a wiring accessories package.
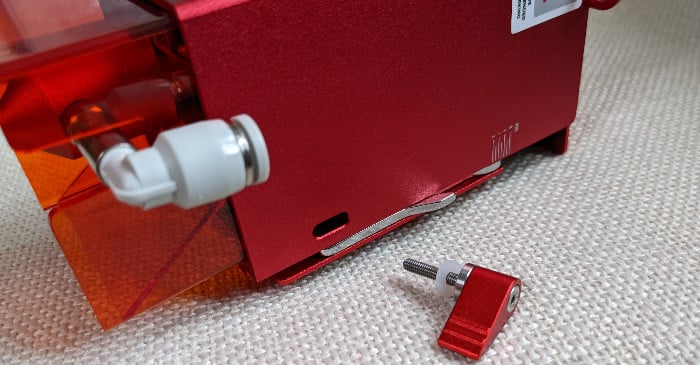
Also, during the installation, I loosened up the focus adjustment screw completely and had a hard time installing it back. It took me a while before realizing that the screw was reverse-threaded. When I figured it out, I was so happy and proud of myself that I didn’t pay attention to where the focus adjustment value was set. My initial few projects were done this way, and I am not sure if that 3 mm focus offset made a huge difference in the engraving quality.

One thing I noticed after assembling the unit, is its weight. Believe it or not, the unit is not very heavy at all. It can be easily carried or moved from one place to another. This means, if you want to take it to an outdoor get-together, garage party, or meetup, you certainly can. Just make sure you have a laser-safe enclosure as everyone gathered will not have proper laser safety glasses.
Laser Engraver Software
xTool Creative Space: xTool Creative Space is the default software that is available from xTool. xTool Creative Space is a software that will communicate with the laser machine, lets you create your designs, and send the design to process on xTool, but consider it as basic software. There are three ways you can process the designs. One is just scoring the vector, then engraving and cutting the material.
xTool Creative Studio Project Center has an expanding number of projects to choose from based on the Machine, difficulty, and Material Type to select and run on the machine, that wouldn’t disappoint any users.
You also have the option to select the material that you are processing, and the XCS gives you “xTool selected reference” choices for your Power, Speed, and Pass settings. You can select the recommended setting or override your test result values with this recommended value. This is also an option to search for various materials from the “tool selected” material list. This is an excellent reference for anyone getting started to find the proper material settings.
It should also be noted that the creative space software is also in its infancy, so, hope more options and features will be added in the future, especially in the designing part. It is necessary for you to have this software, as the machine firmware is updated only using this software.
LightBurn: There is third-party software available. Most people use them for their laser projects, the LightBurn. If you find yourself needing to progress from the XCS to LightBurn, consider it a good thing as you are advancing yourself.
LightBurn has a free 30 Day trial period; then it is $60 for the licensed software. Knowing LightBurn also has the benefit of learning the industry standard software that most laser machines use, including C02 lasers, just in case you find yourself advancing to such a laser machine in the future. One of the downsides of using LightBurn is that the WiFi feature of the machine is not supported for xTool machines. So, you will have to process the job using the USB cable directly.
Machine Working Parameters
I was eager to test the machine and didn’t think much about properly setting up the machine’s Working Parameters/Position mode. Basically, there are two ways to set up the center or corner of each project while using their blue laser module. One method is to use the Red Cross method, and the other one is to use the laser spot. If one is using the laser spot, they don’t need to worry about this, but I choose to use the red cross method.

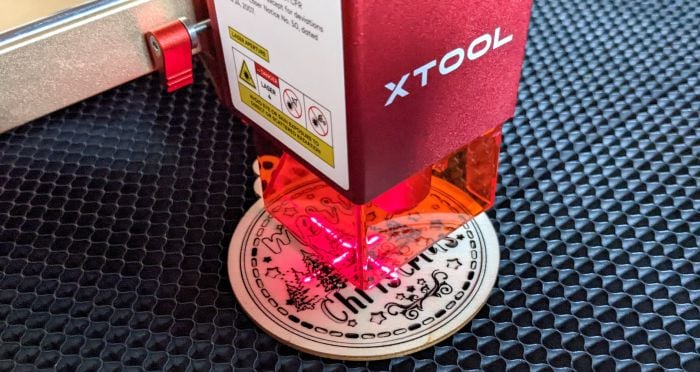
With this method, the light emitted is slightly off from the center spot, and one needs to test what this offset is and adjust that value to their Machine’s Working Parameter, as each machine might be slightly different. In this case, it was X 1.5 mm and Y 1.0 mm. This is one of the reasons why the first few projects weren’t concentric, hence the reason for this adjustment.

The infrared laser module does not have the red cross method feature. The xTool Creative Software does recognize the kind of laser module you have plugged in, and the user can see the setting change in the working Parameters menu.
D1 Pro Repeatability and Precision
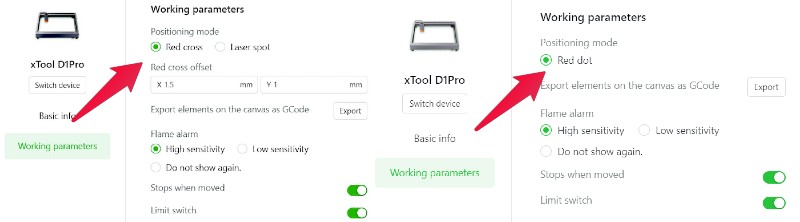
Repeatability is the ability of a machine to recreate the same file repeatedly without any difference between them. In this situation, I simply drew a few squares, copied and rotated them 45º and circles of the exact measurements. Did two samples score them at different speeds to see how they looked?
One of the reasons I did this is because I noticed a slight deviance when the head changes direction from X-Axis to Y-axis on a logo. However, during these sample pieces, I didn’t notice anything odd, and everything looked as expected. Just have to keep an eye on future projects if anything odd is noticeable, especially when the head is changing direction.

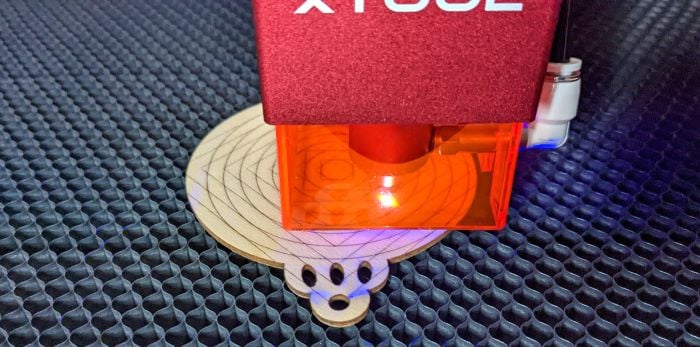
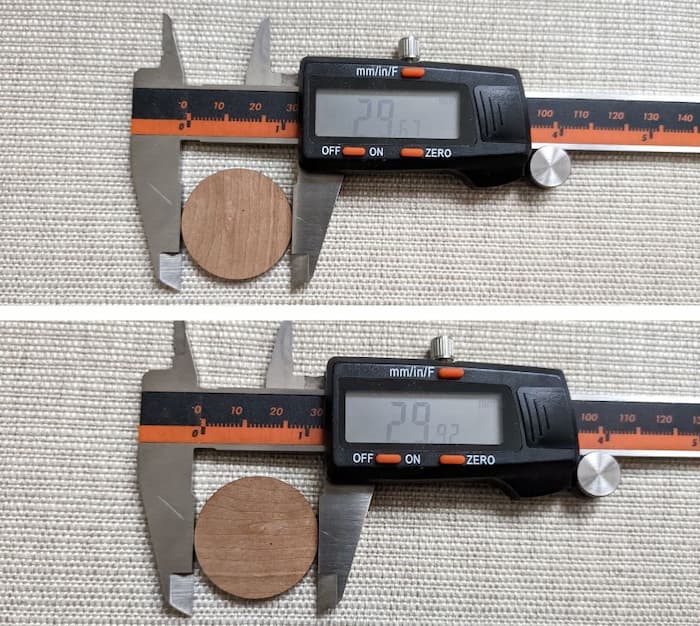
Precision is how close your produced measurement is to your designed measurement. The precision of your measuring tool is a huge factor in evaluating this; still, that doesn’t affect this much in our findings.
Basically, I did a random test cutting a circle of 30 mm diameter and measured the cut piece to see how close it was to 30mm. I measured it on both axes, and on the X-Axis, I got a measurement of 29.92mm; on the Y-Axis, the measurement was 29.67mm. Many factors will affect this. These include the precision of the Axis motor, belt tension, the backlash on gear and pulleys, etc.

Axis calibration is not yet possible using the xTool Creative Space software. However, a feature in the Lightburn setting for the Machine setting to Calibrate Axis will account for this error factor. Then again, for many users, this depth of precision is unnecessary. An example of where this error factor creates an issue is when you are making boxes out of cut pieces.
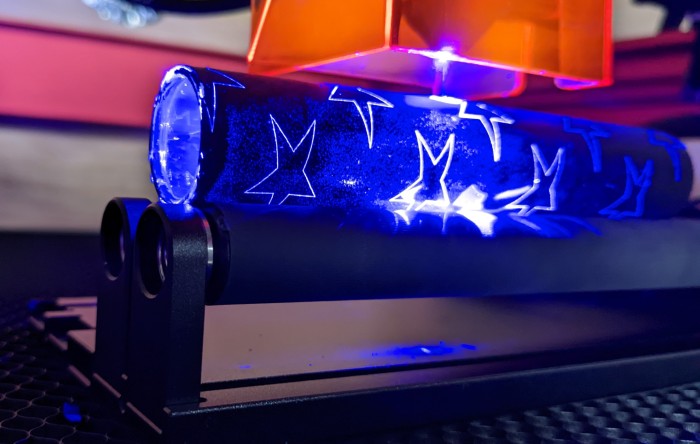
Default Laser Head (Blue Laser)
xTool D1 Pro has the option to purchase a 5 Watts, 10 Watts, or 20 Watts 455nm Blue laser module. The Watts are basically the power of the laser module, and the higher the power, the better it is, or less passes one needs to do or run the machine at a faster speed to achieve the same result.
Built-in swivel focus arm on the laser head allows quick and easy focus adjustment for different thick materials.

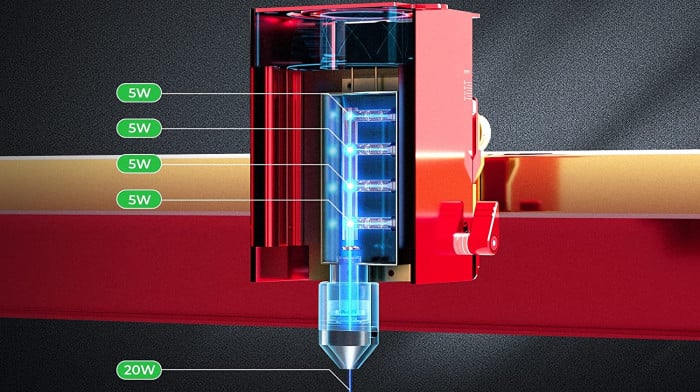
Where the power matters during the cutting process and not so much during the engraving process, one needs to refer to the recommended material guide available. Still, if the module is more powerful than required for a certain project, you can control the laser power to a lower percentage of its available power. However, if the laser module doesn’t have the necessary power for certain projects, then you will need to upgrade to the necessary powered module.

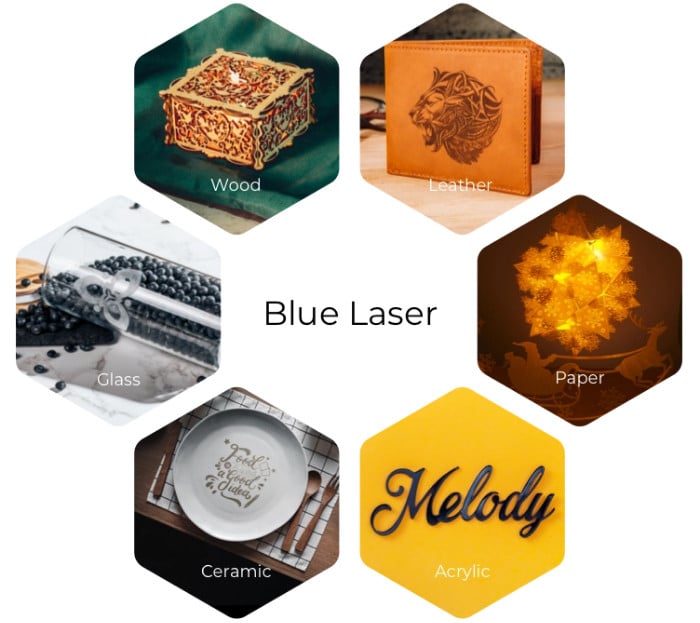
xTool D1 Pro Blue Laser Material Test
There are a couple of sample projects we did with this 455nm Blue Laser. The end product came up with a fairly good finish.
Leather: Purchased a Leather Key Fob package from Amazon and engraved the Mashtip Logo. Engraving leather definitely smelled up the living space, therefore the need of an exhaust system when working on leather projects.

Wood/Plywood: Did scoring, engraving, and cutting on the wood and plywood. Didn’t test the maximum thickness the 20 Watts laser can handle, but cutting a 2.5mm (0.1in) in one pass definitely was impressive.

Slate Stone: Normally, a sample piece is done to find the optimal setting that gives the best results. I just happened to select a value someone else suggested on the xTool Facebook group. I put on a coat of mineral oil prior to engraving.


Glass: The ability to engrave on glass is achievable by painting the glass using a 50/50 ratio of black tempera paint and water. The tempera paint is safe, non-toxic and washable once engraved. For round material, the optional rotary unit is necessary.

Optional Laser Head (IR Laser)
xTool recently came up with a 2W infrared laser module. While the blue laser diode functions well with many materials, the blue laser is not the best wavelength to engrave on metals, alloys, or plastic. This is where the 1064nm infrared laser module is a solution. Its function is to engrave on metal and alloys and the better end result on Plastic.
While this provides a niche purpose, it is welcomed by someone who does only metal engraving or a jewelry maker. So, understanding/knowing your desired use of the machine should answer whether one should get this infrared laser module.

The infrared module is slightly larger than the blue laser module, so remember that the machine’s overall working space will be slightly smaller.

I had two questions regarding the infrared laser module, and I emailed and asked xTool that question. While I was waiting to get the replay back from xTools, I was able to find the answer to those questions on the xTools support (xTool) page itself. So, before writing and inquiring about any specific doubts, it’s a good practice to check the manufacturer’s FAQ. My questions were as follows, and the answers were provided by xTools.
A 1064nm laser head can not be used to engrave wood or cardboard, the materials that will generate a lot of smoke and dust when engraving or cutting. The 1064nm laser head is used for engraving metal and plastic. Metal and plastic materials generate little dust, so the air assist is not needed when using a 1064nm laser head to engrave them.
The focus of the infrared laser is very short. Besides, the application materials for the infrared laser are small. The laser cover/shield will affect the framing if added to the 1064nm laser head. Moreover, infrared light is invisible, which will not cause dazzling light. In this regard, the laser cover/shield is not needed for the 1064nm laser head.
1064nm are dedicated to metal alloys and plastic. Obviously, we’ve tried some daily using materials under this category, and here are the final products.
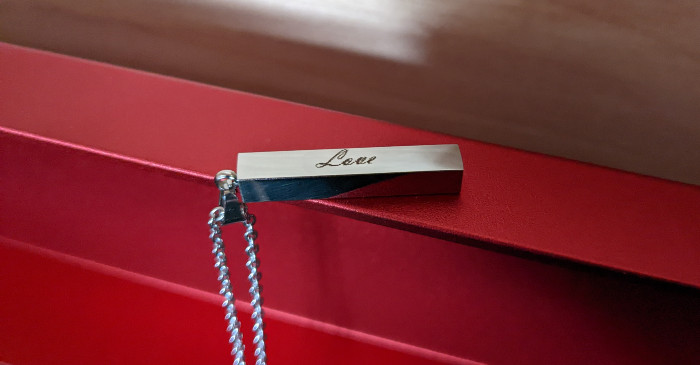
xTool D1 Pro IR Laser Material Test
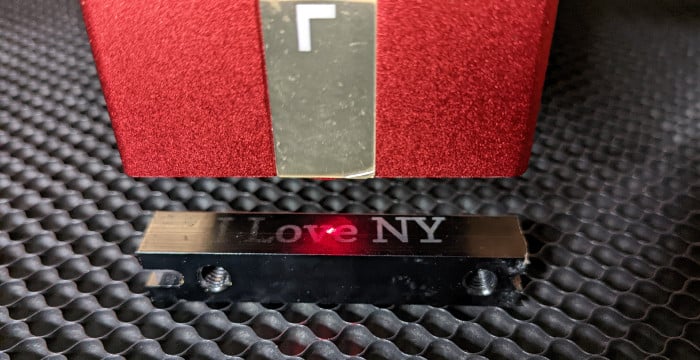
Stainless Steel: I used the infrared Laser module to score and engrave on stainless steel. The stainless steel is engraved wonderfully, especially the Leatherman. The stainless steel bar necklace purchased from amazon also came out well, but not as nice as the Leatherman. Not sure if the actual material properties of these two steel caused the difference or if the mirror-finished look on the stainless steel bar made the difference while the Leatherman lacked the mirror-finished look.
Anodized Aluminum: I tested the infrared Laser module on raw anodized aluminum and a black finished aluminum piece. The scoring on raw anodized aluminum came out well, while scoring and engraving on the black anodized aluminum weren’t visible. Honestly, I didn’t do a test chart with different power and speed settings to find the optimal setting for each, depending on what color it is finished on. So, take the negative result on the black anodized aluminum with a grain of salt.

Plastic: Not exactly sure what kind of plastic the google pixel headset is, but having 2 at home definitely had its moment of confusion. So, the solution was to mark at least one of them. Well, it was taking a risk without doing any samples, but it worked well. In fact, it worked a little too well.

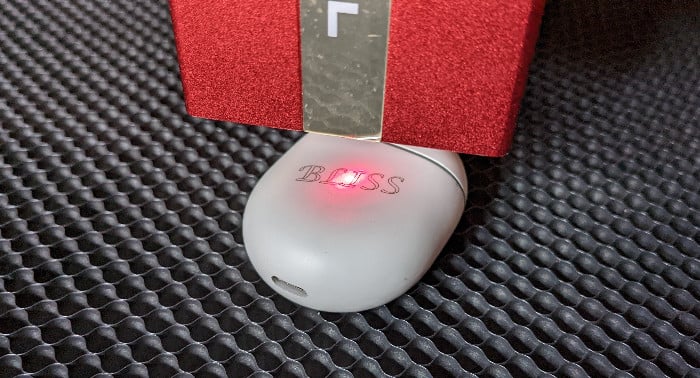
I could have lowered the power or increased the speed a little more, as I could feel the engraving when rubbing my fingers across it.

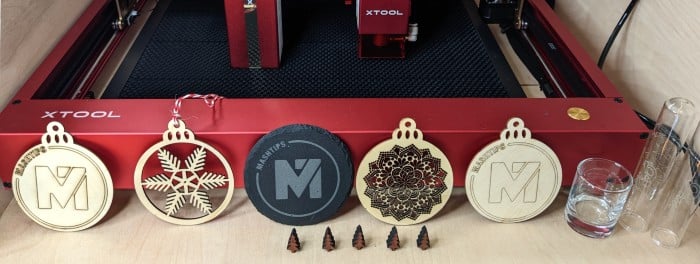
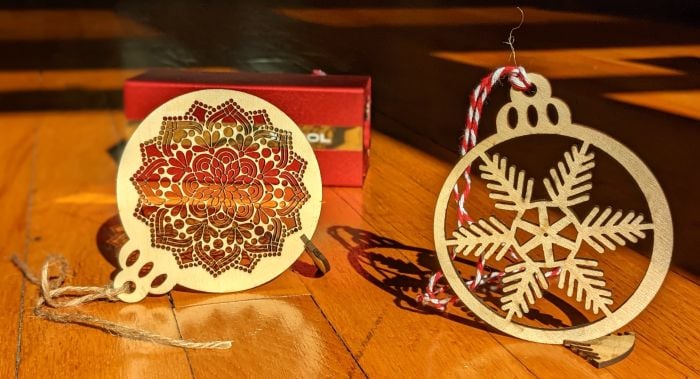
And finally, here we have most of the projects and materials we ‘tried for testing. There is a learning curve to get the best output by adequately adjusting the speed and selecting the laser power. However, once you master this D1 Pro, you can produce unique personalized products.
Once you master this D1 Pro, you can produce unique personalized products.
Laser Operational Saftey
When working with a laser machine, safety should be your priority. Laser modules generate intense beams of light to create heat and fire as per their standard operating procedure. Ignoring proper safety measures can burn/blind yourself or others and start a fire. You need to consider a few different safety aspects when processing your laser machine.

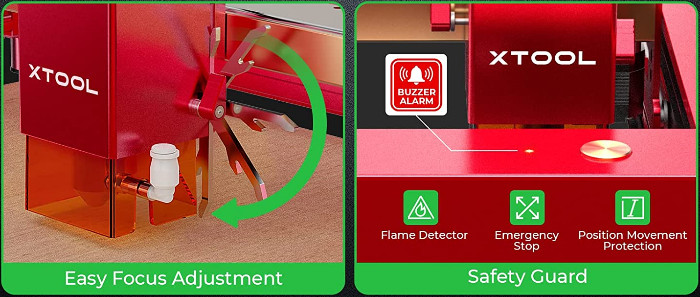
Built-In Machine Safety: The laser module has a built-in flame sensor. While you have the option to select either High or Low sensitivity in the Fire Alarm on the machine’s Working Parameters, you cannot disable it. We opted to keep this at High. You also have the option to stop the machine if the machine is moved while processing a project. Then there are limit switches when engaged, preventing the module head from over traveling and hitting the frame. This option can be enabled or disabled.
Other Safety Measures: Knowing and understanding the kind of materials you can process safely on the Laser machine and its speed and power setting. Next is shielding your eyes when the laser is processing. xTool D1 Pro provided a laser goggle with the machine that is sufficient for the 455nm laser.
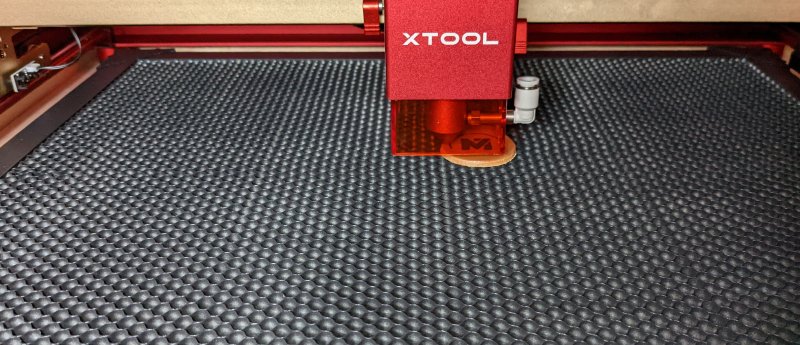
The other part of safety is supporting the work with proper materials. This is where the Honeycomb panel comes in. The purpose of the honeycomb is to allow the extraction of the smoke and heat depending on the type of material being cut. Also, the honeycomb has an Aluminum sheet that needs to be placed underneath the honeycomb, which will protect the table or surface you have the laser sitting on.
Then there is the extraction or managing of the smoke/fumes from the projects that get generated depending on the type of project you process. Ideally, you will want to extract this outside, away from your living space. If this option is not possible, there are filtration systems available at a cost to filter out the smoke and fumes in your living space. Last but not least, Never leave your machine unattended while the laser is processing.
xTool D1 Pro Accessories
A few accessories are necessary and nice to have to achieve the best results with the D1 Pro Laser Engraver. There is even an extension module available if you need to expand the working space of your laser machine. Even though these are optional, you can find the same items from the xTool Store or their Amazon Store. However, I would recommend many of these for the engraver’s long life and overall performance. Some accessories can be third-party provided, and some can be DIY projects.
Plenty of options to add the necessary laser head modules to your xTool frame and any additional units necessary.
Honeycomb Working Panel: An essential part of safety as the honeycomb absorbs and deflects the laser and avoids burning the material. It also provides airflow, smoke reduction, and better heat dissipation. The provided metal sheet under the honeycomb protects the table/workbench surface on which the laser unit is sitting.


- 【Double Protection】: Not only does the honey comb absorb and deflect the laser and debris, it…
Air Assist: The air assist is considered an accessory, just like the honeycomb panel, to avoid unnecessary charring on the project. Depending on the material you process, I would also consider it part of safety as it can avoid fire/smoke hazards. What I found interesting about the xTool Air Assist is its oscillating motion sitting on its rubber feet, compressing air.

- Cut Deeper & Faster: Equipped with an air assist set on the laser engraver for wood and metal, large…
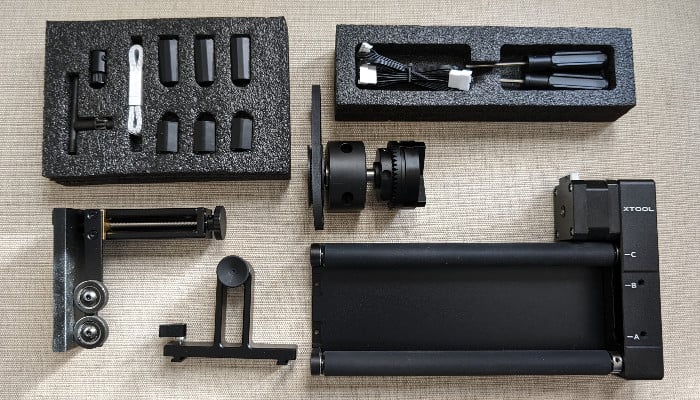
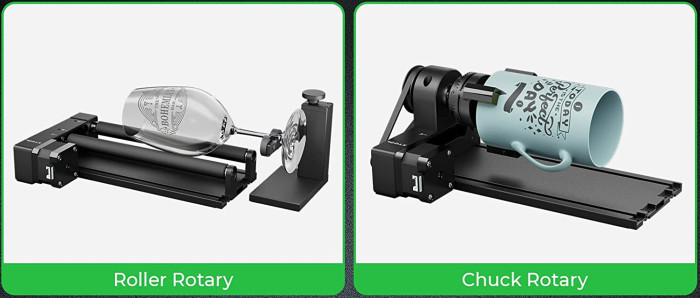
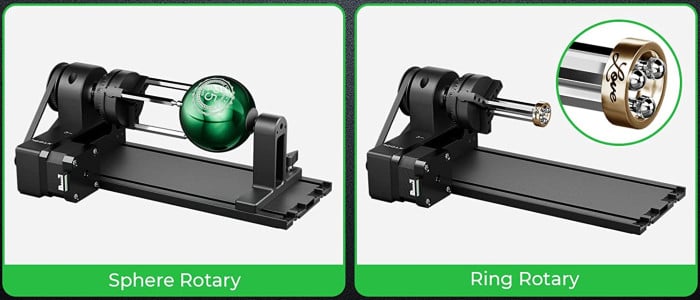
Rotary Unit: xTools had an upgraded version of their rotary unit, called RA2Pro, which is a 4-in-1 rotary unit. This unit solves and adjusts to many of the previous challenges.

- Suitable for 90% Daily Use Cylindrical Objects – xTool RA2 Pro is the WORLD’S FIRST 4-in-1 laser…
The assembly of the RA-2 Pro rotary unit is more involved than the xTool D1 Pro unit, as it had few small pieces to assemble. You will need this unit to engrave tumblers, bottles, cups, or wine glasses.

One of the challenges of using the rotary unit is setting it up properly. Then, you will have to read up to properly set up either the XCS or light burn software for the rotary function.

You will also need to unplug the Y-Axis cable and connect it to the rotary unit. There are actually aftermarket switches that will enable selecting the rotary function or Y-Axis with a selector switch if someone finds switching between rotary and linear motion often. Another issue is increasing the height of the laser unit, which can be achieved using the xTool Riser block accessory that threads into all 4 corners of the existing stand.

Some advanced users and early adopters came up with creative solutions to avoid changing the unit height each time they switch back and forth from the rotary function by having adjustable work shelves for their work area, where they achieve the same means. This kind of setup and method does take time and effort to achieve initially but it will be a time-saving effort in the future.
Enclosure: Provide the space for the laser unit to sit in. Also, it should have a laser-safe window allowing progress monitoring of projects. The xTool Enclosure is a foldable and smoke-proof unit. I decided to make my own using a ½” plywood, which is still a process.

- Enhanced Air Quality Management – Featuring an innovative and efficient air circulation system, the…
Exhaust System/Filtration Unit: I have purchased an inline fan with a variable speed controller to extract the fumes from the laser unit. While I like to exhaust the fumes outside, I am not sure how practical it is during the wintertime. So, I have also purchased a carbon filter to go along with it. I will still have to put it to use and see how well this will perform, but this is the path I choose now.


Extension Module: xTool D1 pro 20 watts comes with a working area of 430 mm x 390 mm (16.93 * 15.35 inch). If you need to expand this, the extension module is your solution. You can double your working space by having the extension module, supposedly 936 mm x 390 mm (36.85 inch x 15.35 inch). If you decide to add the extension module due to your workflow, you must consider adding an extra honeycomb and exclosure to work safely. Also, don’t forget that you will need a bigger workspace for your laser unit.

Pricing and Availability
Now you decided to try this engraver. You can have multiple options to buy this. The xTool website ships the unit directly to the customer, and you have several options with several accessories and packages to choose from. This included the base unit or the kit with multiple accessories to add to the machine. Similarly, you can get almost all accessories from Amazon and get the product. There are many additional accessories available on xTool Amazon Store to choose from.

- 【Thicker Cuts with 20W Higher Laser Power】xTool D1 Pro laser cutter and engraver machine has a…
Pros:
- Powerful Laser
- Future Expandable
- Built-in swivel focus arm.
- Built-in Limit Switch for Laser
- Wireless connection for xTool Creative Studio
- Plenty of beginners & how-to guide
Cons:
- Bit of learning curve for beginners.
- Limited Manufacturer’s software options
- Wifi feature does not work with light burn
- Might be out of budget for some accessories
Key Features: 20W Powerful Laser Diode | Up to 400mm/Sec Engraving Speed | Easily Expandable | Multi-head Support | 340+ Engraving Colors | Free Software with Wifi Support | Community support
Final Thoughts
xTool D1 pro is a wonderful machine for anyone who wants to get started with laser engraving. The quality of the body, bearing and steel rod used is not of a beginner’s machine, but instead, a well-built machine expected to meet any part-time user’s demand. However, the more ways one tries to make use of their machine, the more challenges one will have to resolve. This is normal with anything, as the more familiarity/experience one gain, the more one demand the machine they have and look for ways to save time if possible.
In this aspect, the xTool D1 Pro is an excellent start. The xTool Creative Space is a great way to get started and meet any starter’s limited requirements. However, any heavy user will find the XCS is limited in mostly designing parts and will mostly find light burn as their go-to solution. If any user feels that the D1 Pro doesn’t meet their demands after having it for a while, they become a professional, and it is time to consider themself a commercial CO2 Laser. All the knowledge they gained will not go to waste owning the D1 Pro, especially learning the light burn and setting up jigs for batching their projects.
Credit: Thanks for the help and support in testing this machine: Bliss Woodshop

