
GNOME is one of the most popular Linux desktops around. Even though it left many fans behind with the switch to GNOME 3, it earned quite a few too. Ubuntu finally leaving Unity in history with Ubuntu 18.04 LTS adopting GNOME, more and more users are flocking to GNOME. For experienced users, GNOME isn’t anything new. For those that don’t know how it works, it can be a little confusing. Canonical did try to make GNOME as Unity-like as they could but there still are some differences, GNOME Extensions are one of them. If you ask any GNOME user what’s the best thing about it, more often than not the answer would be directly or indirectly GNOME extensions.
There are so many GNOME Extensions, you can get, those are good to have, and it makes difficult to figure out which are the best GNOME extensions.
What are GNOME Extensions?
Extensions are not a new concept for most people these days thanks to Mozilla Firefox and subsequently Google Chrome. They’re browsers that let others add features to them via extensions. Users can then cherry-pick the features they want. It’s similar here as well with GNOME and GNOME extensions. These are little pieces of code that add functionality or modify the appearance of the GNOME desktop.
Related: 15 Best Lightweight OS for Old Laptop and Netbook
How to Install GNOME Extensions
Your Linux distribution already provides a number of GNOME extensions in the official repository bundled as a single package. These can be installed by entering a simple, easy command in the Terminal.
sudo apt install gnome-shell-extensions
This will install about 8 to 10 extensions, depending on the GNOME shell version and your Linux distribution. These extensions are compatible with your GNOME shell version because your Linux distribution takes care of that for you. However, you can also install plenty of other extensions as well.
Installing more GNOME extensions is easier than installing apps on your smartphone once you get through the initial setup. It’s pretty much a click and install process and you don’t even have to wait for an extension to download or install. An official repository of GNOME Extensions is maintained at extensions.gnome.org. Not only can you find a ton of extensions on the website but also directly install them from there without having to download anything.
Browser Extension
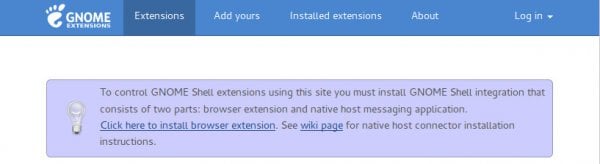

When you visit the website for the first time you may see a little message on the top saying, “To control GNOME Shell extensions using this site you must install GNOME Shell integration that consists of two parts: browser extension and native host messaging application.”
You essentially have to install an extension for your browser in order to be able to install the GNOME extensions from the website. You can click on the link that says Click here to install browser extension or click one of the links below depending on the browser you use.
Host Connector
The message said two parts if you remember and this is the second, the host connector. Installing it is just another copy and paste away. Use the command given below in a terminal and that’s it.
sudo apt install chrome-gnome-shell
Once you have both the browser extension and host connector installed, you can just browse the website, or search for extensions. On every extension’s page, you’ll see a toggle to turn it on.
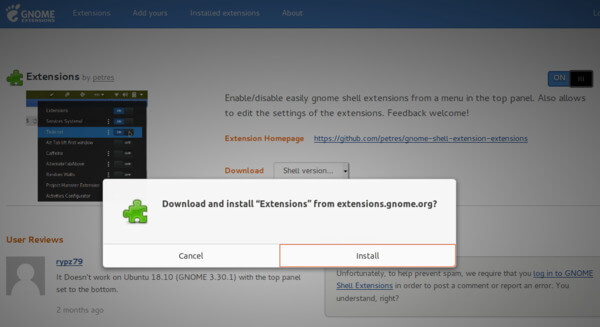

To install GNOME extensions, you’ll have to click Install on the pop-up that appears after toggling the extension on.
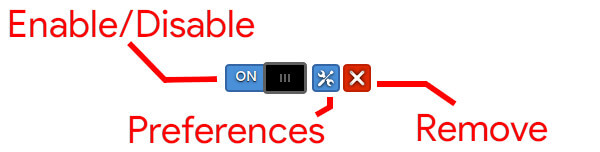

It can also be similarly disabled by toggling it off or just deleted by clicking the red X button. It helps to know your GNOME shell version number because not all of the extensions available on the website are necessarily compatible with the GNOME shell version you have installed. This can be easily known by entering this command in the Terminal.
gnome-shell --version
GNOME Tweak Tool
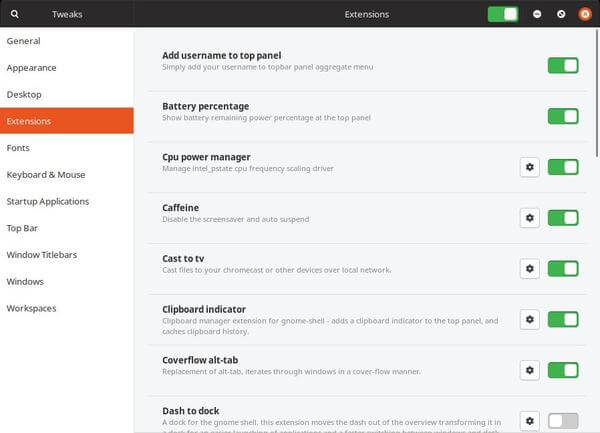

An easier way to manage your extensions is through the GNOME Tweak Tool which is a bit of a must have if you’re using GNOME desktop. GNOME Tweak Tool can be easily installed from the Software Center or via the following command.
sudo apt install gnome-tweak-tool
Related: Top 10 Free Operating Systems For Laptop or Netbook
Best GNOME Extensions
The list here is, of course, subjective so there can possibly be extensions that are more useful to you or a niche group of users than others. Moreover, the list here is in no particular order so we’re not giving any rankings.
1. Extensions
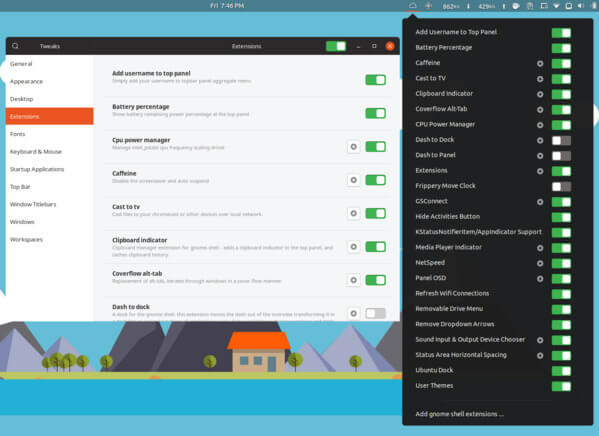

The Tweak Tool does let you manage extensions pretty effortlessly but you still need to open it and then head to the Extensions section. If you prefer, you can manage your extensions right from the GNOME shell with the Extensions extension. With a couple of clicks, you can enable and disable an extension, access its configuration module if it offers one or completely uninstall it.
2. User Themes
If you like customization this is perhaps the first extension you should install. By default, GNOME Tweak Tool will let you theme your GNOME desktop as much as you want. From the wallpapers to icons and application themes but it doesn’t let you change the GNOME shell theme. The User themes extension fixes that and allows you to apply GNOME shell themes from the Tweak Tool.
3. Dash to Dock & Dash to Panel
On GNOME, all you get on the desktop is a top panel and nothing else. There’s no dock, no place to pin your favorite apps. Instead, this is found in the Activities overview screen accessible via the Windows button. This makes launching apps a little inconvenient. Some users prefer the Unity way of launching favorite apps from a dock on the left of the screen.
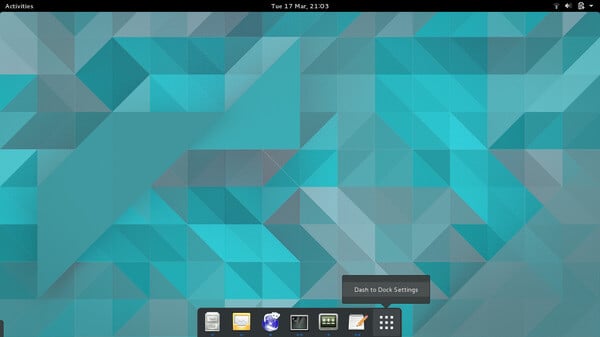

Dash to Dock gives users that option. It allows you to place the GNOME dash on the desktop as a dock, not only on the left but also the top, bottom, or right. It isn’t something you’ll necessarily need on Ubuntu 17.10 and above since Ubuntu already includes the Ubuntu dock extension which does the same thing.
![]()

Dash to Panel is a similar extension to Dash to Dock except it brings the Dashboard icons onto the desktop as a bottom panel. It also unifies the top bar together with the bottom panel making the desktop look more like Windows than Unity.
4. Clipboard Indicator
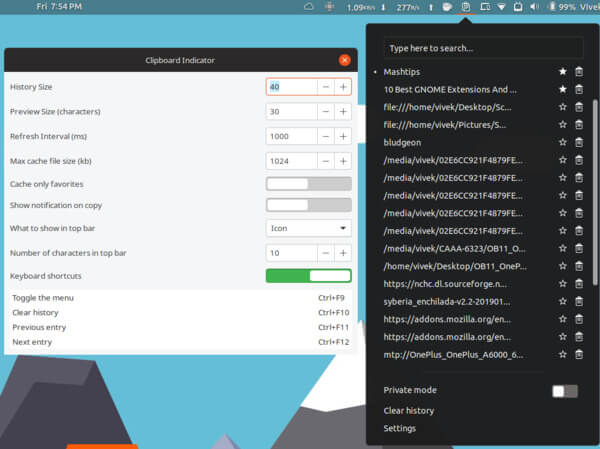

It’s a simple, and clean looking clipboard management tool that works right off the GNOME shell. Clipboard Indicator sits in the top bar and caches in your clipboard history. It offers a configuration module that lets you change a few things such as the size of history. It retains all of it until you manually clear the history.
5. CPU Power Manager
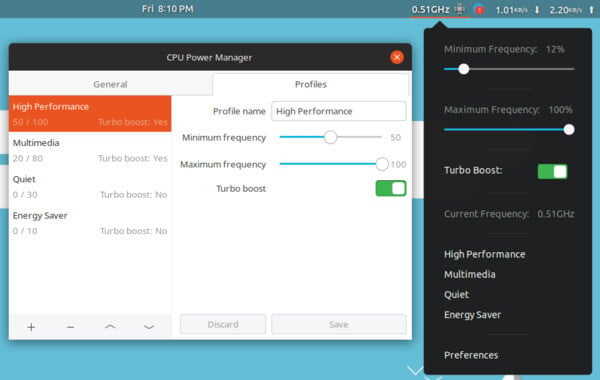

CPU Power Manager is a must have if you’re using GNOME on a laptop or notebook although it only works if your device has an Intel processor. It adds an icon in the top bar which allows you to quickly manage the Minimum and Maximum frequencies of your CPU in order to maximize performance or prioritize battery life. This kind of control can be a bit too much for some people. Hence, there are also some pre-installed profiles to choose from which is more user-friendly.
6. GSConnect
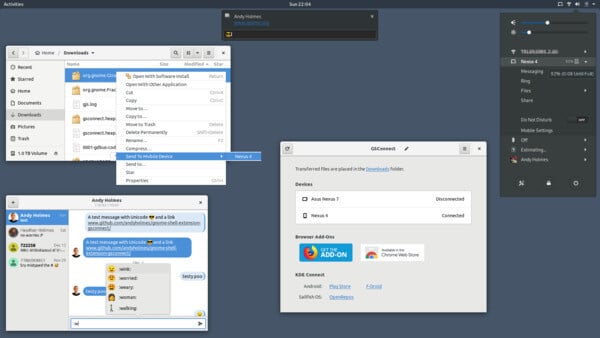

GSConnect extends your GNOME desktop to your Android smartphone. It ports the functionalities of the brilliant KDE Connect app from the KDE Plasma desktop to GNOME. As for what those functionalities are, it lets you sync your Android smartphone to your GNOME desktop wirelessly. As long as your PC and your smartphone are on the same WiFi network, you can receive notifications from your phone on your PC and even reply to SMS, WhatsApp, Telegram and other messenger notifications. Similarly, it can also send your PC’s notifications onto your phone.
You’ll know when your phone’s ringing and you can even reject a call. We’ve discussed all of the functionalities and more earlier when we talked about KDE Connect. Make sure you check that out.
7. Caffeine
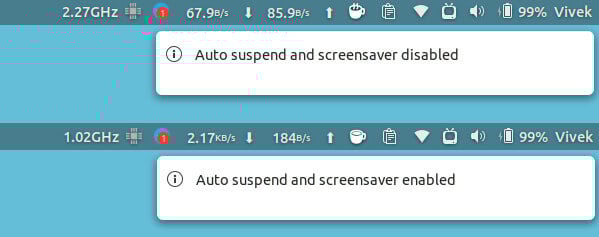

Most operating systems have some form of built-in power management and Linux is no different. At default settings, it turns off your screen and after a while puts your computer to sleep if it detects no activity. Sometimes though you just don’t want it to. For instance, when you’re downloading a large file and can’t wait for it to get completed so you keep coming back to check on it. Maybe you’re transferring files, whatever your reason may be. Caffeine allows you to keep your screen turned on until you decide to turn off Caffeine and makes it easy by giving you a switch right on top of your desktop.
8. Panel OSD
Before GNOME, Ubuntu used the Unity desktop as the default desktop environment which displayed notifications in the top-right of the screen. Since Ubuntu switched to GNOME, that behavior has changed because GNOME displays notifications in the top-center. This can be easily fixed with the Panel OSD extension. Notifications appearing from the right edge of the screen also tend to be less obtrusive. Not only does Panel OS allow you to change the position of the notifications to the top-right but also to anywhere else on your screen.
9. Refresh Wifi Connections
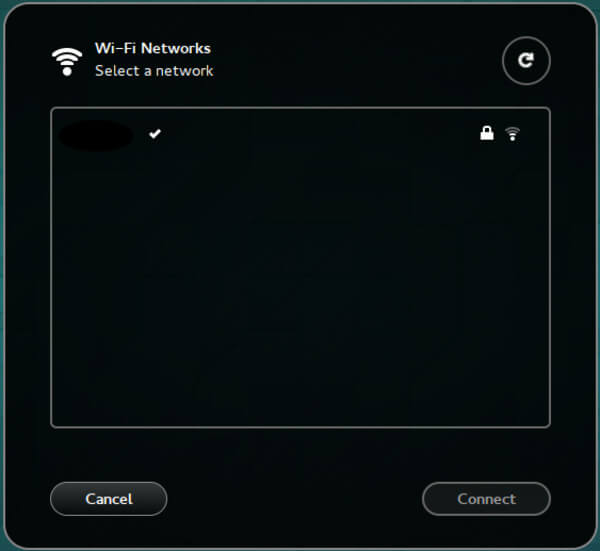

GNOME has quite a few minor annoyances here and there, less than KDE, but they’re there. For instance, there’s no option to manually refresh the WiFi connection. When you’re trying to connect to a new network, you have to wait for the system to automatically refresh the list and detect a new network. Refresh Wifi Connections extension fixes this by introducing a refresh button in the WiFi menu.
10. Status Area Horizontal Spacing
By default, the icons in the top bar have a fixed spacing which is needed, in fact, to better separate the icons. This helps you to avoid accidentally clicking something else while you’re trying to click on something else. However, the spacing is a bit too much for some people’s liking. It gets very noticeable when you have a number of icons at the top. Status Area Horizontal Spacing allows you to not just decrease but also increase the spacing if that’s what you want.
There are a ton of other extensions for the GNOME Desktop out there each serving a specific requirement. Did you install any of the extensions mentioned above? Which ones do you use? Let us know in the comments below.


