
The Nintendo Switch packed in a 20nm NVIDIA Tegra X1 chip with the original Switch model. It ran great. But, the Nintendo Switch battery life was sort of a mixed bag. Depending on the game, the massive processing power chewed through the battery within 2.5 to 6.5 hours. Many players were not satisfied with the amount of playtime they got on a single charge.
This guide will assist you in performing said tweaks to improve the battery life of the original Nintendo Switch, Switch V2, and Switch Lite.
Adjust the Display Brightness Settings
Lowering the display brightness is the easiest way in order to get more playtime and improve the Nintendo Switch battery life. This can be a lifesaver in portable handheld and tabletop mode. You can access the brightness slider from the Quick Settings menu.
For our adjustment purposes, we need Auto-Brightness to be turned off. That will ensure that our changes stay the way they are and don’t automatically change with the available light. The Switch Lite doesn’t have an ambient light sensor. So you won’t see the option in case you own a Switch Lite.
- Simply hold the Home button on the right Joy-Con.
- Wait for the Quick Settings menu pops up on the right side of your screen.
- Turn the brightness slider down manually according to your needs.
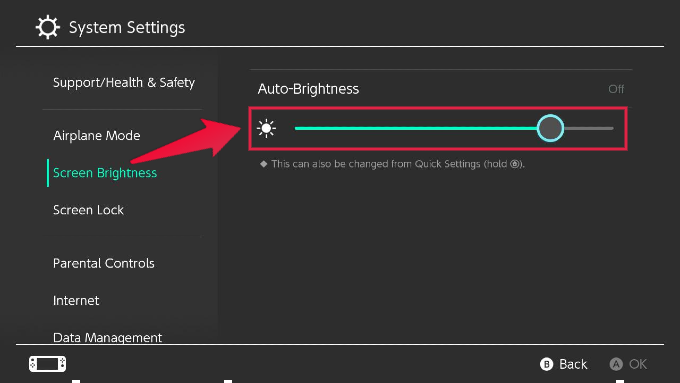

We don’t really recommend going any higher than 75-80% brightness for the sake of battery life. Even at that brightness, Switch’s display is perfectly visible under the Sun or any other bright object.
You can also make the same changes from System Settings. Just go to the Screen Brightness section in System Settings and make the above changes.
Turn on Airplane Mode
The WiFi chip in the Nintendo Switch uses a lot of battery. Even when you don’t have any WiFi connection near you in range, the Switch keeps searching for a WiFi device to connect to. And that drains a lot of battery in the process.
If you are not playing a game that requires an active internet connection (e.g., an online multiplayer game), you should turn on Airplane Mode. It stops the Switch from seeking for new WiFi connections and improves battery life.
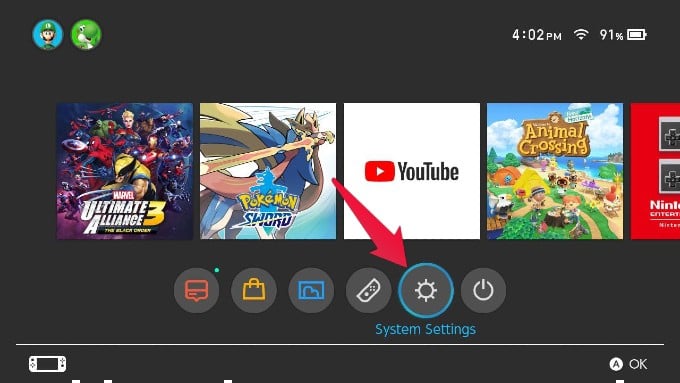
- Go to the home screen and click on System Settings.
- Go to the Airplane Mode section.
- Toggle on Airplane Mode.
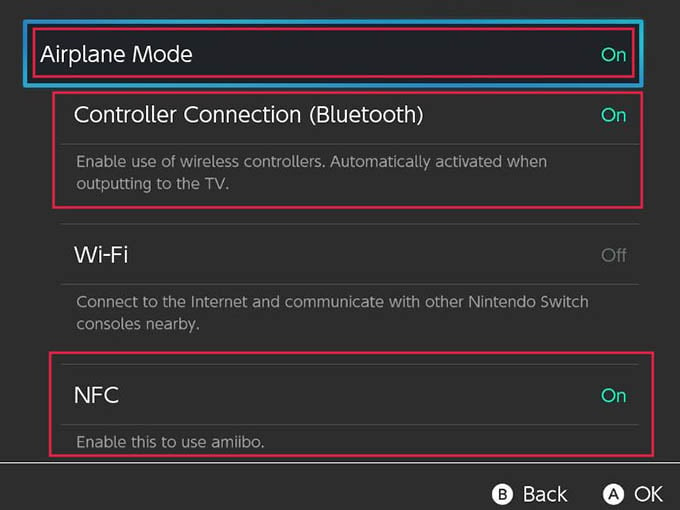

On the tabletop mode, you may not be able to use your Joy-Cons or any other wireless controller for that matter after enabling Airplane Mode. So just toggle on the Controller Connection (Bluetooth) option below. Then you can keep playing with your favorite wireless controller. If you want to use your Amiibo, you can also toggle on NFC from below.
Do note that you can also toggle on Airplane Mode from the Quick Settings by holding the home button. However, to enable wireless controller input and NFC, you always need to go back to System Settings, as mentioned above. And you have to do that each time you toggle Airplane Mode on.
Related: 14 Best Nintendo Switch Pro Controller(Opens in a new browser tab)
Adjust Sleep Mode Settings
By default, the Switch goes into Sleep Mode after a certain period of inactivity. In this mode, the Switch stays in a sleep state to decrease power draw. That, in turn, saves the battery. But the Switch still keeps everything in its memory.
Once you start your console back up, you can access everything from the same pause state you left them on. For example, if you pause a game and put the Switch into sleep mode, you can still access the game from the same state once you turn it back on. You can adjust the settings so that the Switch goes into Sleep Mode at your desired time.
- Go back to the System Settings, as explained above.
- Go down to the Sleep Mode section.
- Set the Auto-Sleep (Playing on Console Screen) option.
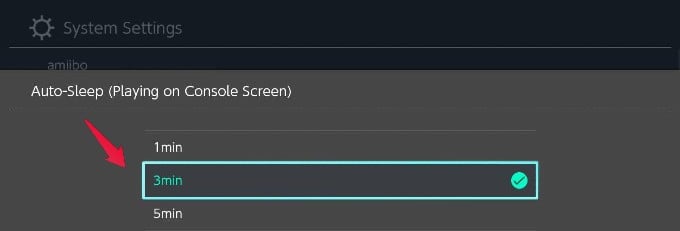

You can set this anywhere between 3 to 5min to change the setting for handheld and tabletop modes. The Switch Lite doesn’t have docked mode support anyways, so you should only see that option on a Switch. Don’t set it too low to something like 1min as it might put your Switch to sleep during a long cutscene or something like that.
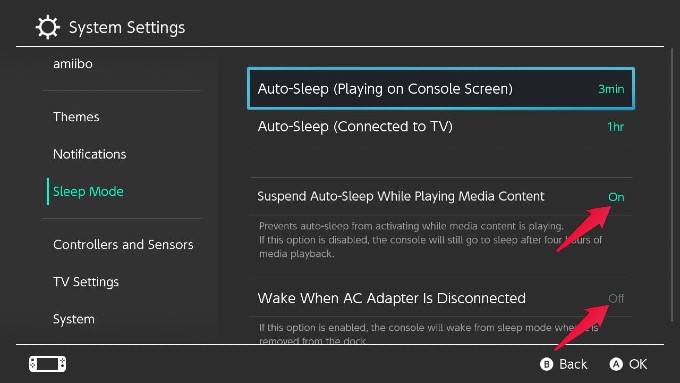
Many watch YouTube, Hulu, and other media content on the Switch. In that case, make sure to toggle on the Suspend Auto-Sleep While Playing Media Content option.
In addition to this, toggle off the Wake When AC Adapter Is Disconnected option. Doing this will prevent the Switch from waking up any time you willingly or accidentally disconnect the charge.
Turn Down the Volume
If you don’t use headphones, turning down the volume of Switch’s two front-firing speakers helps to improve battery life. You can simply adjust it using the VOLUME + and – button on the top of the Switch. You can also change the volume slider in Quick Settings.
Enable Dark Theme
The Switch and the Switch Lite both come with an LCD display. So this tweak might not help much in improving battery life. Still, it’s easier on the eyes, and many players prefer it over the Basic White theme.
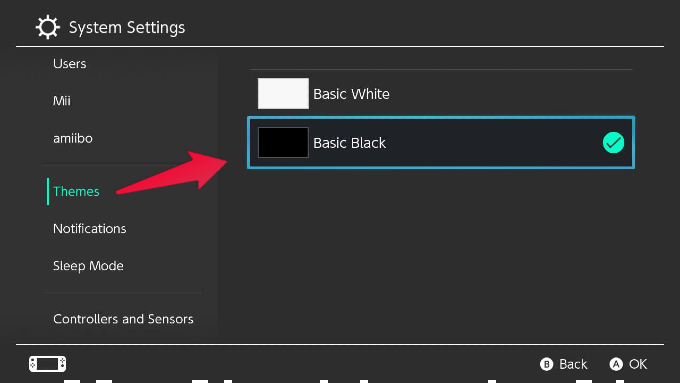
- To switch the theme, simply visit the System Settings over again.
- Go to the Themes section.
- Select Basic Black from there, and your theme should get switched immediately.
Adjust Your Gaming Needs
More demanding games obviously chew through the battery faster (e.g., The Legend of Zelda: Breath of the Wild due to its vast open-world). However, you get much more playtime out of a less extensive game (e.g., Super Mario Maker 2). So if you try playing more less demanding games in portable handheld mode, you can get a lot more battery life out of your Nintendo Switch.
Disconnect the Power Source Upon Full Charge
Lithium-ion batteries degrade over time. And that degradation happens faster if the battery always stays at 100%. Granted, most modern mobile devices and the Switch itself come with overcharge protection.
Still, it is a good idea to keep checking your battery percentage and disconnecting the charge once it is full. Doing that should help you in the long run as your battery will degrade much slower. You can follow these steps to get the battery percentage counter on your home screen:
- Open up the System Settings back again.
- Go to the System section.
- Toggle on the Console Battery (%) option from here.
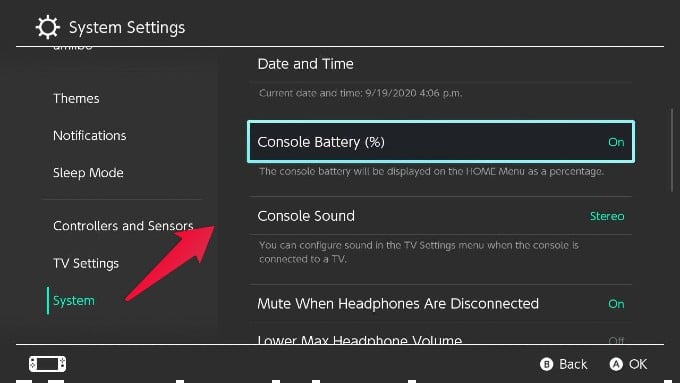
Once you set the Console Battery option, the battery percentage counter should start showing on the home screen from now on for easy tracking.
Related: How to Fix Nintendo Switch Joy-Con Connection Problem
Disable HD Rumble
HD Rumble is a major feature of the Joy-Cons and the pro controller. However, not many games support the feature to its full extent. You might be out and about and use your regular Switch in portable handheld mode. In dire conditions like those, you can turn off the HD Rumble to save the battery of both your Switch and your Joy-Cons.
Editor’s Note: Only the official Joycons, Pro controller, and very few third-party controllers support Rumble. So this method is not for Switch Lite owners. You might own one or more separate rumble capable wireless controller or accessory alongside your Switch or Switch Lite. You can use this method to save that controller’s battery life. But your Switch Lite’s battery life will not be impacted by following the steps below.
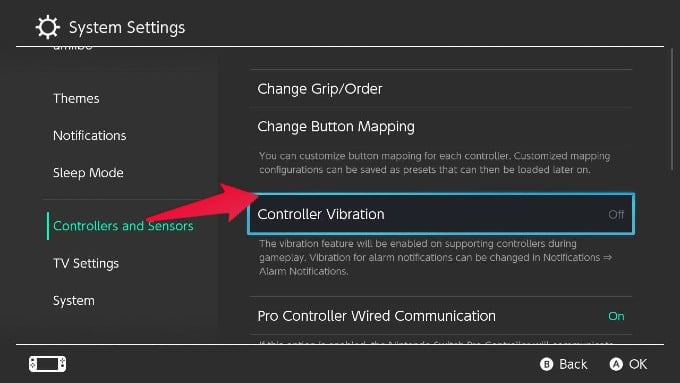
- Go back to System Settings and visit the Controllers and Sensors section.
- Toggle off the Controller Vibration option from here.
Keep Your Joy-Cons Disconnected
On the regular Switch, the two Joy-Cons are detachable. They recharge from the Switch itself while attached. An official Joy-Con lasts roughly 20 hours on a full charge, which is pretty incredible given their size.
That’s more than triple the average battery life of a regular Switch system. So you don’t need to keep your Joy-Cons always fully charged. You can keep your Joy-Cons detached while in Sleep Mode to improve the battery life of your Switch.
Put Your Switch in Sleep Mode or Power It off Manually
You can set up an auto Sleep Mode cycle following our previous method. However, it’s always a better idea to put your console to sleep manually when you are not using it. Better yet, you can turn off the Switch completely to save the maximum amount of battery possible.
- Hold the Power Button on top of your Nintendo Switch for a couple of seconds.
- You can put your Switch into Sleep Mode from here. But to turn it off completely, select Power Options.
- Now select Turn Off. Your Switch should power off instantly.
After powering your Switch down entirely, it might take a couple of seconds more to boot up the next time. But it’s pretty much worth it considering the amount of battery life you end up saving.
Keep an External Power Bank Ready
Although this won’t improve the Switch’s own battery life, it’s always a good idea to keep a power bank handy. Power banks have advanced quite a lot and won’t add much heft to your Switch travel pack. Any USB PD (Power Delivery) compliant battery bank should work just fine.
However, we recommend getting a Nintendo certified one even if it’s more costly. This is because even though Nintendo says that the Switch draws power according to USB PD compliance, in reality, it doesn’t. That’s why there have been multiple reports of Switch systems getting bricked for using a third-party dock.


- 10000mAh Battery Charger Case: Provides 2x more additional switch games time; Notice: Before...
- Pop-Up Design Backup Case: Comfortable pop-up and snap-fit design; Specially customized for Nintendo...
- Lighter and Portable: Weight 9.3 ounce only and size 6.40 x 4.28 x 1.07 inch, lighter and smaller...
And in case that happens, you will be stranded with a bricked Switch because it voids your warranty. We also recommend you use the type C cable that came with the console or an aftermarket Nintendo manufactured one just to be safe.
Keep a Spare Charger Handy
Nowadays, most places have power sockets. While traveling, you can stop by at any location to refill your Switch if you keep a charger with you. Once again, we recommend you only use a Nintendo manufactured charger for the Switch to be on the safe side.

- Plug in the AC adapter and power your Nintendo Switch system from any 120-volt outlet. The AC...
If you plug in your Switch to the wall while playing an intensive game, the Switch actually charges faster than the battery drains. So you can get a little more playtime and more charge to set you up on your journey.
Following the above methods, you should be able to improve your Switch’s battery life. It should at least give you an extra 30-40 minutes of playtime, depending on your Switch version. The launch Switch is the model most plagued by battery life issues. So this comprehensive guide should help users of that Switch the most.
Nintendo addressed the battery draining problem by releasing a refreshed Switch model along with a Switch Lite model in August of 2019. Both Switch V2 and Switch Lite came with a new 16nm Tegra chip. The revised SoC also included and more efficient LPDDR4X RAM chips for both consoles.
No real-world performance gain came with the die shrink. But the battery life improved significantly by up to 78%. The new Switch lasts 4.5-9 hours, depending on the game. Even the Switch Lite (3570mAh) that comes with a smaller cell compared to the full-fat Switch (4310 mAh) due to its smaller size lasts around 3 to 7 hours. Regardless of the Switch model you personally happen to own, you can perform some tweaks mentioned above to improve battery life even more.


