
Following the successful implementation of Screen Time feature on iOS devices, which focused on users’ digital wellbeing, Apple now brings the Screen time on macOS Catalina. It was not a big surprise when Apple initially rolled out the Screen Time on Mac with Catalina.
If you have just updated your MacBook or iMac to the all-new macOS Catalina, here is a complete guide to using Screen Time on MacOS.
- What is Screen Time on Mac?
- How to Enable Screen Time on MacOS Catalina?
- How to Turn Off Screen Time on Mac?
- How to Find Your App Usage Time on Mac?
- How to Keep Track of Your Notifications?
- Find How Many Times You Checked Out Your System
- How to Enable and Use Downtime on MacOS?
- How to Set App Limits on MacOS?
- How to Restrict Contents and Apps on Mac?
- How to Get Screen Time of All Your Devices on Mac?
What is Screen Time on Mac
Screen Time on iOS 12 was Apple’s vision towards bringing healthier smartphone usage among users. On iOS devices, the Screen Time keeps track of your app usage, the screen on time, and other user behavior and lets you know if you are using your device too much. Now, Apple brings the same Screen Time feature on to the Mac users as well with the macOS Catalina.
Many Mac users have been using several third-party tools to get the Screen Time feature on Mac, like Timing. If you just updated your Mac to the latest macOS Catalina, then you no more require any third-party tools to keep track of your usage. Screen Time can do it for you. It can show you how much time you do spend with your Mac, and the statistics of your individual app usage. By analyzing your usage statistics. you can either choose to reduce the usage time or set app limits for each day, for better productivity.
How to Enable Screen Time on MacOS Catalina
Screen Time is a default feature that comes along with the latest macOS Catalina. The feature is enabled for most of the users. However, if you doubt that whether the feature is enabled on your Mac, you can simply enable it from the System Preferences. Here is how you can do it.
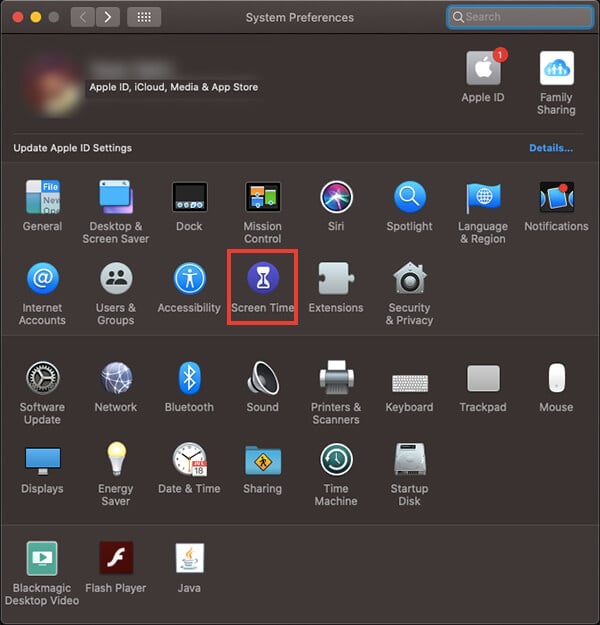

- Open System Preferences and Click Screen Time on your Mac.
- Click “Options” from the left pane.
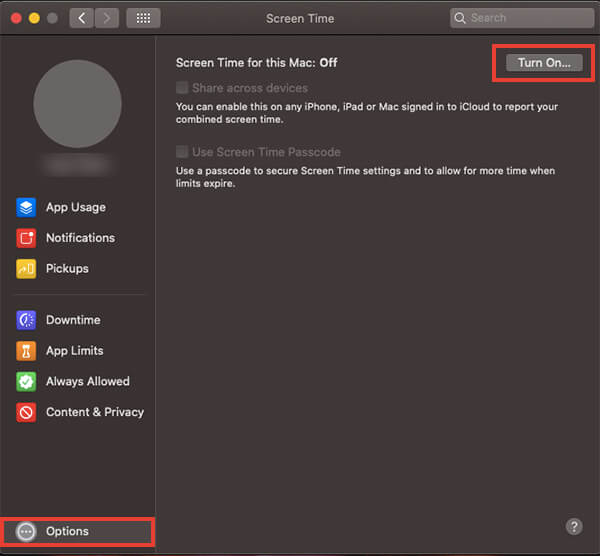
- Check the Status of Screen Time along with “Screen Time for this Mac.”
- Click the “Turn On” button if the status is “Off.”

After enabling the Screen Time, you will be able to see your usage statistics from the Screen Time window.
Also read: How to Skip Login Screen on Mac
How to Turn Off Screen Time on Mac
Just like keeping track of your Mac usage, you can also opt-out of the Screen Time feature. Here is how you can disable or turn off Screen Time on Mac.
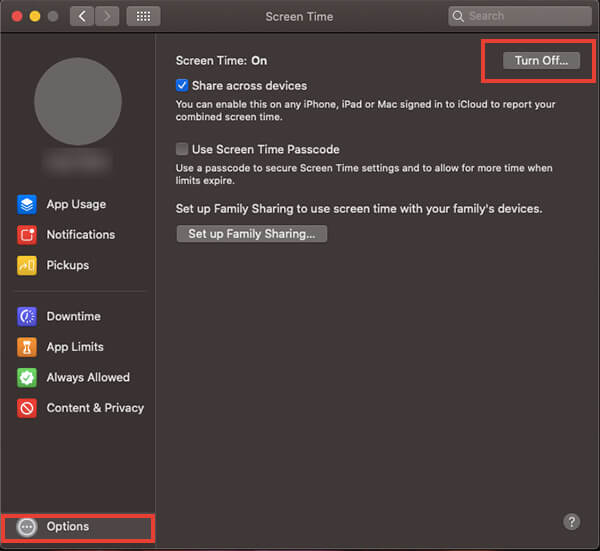

- Open System Preferences > Screen Time.
- Click on Options.
- Click the “Turn Off” button and confirm disabling the feature on your Mac.
Once you disable the Screen Time, your Mac will not track your system usage and disable Downtime feature until you turn it back on.
How to Find Your App Usage Time on Mac
Using the Screen Time on Mac, you can find how much time you spend on each app. The graphical data is available on a daily and weekly basis. You can find your app usage on each day of the week, and the average app usage for the entire week from Screen Time on Mac. Here is how.

- Open System Preferences on your Mac.
- Enter Screen Time.
- Click on the App Usage menu from the left.
- Find your app usage duration from the graph, and scroll on the list to find more details app-wise.
- Click on the arrows along with “Today” to find the app usage from your previous days.
- Click on the Date on the top of the window and select “Last Week” to see the usage from the past week.
Looking more into the graph, you will also get more insights about the category of apps you have bee using, and can keep a track of it.
Related: iOS ScreenTime: Set Time Limits for Apps on iPhone?
How to Keep Track of Your Notifications
Notifications are distracting during worktime and can affect your productivity. Therefore, Apple allows you to keep an account of all the Notifications you receive on your Mac. You can find the number of notifications you received over the week, and on the whole day itself. The below steps will show you how to get the count of all notifications on your Mac.
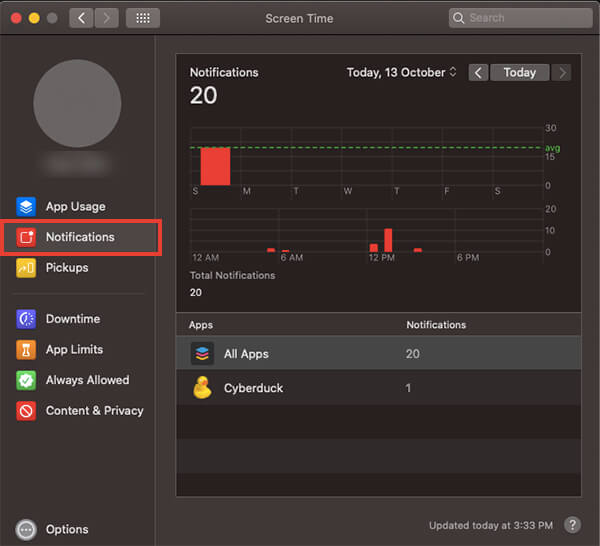

- Open System Preferences and then Screen Time.
- Click Notifications from the left sidebar.
Similar to the App Usage window, you can, however, view the notification count for each day and the whole week as a graph from the Notifications window.
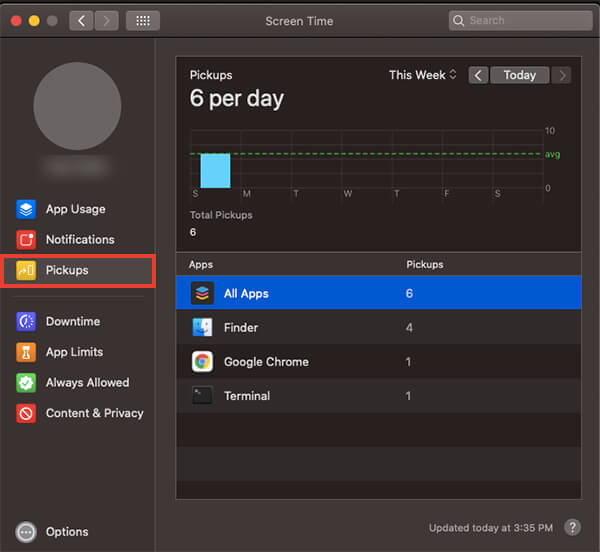
Find How Many Times You Checked Your System
Have you ever tried to count how many times you check your system for notifications, browse the web and open apps a day? Well, the Pickup feature on Screen Time has accurate data on how many times you open your Mac and run apps a day. This data can help you get an understanding of your computer usage in a day, similar to how many times you check your phone.

- Launch System Preferences app on Mac.
- Enter the Screen Time option.
- Click on Pickups.
- You can find the number of times you picked up your Mac during the whole day, and the apps you have opened.
Also, you can see the pickups from the entire week, by changing the day and Show Usage preferences.
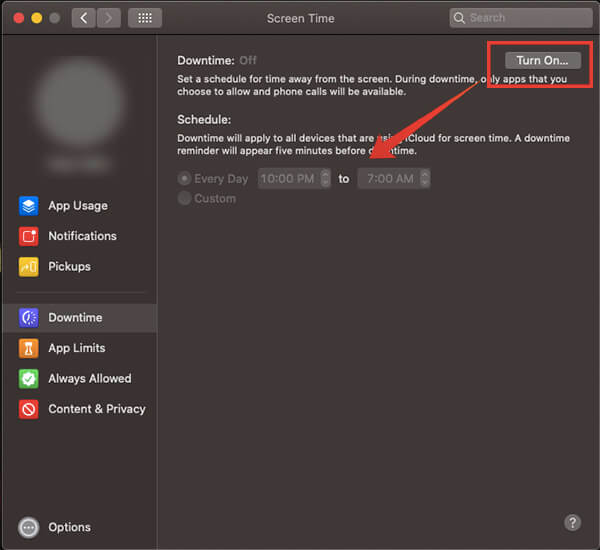
How to Enable and Use Downtime on MacOS
Downtime is one of the major features on Screen Time, which lets you set your Mac inaccessible after certain time of the day. Using this, you can set the Downtime as a certain time from night to the morning, and your kids will not be able to access the apps during the timeframe. Here is how you can enable and schedule the Downtime on Mac.

- Open System Preferences.
- Click “Screen Time” from the Preferences window.
- From the left sidebar, choose “Downtime.”
- Click the “Turn On” button at the top right corner.
- After enabling the feature, schedule the Downtime on Mac from the same window.
- If you want the Downtime to run on every day as scheduled, choose “Everyday” and set starting and ending time.
- If you want the Downtime on specific days of the week, then choose “Custom,” and then select the days you want to run the Downtime feature on your Mac.
All the apps will be disabled when during Downtime. However, you can choose to opt-out the app fr a limited period of time while Downtime is enabled. Read our complete guide to Downtime on Mac for more details.
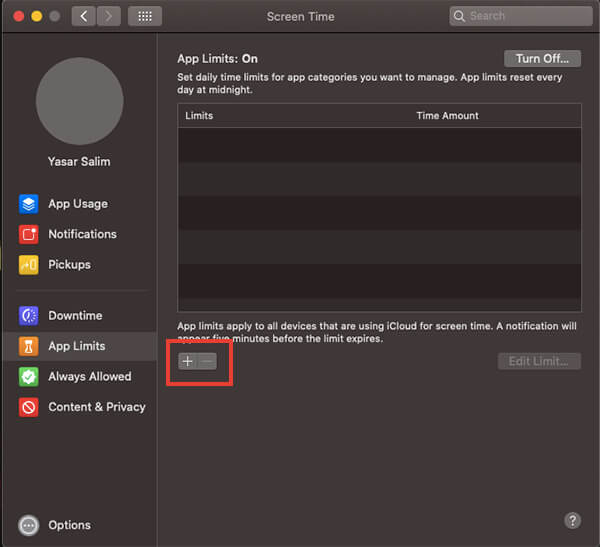
How to Set App Limits on MacOS
Apart from Downtime, you can time limit for individual apps from your Mac now. For that, you only have to create new App Limits and set the time limit an app can be used each day. See how to set app limits on Mac with macOS Catalina.

- Open Preferences window from Apple Logo > System Preferences.
- Click Screen Time next to Accessibility options.
- Go to the App Limits screen.
- If the App Limits off, click on Turn On button.
- After turning on App Limits, click the “+” button at the bottom of the list to create a new app limit.
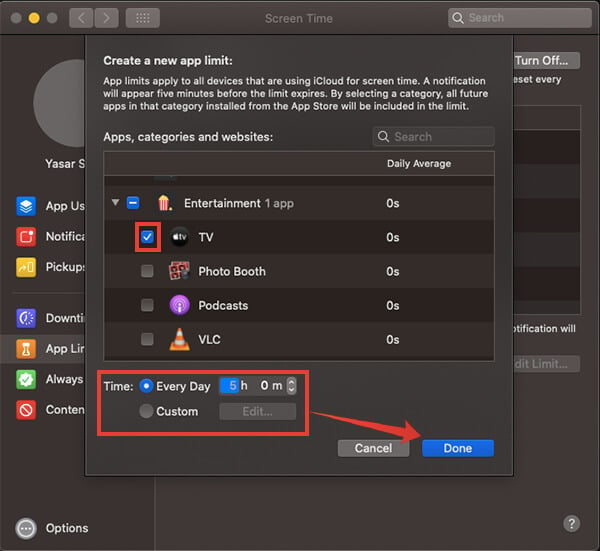
- You can either choose an entire category or expand the list and choose individual apps to set limits.
- Choose the time limit.
- Select Everyday and set a time limit for setting the same usage limit for all days in the week.
- If you want to set different app limits for different days, choose Custom and create a separate time limit for each day.
- Click Done.
Your Mac will track your usage and block you from opening the app when the time limit exceeds. Want to know more about App Limits? Here is our guide to Downtime and App Limit on Mac for more details.
How to Restrict Content and Apps on Mac
Content Restriction and App Restriction were the parts of Parental Control options in previous macOS versions. However, Apple seems to have moved the parental control and other content restrictions to the Screen Time option and now becomes easier with macOS Catalina. Here is how to restrict content and apps on Mac.
- Click on the Apple logo on the top left corner of the Menu bar.
- Choose System Preferences.
- Click Screen Time.
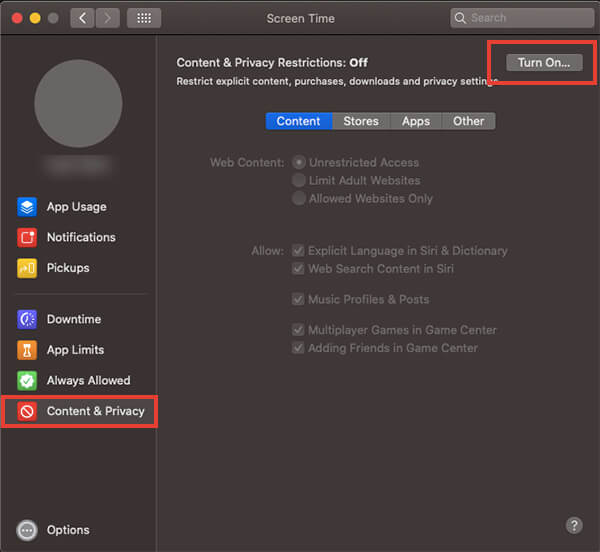
- Choose Content & Privacy from the window.
- Turn on Content & Privacy Restrictions.
- Choose your content restriction preferences, therefore children would not be able to get certain web content and apps.
- Click on the “Stores” tab to choose the contents you want to allow/block from the iTunes store.
There are many other options you can choose to enable content restriction on your Mac.
How to Get Screen Time of All Your Devices on Mac
Currently, all the Apple devices you own, including Mac, iPhone, iPad and iPod Touch, have the Screen Time feature enabled by default. In case you are using the same Apple ID on all the devices, then it is possible to find the Screen Time analytics on each devices using any other device. If you want to get the Screen Time of your other devices using your Mac, here is how.

- Open System Preferences window on Mac.
- Click Screen Time.
- Choose Options from the next window.
- Check “Share Across Devices.”
After the syncing, you will be able to see the App Usage statistics from the Screen Time on your Mac. By the same token, you can find your Mac’s Screen Time on iPhone as well. To share the Screen Time of your iPhone with all the iCloud connected devices, follow the below steps.
- Open Settings from your iPhone.
- Tap Screen Time.
- Scroll down and toggle on “Share Across Devices.”
You now have a clear idea of how to use the Screen Time on Mac. Comment down if any queries or extra tips.


