
Google Photos let you save and browse through the images you capture on your phone. But the one major thing we did not have was an option to hide or lock photos in Google Photos. Well, now you do. You can now hide photos in Google Photos and even lock photos in the Google Photos app.
Here, let’s see how to hide and lock photos in Google Photos app to protect your private photos.
Content
Set up Google Photos Private Folder
If you have a Pixel 3, Pixel 3 XL, Pixel 3a, Pixel 3a XL, Pixel 4, Pixel 4XL, Pixel 4a, Pixel 4a 5G, or the Pixel 5, you can start using Locked Folder on Google Photos right now. The Google Photos private locked folder feature will eventually roll out to more Android phones sooner.
Related: Can’t Find That Photo? Use These Google Photos Search Tricks Instead
To hide and lock photos in Google Photos, you’ll first have to set up the Locked Folder. There isn’t much to set up, however. Just follow the simple steps below to learn how to lock your photos.

- Launch the Google Photos app, obviously.
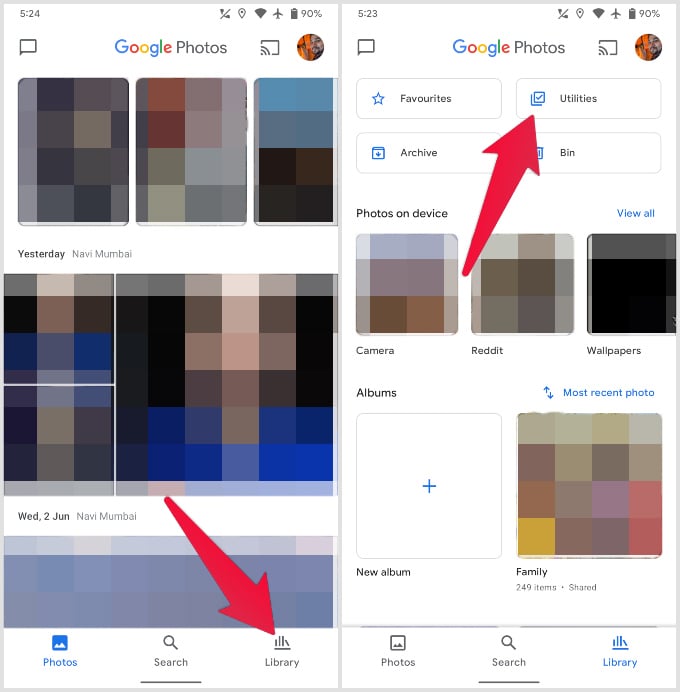
- Head over to the Library tab from the bottom bar.
- Select the Utilities section on the top.
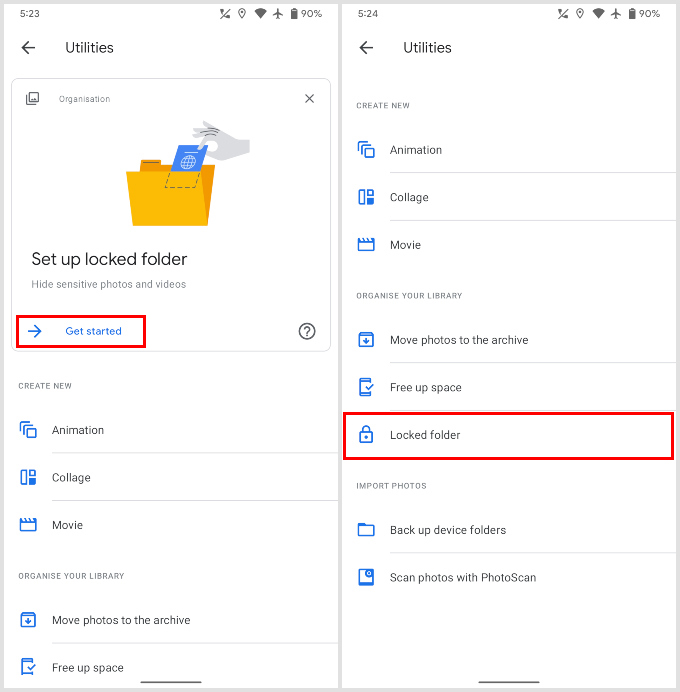
- Tap Get started on the card inviting you to set up the Locked Folder feature.
- If you don’t see the card, just scroll down and select Locked Folder.
- On the next page, tap the Set up Locked Folder button.
- Enter your PIN, password, or Fingerprint ID to enable the feature.
Related: How to Enhance Photos with New AI Features on Google Photos
Hide and Lock Photos in Google Photos
Once you’ve set up the locked folder, you’re ready for hiding and lock your photos. There are multiple ways to go about it. The simplest at this point would be to tap on the add photos icon at the top and select the photos. Here are two other ways that’ll be more convenient when you’re not already inside the Locked Folder.
While Browsing Photos
When you’re browsing through your photos and find one or several that you would like to hide, follow the steps below.
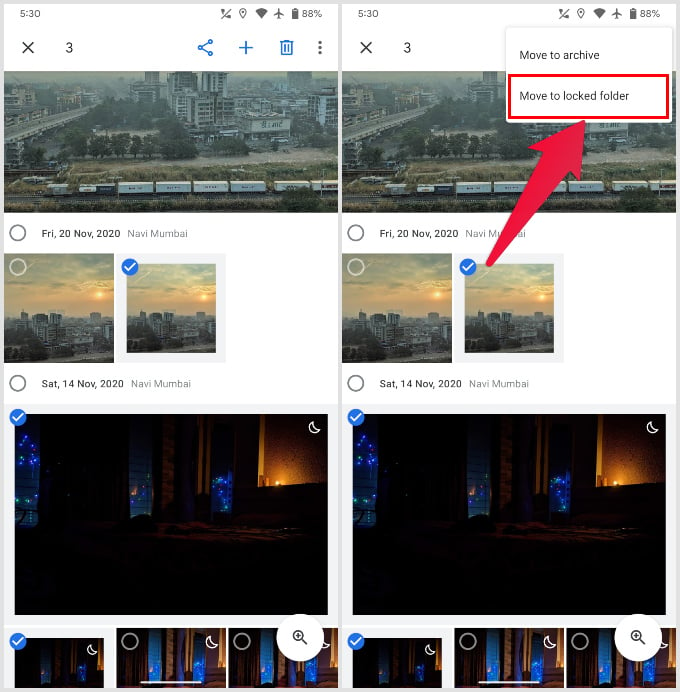
- Long press on the photo that you want to hide.
- Tap and select any other photos that you want to hide.
- Tap on the three-dot overflow menu button in the top-right.
- Select Move to Locked Folder
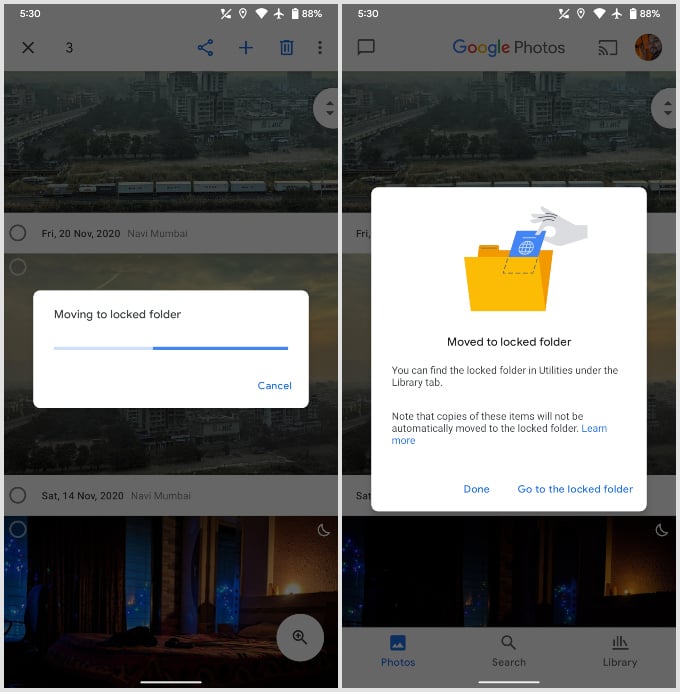
Your selected photos will then be removed from your Google Photos library and hidden in the locked folder, behind the lock, of course.
Related: How to Move Facebook Photos to Google Photos
While Taking Photos
What if you can hide the photos you take on your phone? Yes, you can capture and save photos directly to Google Photos private folder It would be unnecessarily tedious to take the picture, go to the Photos app and then lock it. You can save several steps by directly saving the photo to the Locked Folder.
- Open the Pixel camera app.
- Tap on the Folder icon in the top-right corner.
- Select Locked Folder from the two available options.
- Take your pictures or even videos.
Any photos or videos shot with the Locked Folder selected as the destination will be saved directly inside it and not appear in your Google Photos library.
It is worth noting that photos or videos inside the Google Photos private folder are not available on any other device or even with Google. These files are stored locally on the device. Therefore, Google will not and can not also use them to create memories. Moreover, Google will also remove them from existing memories when you hide photos on Google Photos.


