
Windows 11 might be cool and a great update, but many people will not get the update. Only computers with TPM 2.0 are eligible for Windows 11 update, but there is a workaround to bypass this. This means that you can get Windows 11 without TPM 2.0. With this, you can now install Windows 11 on unsupported PCs, albeit if the only requirement your PC fails to fulfill is having TPM 2.0.
Let’s see how to install Windows 11 on unsupported PCs.
Install Windows 11 Without TPM 2.0 on Any PC
Bypassing the TPM restrictions lets you install Windows 11 even if you have a very old PC. That requires a few steps to be taken and in the end, you will get a free direct upgrade to Windows 11 even if you are using an unsupported, outdated PC. Let’s begin with the steps.
Check the TPM Version on Windows PC
Your PC needs a TPM module to be able to install Windows 11, even if it isn’t TPM 2.0. A point to note is that this workaround works only if your PC at least has TPM 1.2.
There are many ways to check the TPM version on Windows. The easiest way is to open up the TPM Management module from Run or Windows search. You can find detailed instructions by following our guide by clicking here.
Bypass TPM 2.0 Restriction on Windows PC
If you know your PC has TPM 1.2, you can follow the steps below to bypass TPM 2.0 and get the Windows 11 update without TPM 2.0.

- Click on the search icon on the taskbar, or press the Windows key and type regedit.
- Click on Registry Editor to open it.
- Navigate to the following address using the left navigation column, or copy-paste it into the address bar and hit Enter.
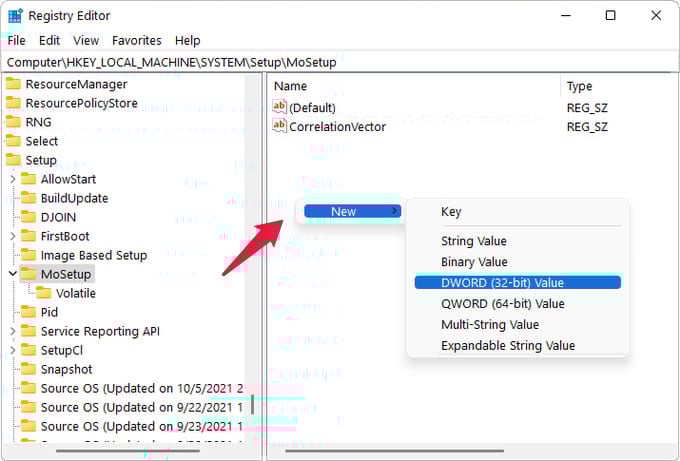
HKEY_LOCAL_MACHINE\SYSTEM\Setup\MoSetup - Right-click in an empty space on the right and select New > DWORD (32–bit) Value.
- Name it AllowUpgradesWithUnsupportedTPMOrCPU.
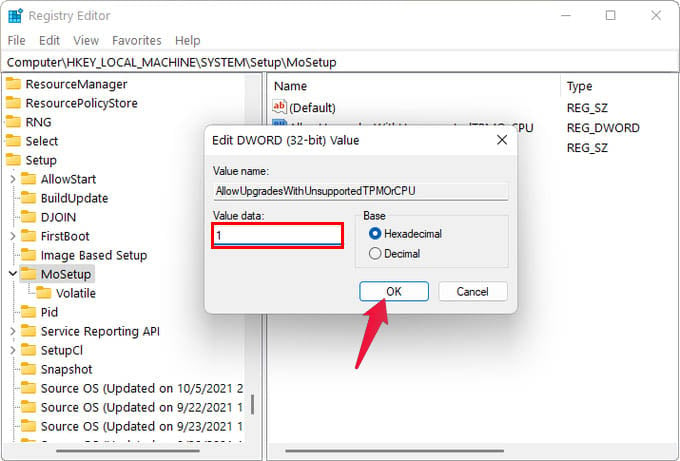
- Double-click on the AllowUpgradesWithUnsupportedTPMOrCPU value to edit it.
- Change the Value field entry from 0 to 1 and click OK.
Once you’ve done that, Windows 11 will not check for the minimum system requirements on your machine. This includes not checking for your CPU, other hardware requirements as well as TPM 2.0. Again, your PC must at least have TPM 1.2 for this to work.
Related: How to Change Taskbar Size in Windows 11
Create Windows 11 Bootable USB Installation Media
Once you have enabled Windows 11 upgrade for unsupported PCs without TPM, you will need a Windows 11 installation media. You can get the Windows 11 ISO from Microsoft for free, then create an installation media from that using a USB flash drive.

- Connect a USB flash drive with at least 8 GB of available memory to your PC.
- Download free Windows 11 ISO from Microsoft’s Windows 11 download page.
- Download the media creation tool to create Windows 11 bootable USB installation media.
- Launch the media creation tool and click Yes on the prompt.
- Click Accept when presented with the terms and conditions.
- Select language and edition, then click Next. Make sure you select the same language that you are currently using on Windows 10.
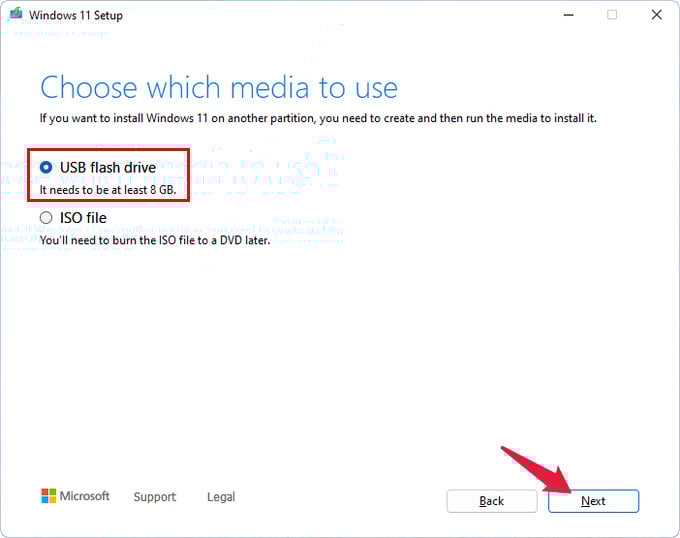
- On the next page, select USB flash drive, then click Next.
- Select your attached flash drive on the next page and click Next.
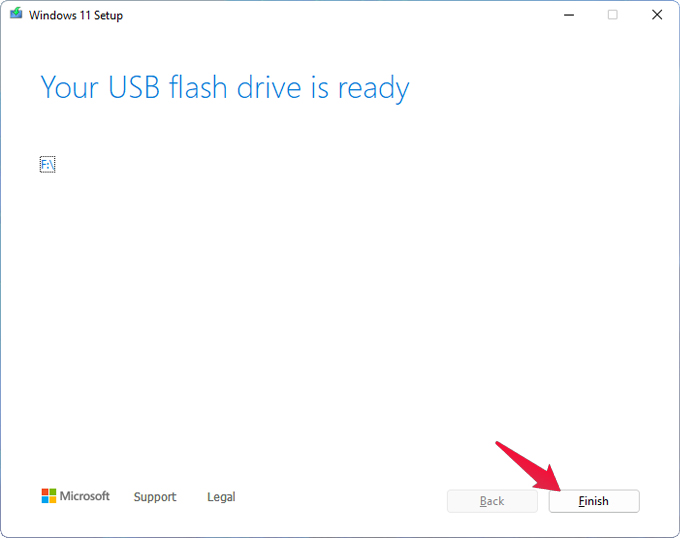
- The process will begin, wait for it to complete, then click Finish.
Keep in mind, any data already present on the USB flash drive will be wiped.
Related: Upgraded to Windows 11? Here are the Best Windows 11 Tips and Tricks
Upgrade to Windows 11
Once you have created a Windows 11 bootable USB installation media, you can go ahead and upgrade to Windows 11 for free. To do that, go to Settings > Windows Update, and select Check for updates. You should now be able to upgrade to Windows 11 directly from your PC without even wiping out data.
While Windows 11’s new design — especially for the start menu — might be a bit controversial for some, there’s no denying a lot of people want to upgrade to Windows 11. Microsoft, however, has set some ridiculous restrictions when it comes to the hardware Windows 11 will support. This means many of those customers wanting the Windows 11 update will have to buy a new PC to get it. But with this trick, you can still install Windows 11 on your unsupported, old PC. In case you never want to remove Windows 10 while trying out Windows 11, check out our guide for dual booting Windows 10 and 11.


