
Smartphone cameras have come a long way but they’re at a point where physics wouldn’t allow them to get any closer to a professional camera. That’s because of the optics since the smartphone camera lens is much smaller. But smartphones resort to software processing to make the images look a lot better than they actually are. Snapseed is an excellent photo editor that can help you do edit pictures manually, to your liking.
Here are some Snapseed photo editing tips and tricks that you may want to know about.
Snapseed Photo Editing Tips and Tricks
- Tune the image
- Adjust The White Balance
- Crop An Image
- Change Perspective
- Edit Pictures Selectively
- Fix Images with the Healing Tool
- Improve Dynamic Range with HDR Scape
Snapseed Photo Editing Tools
Snapseed now offers a few easy-to-use Instagram-like filters up front as soon as you load up an image. The choices are very few though and not really that great either. Where the Snapseed photo editor excels though is in providing manual Tools.
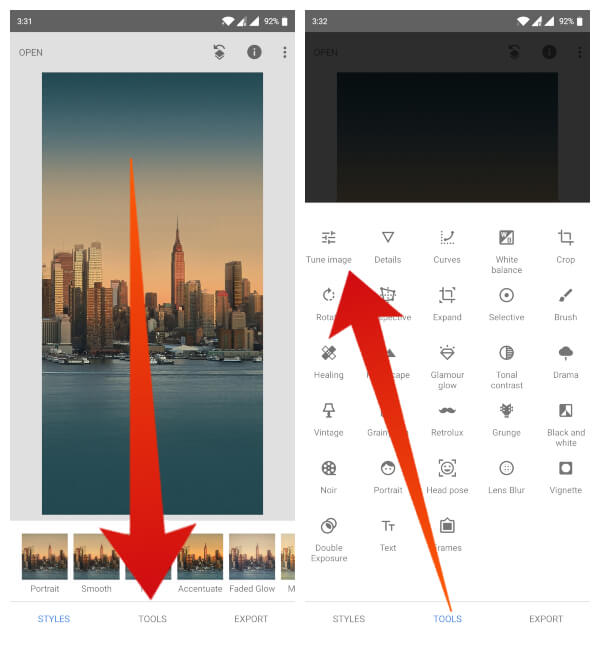

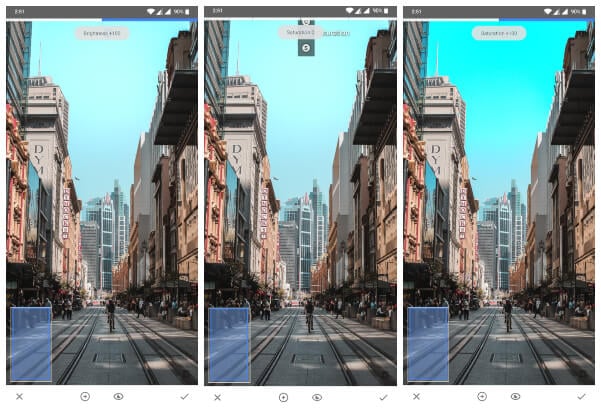
1. Tune the Image
The Tune image option lets you change the Brightness, Contrast, Saturation, Ambiance, Highlights, Shadows, and Warmth.
- Brightness: This is most useful when you have an overexposed image. Decreasing the brightness value can bring more details from the overexposed areas of the image. You can also use it to add a little light to a darker shot. However, you’ll have to be careful about the noise.
- Contrast: This is the difference between the lightest and darkest parts of an image. Some people prefer slightly more contrast while some prefer it normal.
- Saturation: Saturation is the amount of color in an image. What it means is increasing it will make the colors pop, and decreasing it will make them dull.
- Ambiance: This setting lets you change the contrast and saturation together. Increasing the ambiance decreases the contrast but it can bring out the details in darker areas of an image.
- Highlights: Highlights let you change the brightness of only the brightest parts of an image. This makes sure that the darker parts of your image don’t lose any details while the overexposed parts do gain some.
- Shadows: Shadows is the opposite of highlights in that it changes the brightness of the darkest spots. This helps bring out more details from the darker areas of the image while preventing the brighter ones from being overexposed.
- Warmth: This adds an orange/red-ish or blue-ish tint over your image. Some people prefer a cool (blue-ish) tone while some prefer warmer tones.
If you know what kind of photo you want, and what can give you that, this is the only option you’ll need most of the time. I rarely use any of the other Snapseed photo editing tools.
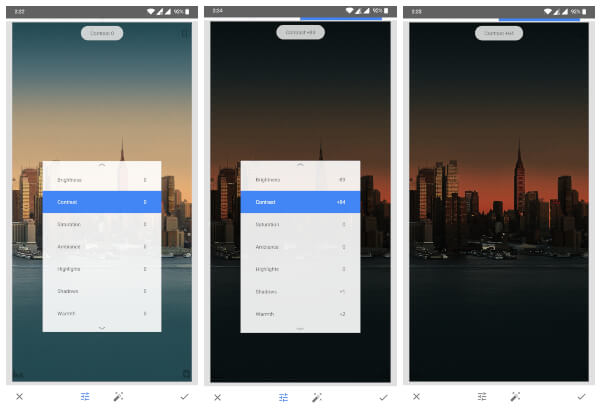

You can simply swipe up and down on the photo to switch between the available options and swipe left or right to decrease or increase the value of it. You can see how drastic a change you can make by these simple settings, in the screenshots above. The photo was probably of an evening, and it almost turns into night.
2. Adjust The White Balance
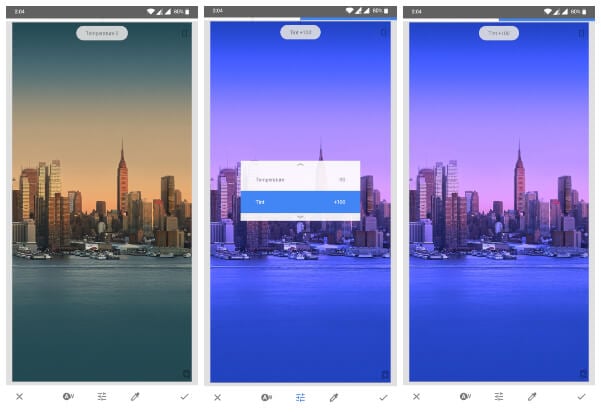
White balance is quite like the warmth setting in the Tune image tool but this gives you more control over the concerned aspect of an image. With the Snapseed photo editor, you can not only give the image a cool blue or warm red hue but you can also add a pink or green tint to the photo. Used right, it can make a dull looking photo into quite a looker, for instance, a dull sky into a cool purple-ish one. Normally photo editing tools don’t provide such a detailed White balance tool.
Related: Best RAW Image Editing Apps for Android
3.Crop An Image
Cropping images is one of the most basic editing tools and it’s even built into any photo editor app. You don’t really need Snapseed for such basic functionality, but it would be a shame if something as good as it didn’t have the crop feature. So yes, it does have it and it’s just as easy to use.
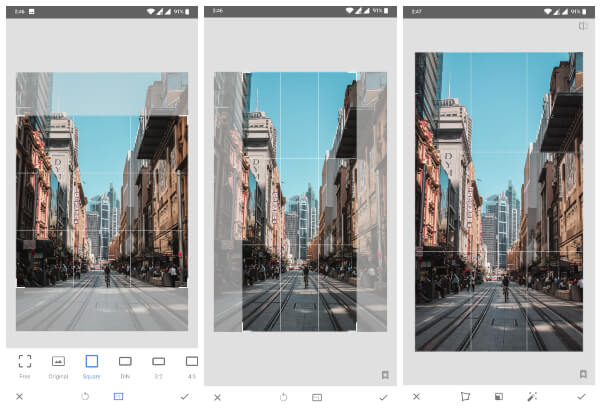
Apart from the usual free form crop that you get with most apps, Snapseed offers many fixed aspect ratios. The crop tool also has a grid view so you can position the subject according to the rule of thirds.
4. Change Perspective
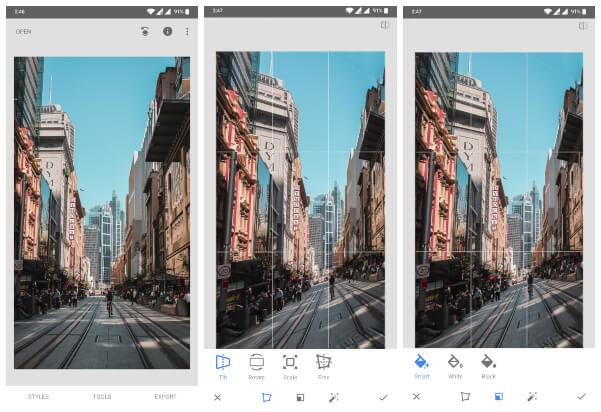
The Snapseed photo editing arsenal has many usual suspects but hidden amongst them are some instances of AI magic. The perspective tool lets you change, well, the perspective of an image. Sometimes what differentiates a great picture from a good one is the angle, after all. Adobe Photoshop on the PC lets you do that too, albeit Photoshop is not exactly free. When you change perspective with Snapseed photo editor, it automatically recreates parts of the image in areas that need it instead of leaving a white or black background. You can turn this off by selecting White or Black instead of the default Smart.
Also read: Best iPhone Photo Editing Apps
5. Edit Pictures Selectively
Sometimes you wish you edit pictures, you wish you could edit only a part of an image, leaving the rest of it untouched. For instance, you took a photo of a landscape but the sky doesn’t look blue enough. Normally then, when you edit pictures like that you want to change the saturation of the sky but it makes colors on the rest of the image pop out unnaturally. Snapseed allows you to only increase the saturation for the sky. You can also change Brightness, Contrast, and Structure, in addition to Saturation.
All you have to do it choose the Selective tool and then tap on something. Snapseed does not show the selection like Photoshop, unfortunately. You can then swipe up or down to choose from the available options and swipe left or right to change the values as usual.
Also read: Best Online Image Editing Tools (Web Apps)Best Online Image Editing Tools (Web Apps)
6. Fix Images with the Healing Tool
The healing tool is another little piece of software magic that is not really exclusive to Snapseed. But it’s presence helps elevate Snapseed photo editing to a whole new level. It can help you fix small mistakes, like removing unwanted objects from an image. This works best if the object you want to remove is surrounded by something plain, and with fewer patterns. Examples would be the sky, water, plain wall, etc.
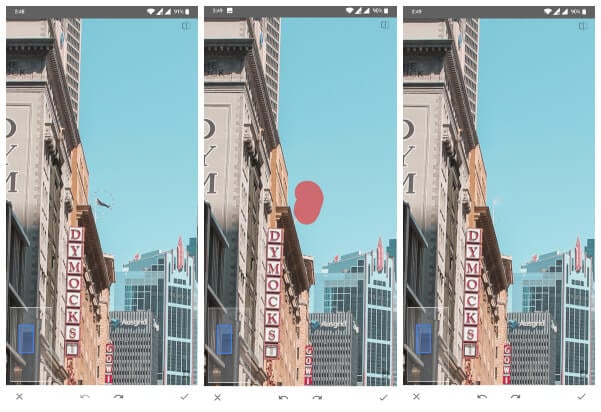
Using the tool to edit pictures can also be tricky if you’re new. After selecting the Healing tool from the Tools menu, zoom into the part of the image that you want to fix. Then select the part you want to heal with your finger, and it will be highlighted in red. As soon as you remove your finger, the selected area will be filled with surrounding pixels. And that’s how you erase a flag on a building.
7. Improve Dynamic Range with HDR Scape
One of the very sought after features of a Google Pixel camera is its HDR+ technology. Google Pixel phones utilize Google’s AI smarts to create a perfect blend of highlights and shadows, producing more details and still keeping the image punchier and contrasty. It basically leaves little to no room to edit pictures since they already look the best, mostly. HDR Scape is a Snapseed photo editing tool that can help you achieve similar results.
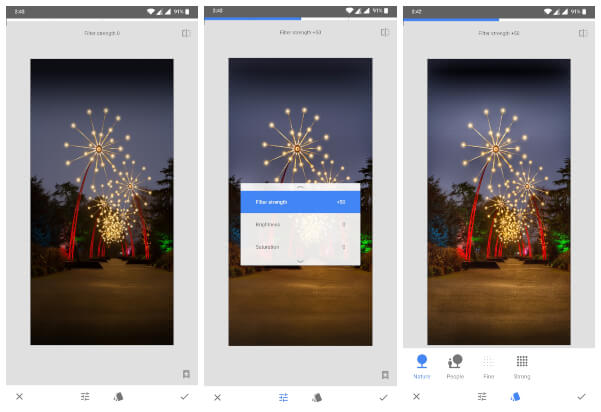
You have to be a little smart about the kind of photos you use with this, though. Ideally, the image should have an undesirable dynamic range with dark shadows that lose detail. Use HDR scape on them, swipe left or right to find that perfect balance and that’s all. You can also try some automatic HDR scaping using the scene choices given at the bottom: Nature, People, Fine, and Strong.
Snapseed Photo Editing
For a free app, Snapseed is a pretty powerful photo editing tool. It provides the usual tools but stands out from other great photo editors by the use of tools like Perspective, Selective, HDR Scape, etc. Since Google is only getting better and better at photography we can expect Snapseed to only get better and better, at least in terms of functionality if not the UI and other aspects.
Most of its features might take some getting used to if you’re new to photo editing. However, there’s only one way to learn and that is to tinker around. Once you’ve got the hang of the basics, you can even try out some even more advanced tools like Curves, Brush, etc.


