
When you dual boot any OS with a Linux based OS, even two Linux distributions, you get a menu which lets you choose between the two operating systems to boot. That menu is called grub and by default, it looks boring. You don’t need to rely on this menu all the time, you can customize it.
Here we take a look at how you can edit grub as well as customize it with GRUB Customizer.
What is Grub?
Most Windows users have never heard terms like grub or desktop environment, bootloader, etc. Most Linux users have. That’s not to say Windows users are dumb, but Linux just teaches things. It’s like a rough life lesson that you begin to enjoy later. For instance, someone who hasn’t seen the grub menu will probably never be on this page looking for ways to customize it.
GRUB, is simply a bootloader, that is, it loads the operating system into the memory at boot. All Linux distributions use the grub bootloader, or grub2, to be accurate. Windows has a bootloader too, it just doesn’t let you boot anything other than Windows. GRUB, on the other hand, lets you boot any OS that you have installed.
Why Edit GRUB?
It looks pretty bland and boring by default. This is why some people might want to customize it after they’ve had enough of the CLI-type look. However, there are more reasons to edit grub than just superficial ones. For example, your newly installed OS is always the default boot choice. So if you weren’t paying attention, grub will boot into it automatically after 10 seconds.
When you’re dual booting Windows alongside a Linux distro it is always a good idea to make Windows the default. Because you know how Windows updates are. They often need to reboot the system several times and with Linux as the default choice, the system boots into Linux instead. Your only options are to either sit there and keep choosing Windows each time or edit grub and change the boot order.
Related: How to Fix Grub Bootloader after Deleting Ubuntu Partition?
GRUB Configuration File
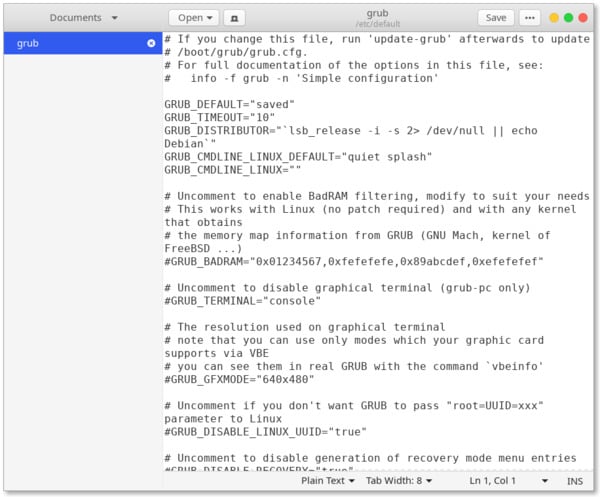
Like most Linux apps and even the OS itself, grub, the bootloader, also stores its configurations as editable text files somewhere in the root directory. So to edit grub all you need is a text editor and root permissions. The grub user configuration file is located in the /etc/default/grub/ folder.
To open it in a user-friendly text editor with a GUI, you can use the command below.
gksu gedit /etc/default/grub
It will ask for your password and open the file as root in gedit, provided you have it installed. It’s the default text editor on GNOME so if you use the GNOME desktop, you should already have it installed. In case the above command doesn’t work, you can try the one below.
sudo gedit /etc/default/grub

Install GRUB Customizer
Although the text editor is GUI, the configurations really aren’t. It’s all text based and you would have to really know what you’re doing. For most users, it is much better to instead opt for Grub Customizer. It’s a simple little tool meant to customize grub, as the name suggests. Installing it is also as easy as copying and pasting the three commands below into a terminal, one by one.
sudo add-apt-repository ppa:danielrichter2007/grub-customizer

sudo apt-get update

sudo apt-get install grub-customizer
The sudo apt-get update command is not necessary if you’re using newer versions of Ubuntu.
Related: How to Install Ubuntu 19 from USB & Dual Boot Alongside Windows 10
Edit GRUB with Grub Customizer
With Grub Customizer installed, it is time to launch it so launch it, using whichever app launcher you use. Or you can simply enter grub-customizer in a terminal.

You’ll have to enter your password for Grub Customizer to open since it will be making changes to the root file system. It takes a few seconds to load up all the configurations.
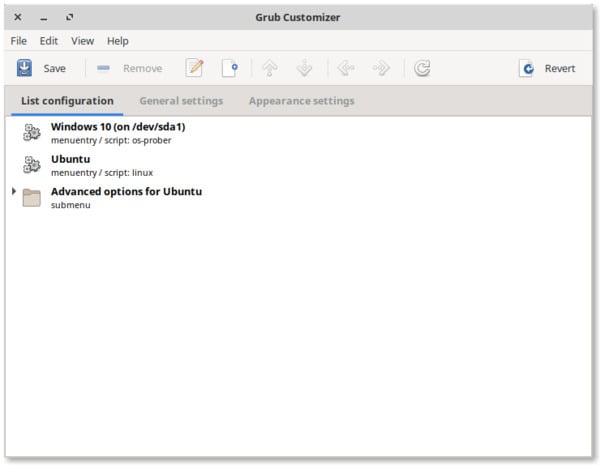
Change Boot Order
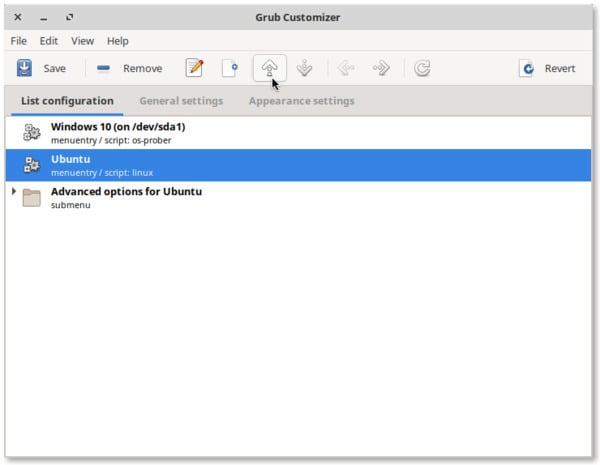
The first thing you see when Grub Customizer opens up is the boot order. Changing it is easy but not as simple as it could have been. Select the boot entry that you wish to move and then click on the up or down button at the top, depending on where you want to move the selected item. Similarly, you can also remove the selected entry by clicking on the Remove button.
General Settings
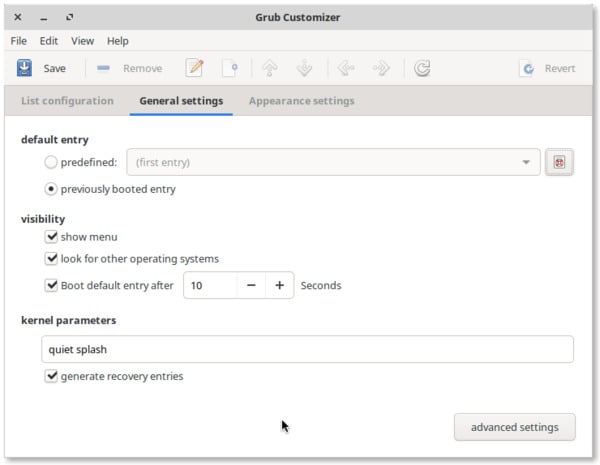
In the General settings tab, you can change the time in seconds that grub waits for input before booting into the default boot choice. There is also the option to completely disable the feature.
You can even go ahead and disable the grub bootloader menu altogether by unchecking the option – show menu, under visibility. This is not an option for experimentation though as it might just lock you out of your other operating systems.
The only setting here that we would recommend to change is the default entry. You can either choose a predefined entry on the bootloader menu to be the default choice or the previously booted entry.
Change GRUB Background
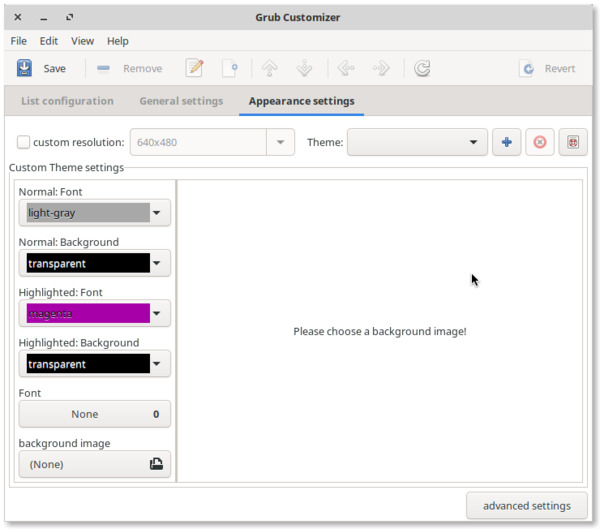

Grub Customizer also allows you to change the grub background and other colors so that it looks nicer than it does. That happens in the Appearance settings tab. On the left, you can find options to change the background color, the text color, highlighted text color, highlighted background color, etc. You can apply your own image as a wallpaper background as well.
However, that’s risky because the image you apply needs to meet certain requirements. The image should be in either PNG, JPG or TGA format. JPG/ JPEG images must be 8-bit (256 colors) but PNG images have no such requirement, hence are preferable. Even then, the image should be non-indexed, RGB. It’s a lot of work.
Install GRUB Theme
If you’re looking for some easier customization, you might want to change grub theme instead. Not only is it easier it also changes the look completely. You can find several grub themes at gnome-look.org. To install a theme, download it and then add it using the + button next to the Theme drop-down menu on Grub Customizer.
More often than not, the method above may not work because a theme might not be created for such an installation. In that case, extract the downloaded archive. Next, copy or move the extracted theme folder to the /boot/grub/themes/ folder. This will require root or administrator privileges.
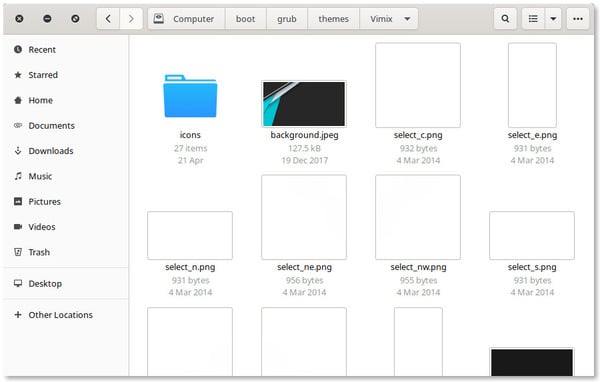

Make sure your theme folder has content that looks similar to what you see above. If not, it may not be the theme folder after all.
Change GRUB Theme
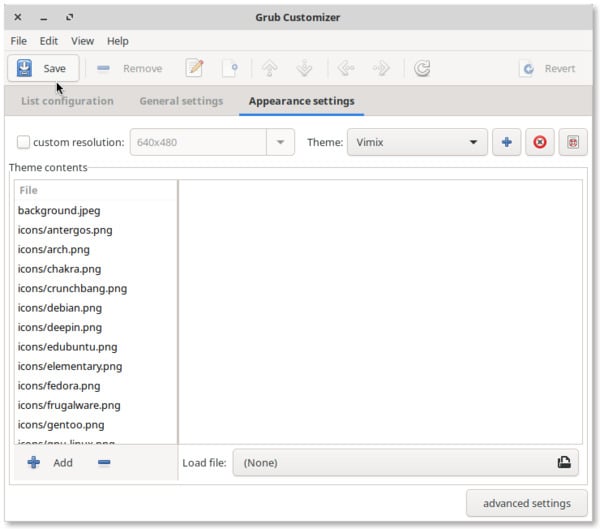
With your theme in place, open the Grub customizer and head to the appearance tab. You should be able to select the grub theme from the drop-down menu next to Theme.
Make Sure to Save the Changes
Now that you know how to make the required changes, make sure you don’t forget to Save them. Grub Customizer does not automatically apply the changes you make because this is a sensitive task. If you apply the wrong setting, for instance, applying the wrong image as the background, it could break grub. That will mean you wouldn’t be able to boot into either of your operating systems until you fix grub. So make sure you only change something that you’re confident about and don’t forget to click Save.


wow thanks so much! took me forever to find this site
256-colour JPEG images cannot exist. Something is wrong here.
8-bit JPEG has 8-bit per component (RGB or YUV) and thus millions of colours. The alternative is 16-bit JPEG but the overall software compatibility of it is very low, it’s not intended for display purposes, but as a HDR intermediate.
how do I back out all of this ( I didn’t save any changes) and remove the customize? In other words what are the commands to uninstall or remove customizer?
Grub customizer is already in the repositories of Ubuntu 19.10 or newer, so there’s no need to do that “add-apt-repository” stuff. Simply type:
sudo apt install grub-customizer
to install it. To remove it, type:
sudo apt remove grub-customizer
Source:
https://launchpad.net/grub-customizer
Help!!!
Mine pc boot key is esc and also grub boot key is esc…
Cant open mine usb boot manager and it no work from bios order (only from boot key), so cant use any other live or installer.
Make a tweak for exchange it, please.