
Switched from an Android to iPhone to pretty recently? No matter how much you enjoy using the phone, you’ll most likely start hating Siri right off the bat. Sure, Siri is the reason why we have so many voice assistants today, but the competition has certainly caught up in the last few years and Apple is now falling behind in the race it started back in 2011 with the iPhone 4S.
Now, Google Assistant, Amazon Alexa, and even Samsung’s Bixby brings a lot more features and functionalities to the table and comparatively, Siri’s progress has been pretty slow to say the least. If you’ve been using an Android smartphone so far, I don’t really have to go ahead and explain how good Google Assistant is. If you were expecting a similar level of experience on your new iPhone, believe me, you’ll certainly be disappointed.
No, I’m not saying Siri is not worth your time at all, but due to Apple’s weird restrictions on iOS, its functionalities are quite limited, especially in comparison to Google Assistant on any Android smartphone. Well, thanks to Google, iPhone users can also utilize Google Assistant instead of Siri for performing a slew of different functions. So, if you think Siri is not making the cut for you, it’s about time to set up and customize Google Assistant on your iPhone. Here’s how to get it done:
Setting Up Google Assistant on iPhone
Google Assistant is available as a standalone app for all iOS devices, which means you can install it on your iPad and iPod touch in addition to the iPhone. It barely takes a few minutes to get it all set up. So, without further ado, let’s take a look at how to get Google Assistant on your iPhone:
First of all, download and install Assistant from the Apple App Store. Once done, we need to configure Google Assistant to make sure we can access it as fast as possible, and for that, we need to add the Assistant widget. With this added, you’ll be able to access Google Assistant even from the lock screen.
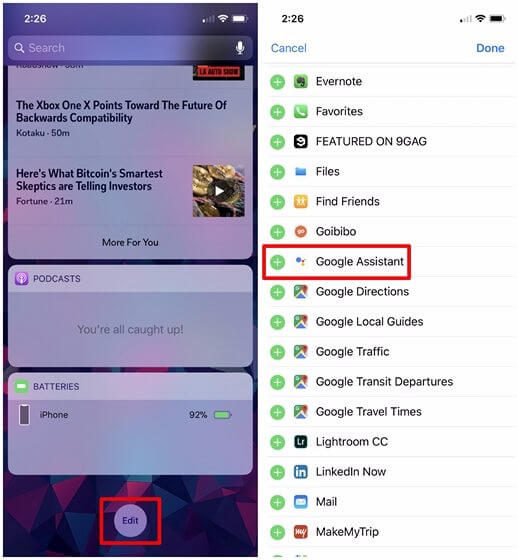
In order to do this, simply swipe towards the right from your home screen or lock screen to head over to the widgets section. Scroll down to the very bottom and tap on “Edit”. Now, scroll a bit down until you find the Google Assistant widget and tap on the “+” icon.

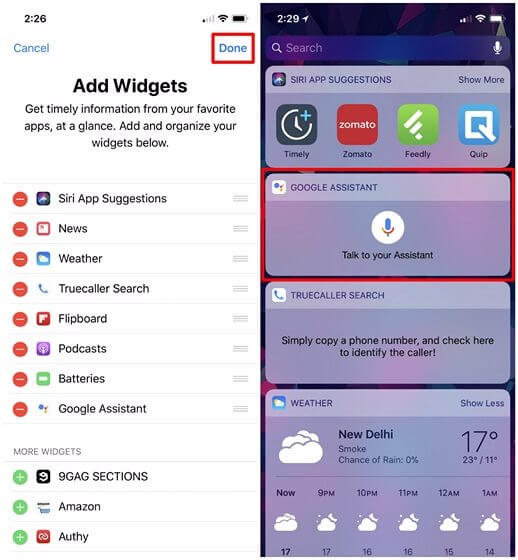
Once done, just tap on “Done” to add the Assistant widget to your widget section. From now on, you can easily access Google’s personal voice assistant with just a single tap on the widget, even if you’re still in the lock screen.
Now that you’ve successfully setup Google’s personal voice assistant on your iPhone, let’s take a look at how to customize it properly.
Customizing Google Assistant on iPhone
There’s a fair amount of tweaking to be done before you can unleash Google Assistant app’s true potential on your iPhone. There are plenty of customization options on offer, and if you have no idea how to fiddle around with the settings, simply follow the steps mentioned below:
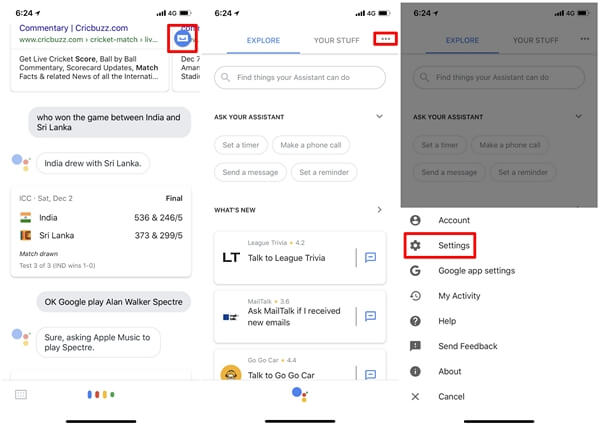
In order to start customizing your Google Assistant app, you need to head over to the app’s Settings. Simply do this by tapping on the icon located at the top-right corner of your screen and then tap on the “three-dot icon”. Now, tap on Settings and a variety of customization options will now be displayed.

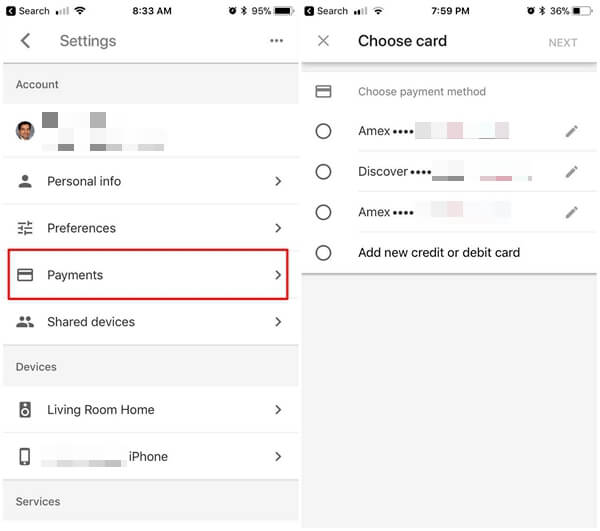
Let’s start with Payments first. You can tap on the Payments option if you want to add your credit or debit card in order to let Google Assistant complete your purchases. The feature as of now is only available if you’re living in the United States.

Next, lets head over to the Devices section. Tap on iPhone option in Google Assistant settings and customize your options for Contacts, Notifications and Location History. For example, enabling the Contacts feature will send your iPhone contacts to Google’s servers, and with the help of this, you can use Assistant to make calls, email and do a lot more.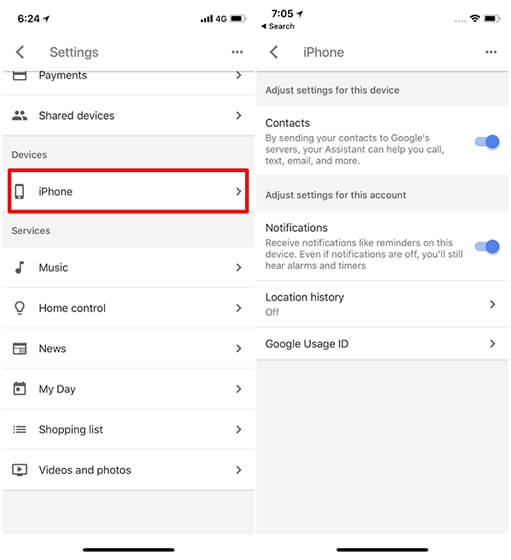

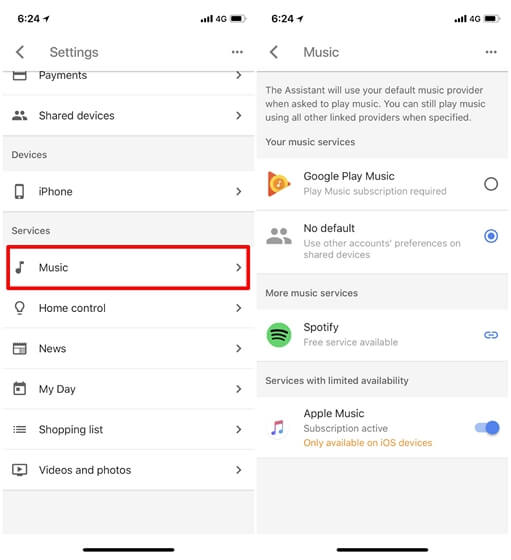
In addition to the customization options that we’ve seen so far, Assistant also provides you some intuitive services that can be completely customized according to your will. We’ll start with the Music service. In order to customize this, simply tap on Music and you’ll have the option to choose between Google Play Music, Spotify or Apple Music, which can then be used by Google Assistant for playing songs upon user request.
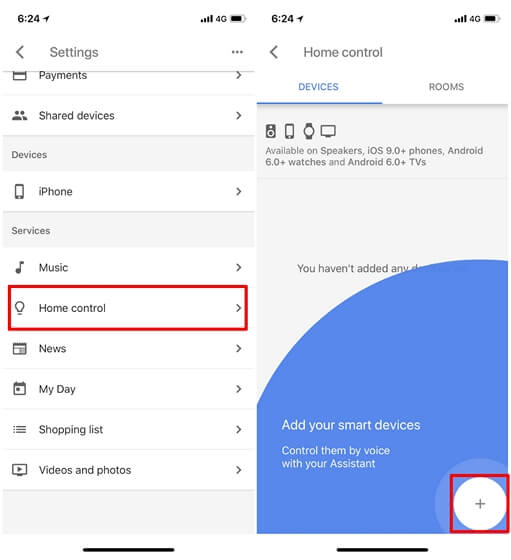
Moving on to the next option under Services, we’ve got Home Control. This essentially lets you add multiple smart devices like the ones you use to build your own smart home. With this feature, you’ll be able to control them with just your voice commands. In order to add a smart device, head over to the “Home control” section and tap on the “+” icon at the bottom-right corner of the screen.
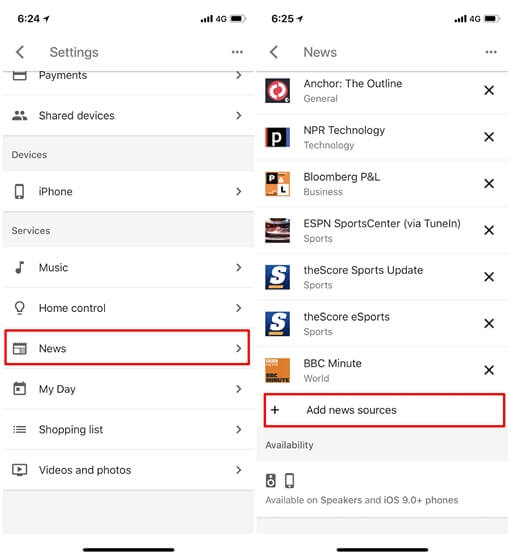
Did you know that Google Assistant can read out the latest news for you with just a simple voice command? In order to configure this feature, tap on “News” in the Settings and you’ll be able to add or remove your own news sources. Once you set this feature up properly, you can just say “Listen to the news” to make Assistant read out all the news for you from only the sources that you’ve chosen.
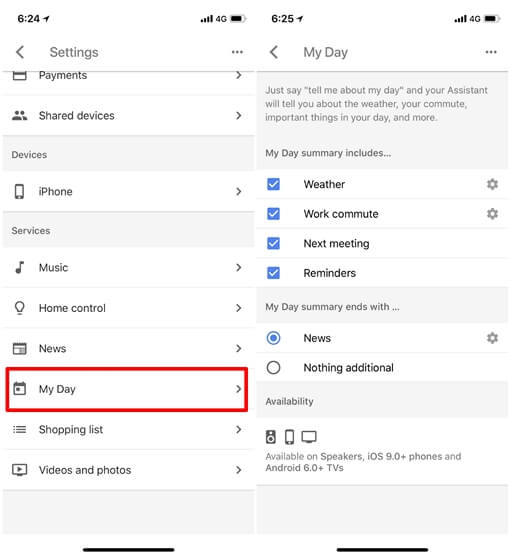
Personally, this is one of my favorite features that Google Assistant has to offer. The voice assistant is capable of reading out the weather, your commute, important events in your day and a lot more. In order to configure this feature, tap on “My Day” in the Settings and you’ll be able to select/deselect options such as weather, work commute, next meeting, reminders, and news, which is impressive, to say the least.
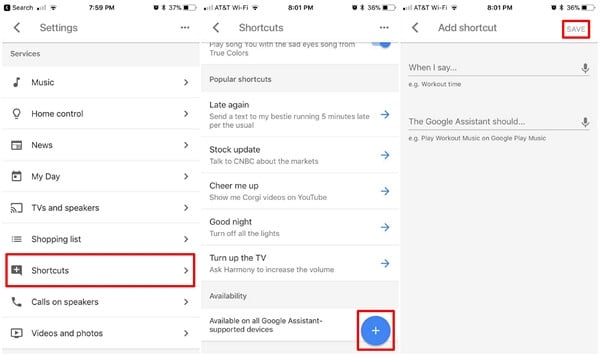
The next option in Assistant’s Settings is Shortcuts. You can completely customize this according to your will. The Assistant app allows you to add a voice command shortcut for performing a variety of different tasks. For example, once you add a shortcut called “Goodnight” for switching off all your lights, the Google Assistant will do just that. Pretty nifty, isn’t it?

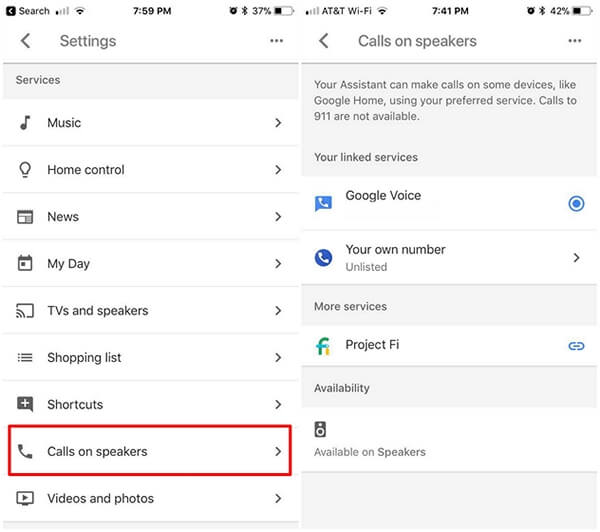
Calls on Speakers is yet another option that’s not available in certain countries like India, but with this feature, your Assistant can make calls from certain devices like the Google Home smart speakers using your preferred service.
Related: How to Set Google Home to Call with Google Voice Number
For example, you can take advantage of services like Google Voice, Project Fi or even simply use your own number. Believe me, this will certainly come in handy if convenience is your top priority.

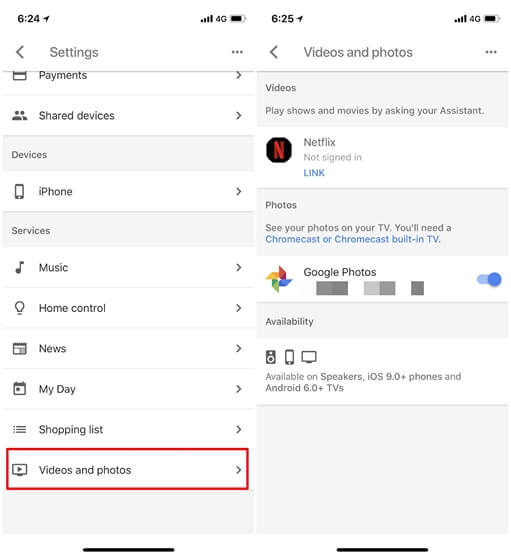
Last, but certainly not the least, we’ve got the option to customize how Assistant utilizes our Videos and photos. Users will be able to take advantage of services like Netflix so that Assistant plays the movies and TV shows that you ask. You need to link Netflix by signing into the service within the app. As far as photos are concerned, Google Photos service can be used to view all your photos on your TV. However, this requires a Chromecast dongle or a TV with Chromecast built right into it.
Well, that’s pretty much how you can set up and completely customize Google Assistant on your brand new iPhone, just in case if you were starting to get tired of Siri’s not-so-smart responses.
However, it’s worth noting that Google Assistant cannot perform at its true potential like how it works on Android due to the restrictions that Apple has placed on the iOS ecosystem. Therefore, it might not be able to perform some operations that the baked in Siri actually can. Regardless, with both of them enabled, you’re still getting the best of both worlds on your iPhone, which is actually a good thing. So, are you guys ready to try out Google Assistant on your new iPhone right away?


