
I am not a big fan of Outlook and so when I installed Windows 10 on my laptop, I was apprehensive, to say the least. Fortunately, Windows 10’s default mail app is a lot better than Outlook that I was using on my Windows 7.
Microsoft has done a pretty good job with Windows 10 and the Mail app has been getting steady updates ever since. On the 10th anniversary, Windows decided to add the ink feature to the mail app, finally. Yes, the ink feature is also available on several other MS apps which allows users to draw using a stylus or their fingers.
Windows Mail was the last app to receive the software update. Let’s see how to draw in Windows 10 mail app using this new way to input data.
1. How to Draw in Windows 10 Mail
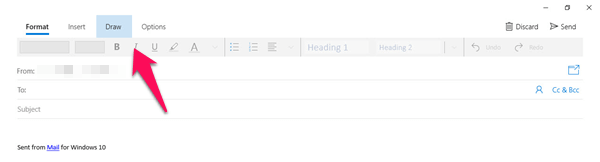
Launch the mail app in Windows 10. When you are composing a new mail, you should see a new option called Draw right next to the Insert button at the top.

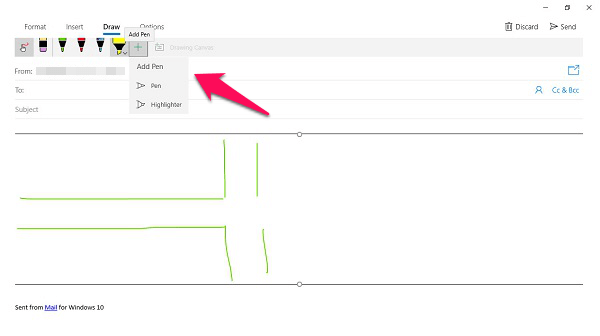
When you click on the Draw button, you will see new options appear below. You can now select color pens in the Drawing toolbar. On the left of different colored pens, you will see an eraser. On the right of the highlighter is a drawing canvas.
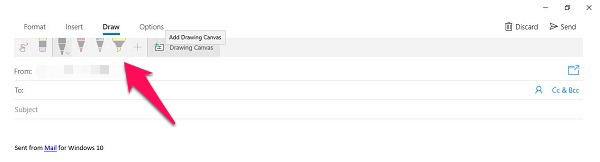
Before you begin drawing and let your creative juices flow, you will have to select the drawing canvas. The drawing or ink tool will work only inside the drawing canvas, however, the canvas is pretty flexible and can be reset and resized easily. To adjust the height of the canvas, drag and drop it from the top and bottom.
Also Read: How to Customize Windows 10 to Fast Boot Your PC?
There are three pens available to choose from and the last one, the yellow one, is the highlighter. If you don’t like or need the default colors, you can always click on the drop-down pen menu to select more colors.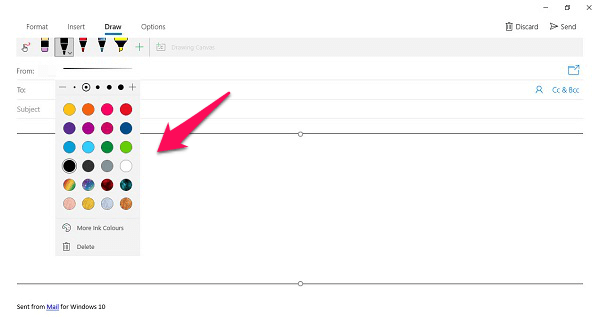

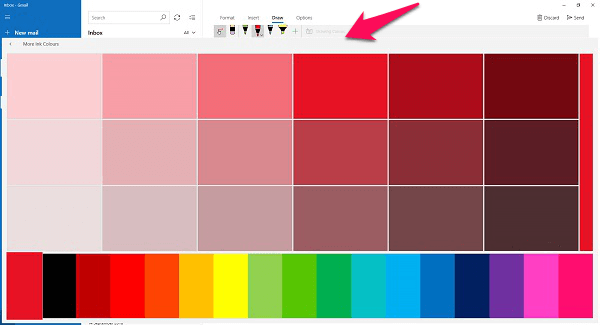
You can not only change the color of the pens but also its size, shape, and stroke intensity. This will help you draw thinner or thicker lines depending on what you are trying to achieve. Right at the bottom of the color picker, there is More Ink Colors option. Here you can create your own colors using the RGB matrix.
There is also some unique color options available to choose from like wood, marble, and so on. This will come in handy if you are an interior decorator, for example.

The same is also true for the highlighter pen where you can change the default yellow color to something else. Note that for the highlighter, you will only get static colors.
While the set of pens and highlighters are really good, having to open the color picker to choose your favorite color again and again can be a tedious task, not to mention boring. This is why the drawing tool comes with a favorite option.
Also Read: Best 10 Dark Themes for Windows 10
Click on the ‘+’ icon to choose your favorite color and Add it to the toolbar. Now you can use this pen color repeatedly. The same is also true for the highlighter. But the fun doesn’t stop here.
What about pen size, shape, and intensity. Once you have selected these properties, it is easy to save them for later use. Deleting a particular pen is as easy as adding them. The ability to control these properties will really simplify your work and save you a lot of time.

Once you have selected your favorite color, size of the pen and its respective properties, it is time to draw. As we already saw earlier, you can only use the drawing tools inside the canvas area. You can then drag around this canvas to any part of the mail.
If you select the canvas from the bottom, you will see a rotate option using which you can rotate the entire canvas in 360 degrees.
Also Read: How to Setup Windows 10 Timeline Feature on PC?
2. Possible Uses of Drawing Tool in Windows 10 Mail
While keyboard still remains the best tool for writing emails, you can use the drawing tool to write a handwritten note. This will not only make your message stand out but also allow you an opportunity to show your creative side.
You can wish your friends or colleagues by sending them an email with a handwritten note. A dash of personal touch. But why limit your imagination to text alone? If you love drawing and know how to use a stylus, it is easy to draw objects too.
If you don’t have a Windows 10 supported tablet with a stylus, you can use your fingers to draw on the canvas. In order to draw using your fingers, you will have to select the hand icon with the index finger.
If you want to go back to using the stylus, just de-select the hand gesture button.
Another interesting way to use the drawing tool is to draw or write a message on an existing image. Say you have a map. You can use the drawing tool to direct the receiver’s attention to that new hangout zone.
Just drag and drop the image inside the mail, select the ink tool and begin drawing on it. Although finger gestures are also supported, Microsoft said that the ink tool in Windows 10 mail app is better optimized for the Microsoft supported the stylus. Think the Surface pen here.
While the Windows phone failed to pick up pace after the launch, those of you who are still using a Windows smartphone can use ink feature within the mail app there.
If you don’t have the mail app pre-installed on your PC, you can download it using the link below.
Windows 10 Mail App: Windows 10
Also Read: 7 Top Windows 10 Privacy Settings You Must Change
Draw in Windows 10 Mail App
Users were waiting for the ink feature to make it to the Windows 10 mail app ever since it debuted on other Office apps like Word, Excel, and PowerPoint. While the mail app was one of the last apps to receive the ink support, it is here now and you can use it to personalize your emails on the fly. You can also annotate images to help the receiver better understand what you are trying to convey.


