
Apple assigns the newly connected AirPods based on the user’s name on the connected iPhone. However, if you want to change it to something else, it is possible now. By default, Apple names the AirPods as “[Your-name]’s AirPods,” in which the name is fetched from your iPhone. You can rename AirPods from any supported devices if you want.
We are taking you through a guide to rename AirPods on both Mac and iPhone.
How to Rename AirPods on iPhone/iPad
Both the iOS devices, i.e, iPhone and iPad share the methods in basic operations and connection. Therefore, you may need this single guide to rename AirPods for both your iPhone and iPad. Here is how.

- Connect the Apple AirPods with your iPhone or iPad.
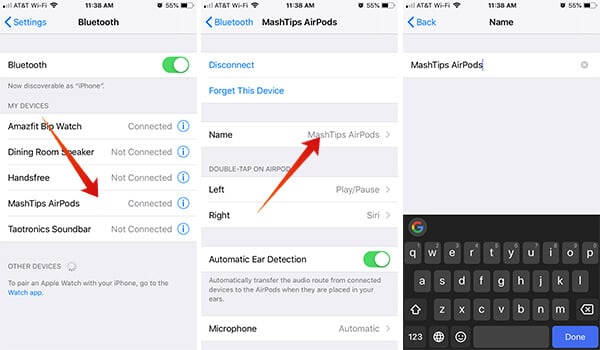
- Open Settings panel from the iOS device.
- Tap Bluetooth under Connectivity.
- Choose your AirPods and tap the “i” button next to it.
- There you will be able to see lots of customization options. Among them, open “Name.”
- Provide the name of your choice and then go back to save the settings.
Related: How to Use Apple AirPods with Android?
How to Rename AirPods on Mac
Apart from doing basic tasks on your iPhone and iPad, you can also do similar tasks from your Mac once it is paired with your AirPods. You can also find out more about using AirPods with Mac by reading our article on How to Connect AirPods to MacBook. Although the steps are little different from iOS, you can have the same effect using your MacBook as well. Here is how to rename AirPods on Mac or MacBook.

- Connect AirPods to your MacBook or Mac system.
- Click Apple logo on the menu bar and choose “System Preferences“.
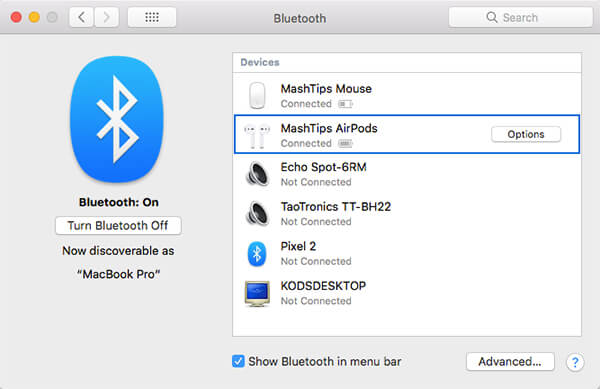
- Open “Bluetooth” options.
- Turn on Bluetooth and connect with your AirPods.
- Choose your AirPods from the list and right-click.
- Choose “Rename.”
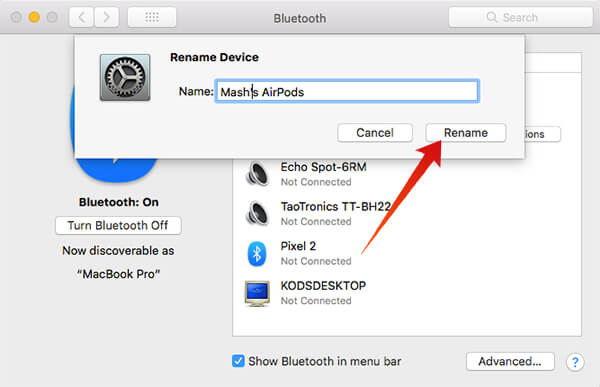
- Type in your new preferred name for your AirPods.
- Click “Rename” to confirm.

Once you rename your AirPods on your MacBook, it will reflect on iPhone when paired and vice versa.
Also Read: How to Pair & UnPair AirPods with Apple Watch
How to Reset AirPods Name
Do you want to reset your AirPods’ name into the factory version, after you changed it to the preference of your own? Well, it is possible even if you forgot what was it initially, and there is no need to enter the default name manually. AirPods name and preferences can be reset when you want the device to be in factory condition. Follow the steps to reset the AirPods name into the factory version. Please note that this will disconnect your AirPods from every paired device and will have to set up as new.
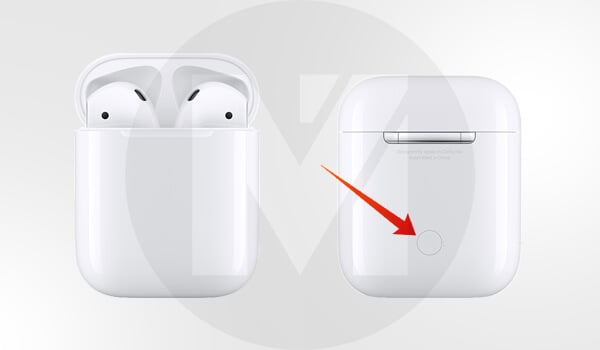
- Place the AirPods inside the case.
- Close the lid and then open after a minute.
- Turn the case around and find the physical pair button at the rear.
- Press and hold the button for at least 5 seconds.
- Release when you see the Amber light blinks thrice.
- Close the lid.
- Now, your AirPods is ready to be paired as a fresh device. All of its preferences and name have been reset.
- Open the lid by placing the device near to your supported iPhone model.
- Choose the AirPods from the popup window and pair.
- Check for the AirPods’ name from Settings > Bluetooth. It must be the default name, i.e., “[your name]’s AirPods.”
Renaming AirPods is as simple as changing the name on any other Bluetooth device. However, Apple preserves the new name to the AirPods, so that you could view the new name for the AirPods on any other connected devices. Once you pair the AirPods with MacBook and iPhone/iPad, it will become a hassle-less task to rename AirPods.
Now you have set your AirPods with the name of your preference. Enjoy listening to music.


