
Do you think it is impossible to hack an iPhone? Even though Apple’s iOS is more robust and secure, you cannot rule out the possibility of hacking or stealing your valuable data from your iPhone. To protect your data from hackers, you need to make sure that you are utilizing all the security features available on the iPhone. Apple has added a lot of new security features and improvements on its latest iOS 12 release and you don’t miss them out.
Here is the list of top security features available on your iPhone which will help to protect your sensitive data.
1. Control Your Lockscreen Activity
No doubt, you can view the preview of your latest emails, messages, calls on your lock screen without the need to touch your iPhone. Just imagine this scenario. What will happen if your iPhone is lost or stolen or you had kept the device in a shared work cabin? Without unlocking your iPhone, the thief or you colleague can easily view a lot of personal and sensitive information about you. Right?
Fortunately, iOS allows you to control the lock screen notifications.
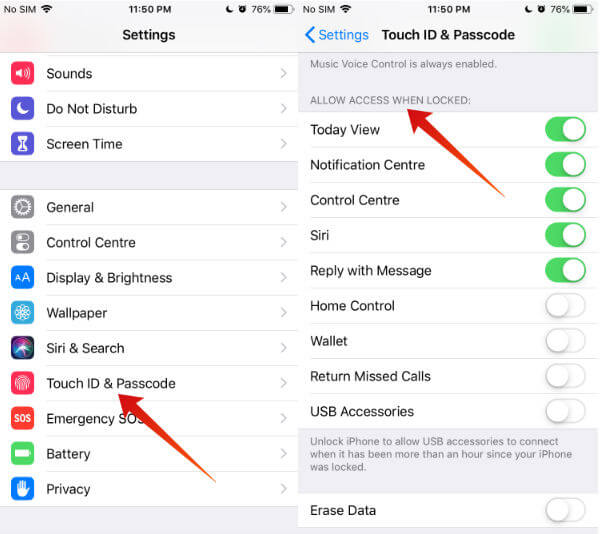

- Tap Settings->Touch ID & Passcode
- Enter your passcode and scroll down to the section titled ALLOW ACCESS WHEN LOCKED:
- Here, you will find the list of features available on your lock screen. – Today View, Notification Centre, Control Centre, Siri, Reply with Message, Home Control, Wallet, Return Missed Calls and USB Accessories
- Turn off the options you don’t need on your locked screen by toggling the switch to left.
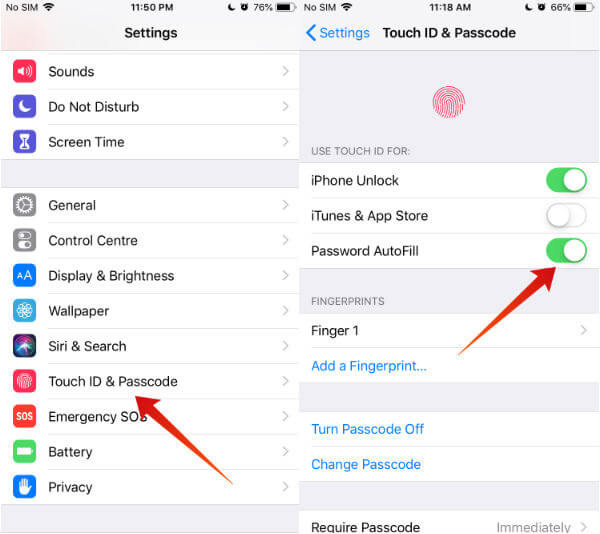
2. Protect Passwords with Touch/Face ID
Thanks to iOS 12, now you don’t need to remember too many passwords as you can make use of the Autofill passwords to log in to the frequently visited websites/apps. manager. However, you need to protect the password access with your Touch ID or Face ID to prevent others from viewing your passwords.
Also Read: How to Share WiFi and Hotspot on iPhone with One Touch?
3. Turn ON Automatic Updates
Do you know? Installing the latest iOS software helps to protect your device, as the latest version will have the bug fixes and the security updates. Just turn on the Automatic update so that you won’t miss the latest iOS software when it is released.
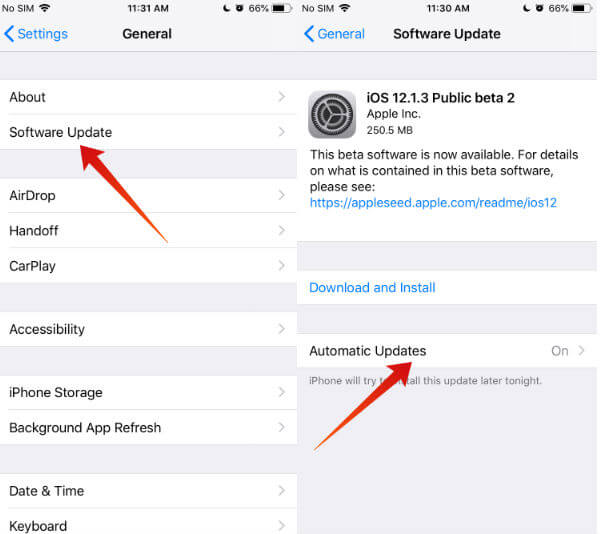
Navigate to Settings->General->Software Update and tap the position of the switch Automatic Updates to the right. Now, your iOS will automatically update the software overnight whenever a new version is available.
4. Enable Two-Factor Authentication
Have you enabled 2FA protection for your Apple ID? If not, you need to do that right away to secure your sensitive personal information. You will be using Apple ID to sign in to iTunes, App Store or other places. In case someone hacks your Apple ID, they can access your personal information like credit card, email, messages, contacts and more. However, if you had enabled 2FA, then your Apple ID can be used to login to the account only from your trusted devices.
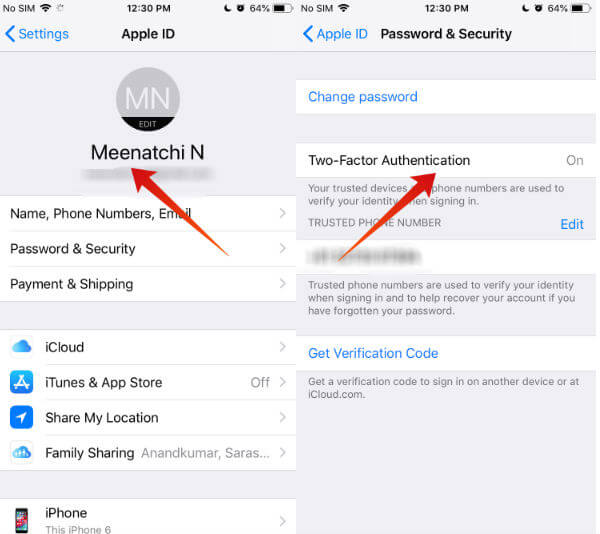
- Tap Settings on your iPhone and then tap on your iCloud account.
- Next, tap Password & Security from the list of options.
- Then, tap Turn on Two-Factor Authentication.
- Next, enter the phone number to which you will receive the authentication code.
- Select how you would like to receive the code: Message/Call.
- Tap Next and enter the 6-digit code to complete the set up of two-factor authentication.
Now, if your iCloud account is accessed from another device, you will get a notification with two options Allow and Don’t Allow. If you tap allow, then you need to enter the 6-digit authentication code (received on the current device) on another device to provide access to your account. This will help to prevent unauthorized access of your iCloud account.
Also Read: Spam Calls: How to Stop RoboCalls on Cell Phone and Land Phone?
5. Check If USB Restricted Mode is ON
This feature was introduced by Apple as a part of its iOS 11.4.1 to prevent unauthorized connection of USB accessories to the iOS devices. If the USB Restricted Mode is turned ON, then it won’t allow any USB accessory to connect to your iOS device in case it is not unlocked for more than an hour.
At this point, you need to enter the passcode to connect a USB accessory. By default, it will be turned ON. (Settings->Touch ID & Passcode->USB Accessories) In case it is turned off, then it is highly recommended to turn it ON to keep your iPhone secure.
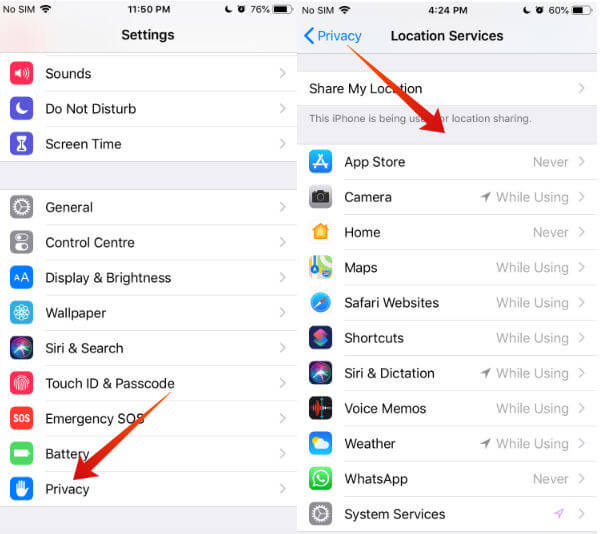
6. Restrict Location Sharing
Do you think all the iOS apps installed on your iPhone needs access to your location? I don’t think so. For example, there is no need to share your current location with messaging apps like WhatsApp, Skype etc.
7. Receive AirDrop Only From Contacts
No doubt, AirDrop is a cool feature to share images, documents or other kinds of files with another iOS device. However, receiving files from unknown contacts is not recommended as you never know what kind of files you will receive from strangers.
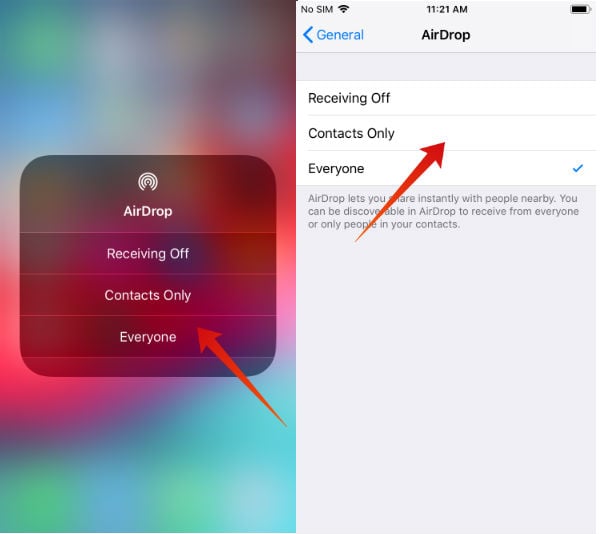
To keep your iPhone secure, use AirDrop option only with known or trusted contacts. Navigate to Settings->General->AirDrop and set the value Contacts Only so that your iPhone will be visible to only your contacts if their device is nearby.
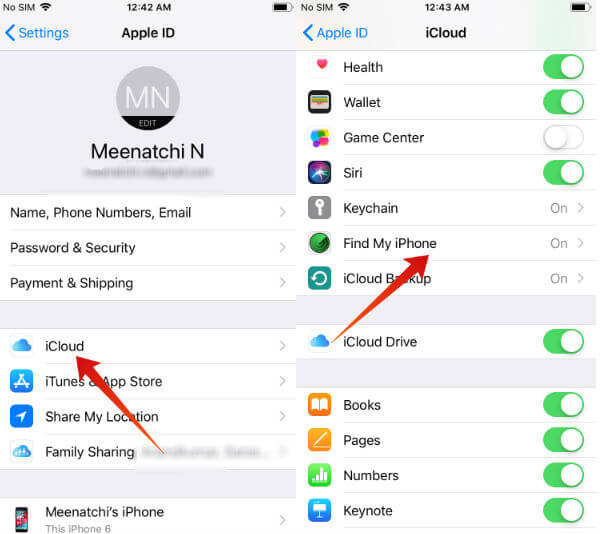
8. Enable Find My iPhone
Is the setting Find My iPhone activated on your iPhone? If not, it is highly recommended to turn ON that security feature. Find My iPhone will not help you to track your lost device but also to lock or erase the contents of your device remotely.
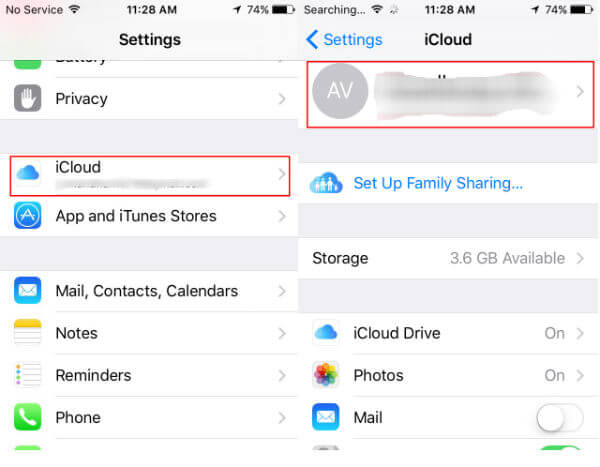
9. Connect your iPhone to iCloud

10. Erase Data After 10 Failed Attempts
Majority of the iOS users might not have come across this option as it is hidden inside your iPhone settings. As per the name, enabling this option will erase all the data on your iPhone, if a wrong passcode is entered for 10 times (iPhone will be disabled after 6 wrong passcode attempts). You can turn on this option provided if you are not sharing your device with the kids. Navigate to Settings-> Touch ID & Passcode and enter your passcode. Then scroll down to locate Erase Data and toggle the switch to the right.
Apple took every measure to make iOS secure and keep doing with the updates. However, hackers are smart and they can steal data from the iPhone. The best thing you can do to protect the iPhone is to make sure you turned on all security features that offer in the iOS by Apple. We have listed the best possible security settings that you can tweak to tighten the security for the iPhone. Go ahead and make sure you turned all these iPhone security settings to protect your Apple device.


