
Windows 11 requires a Microsoft account to sign in if you’re doing a fresh installation. The setup does not offer the choice of a local account anymore. If you don’t connect to the internet, Windows 11 will not let you proceed further. This can be bypassed using a non-existent email account during the setup. But what if you’re already signed in with a Microsoft account?
Let’s see two ways to sign in with a local account on Windows 11.
Sign in With Local Account on Windows 11
The first method is useful when you want to sign in with a local account instead of your current Microsoft account. This does not require you to create a brand-new account. You can continue to use the same account you are using minus the Microsoft account integration. Of course, this means your data such as your windows wallpaper and settings will not be backed up to your Microsoft account.
The local account on Windows is a classic account type, back when cloud backups and sync were not a thing. You don’t need an internet connection and is password-free. To sign in with a local account on Windows 11, follow the steps below.
- Open the Settings app from the Start menu or press Windows + I on the keyboard.

- Head over to the Accounts section from the left column.
- Select Your info which is the first option on the right.
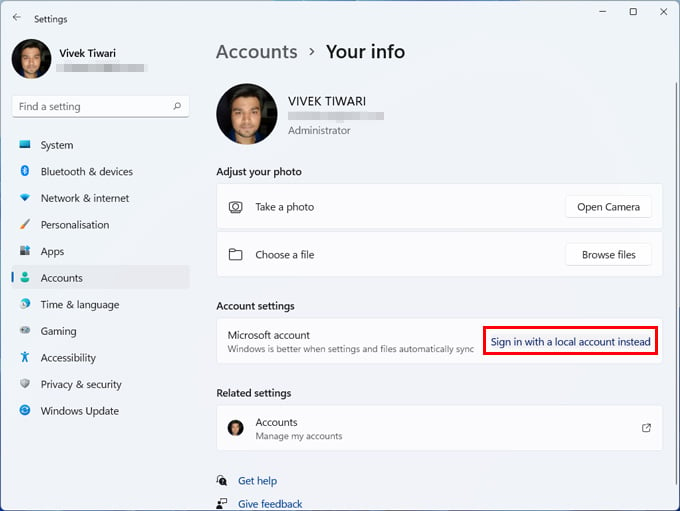
- Click on the link that says Sign in with a local account instead.
- This will open up a Windows 8-esque pop up where you have to enter credentials for your local account.
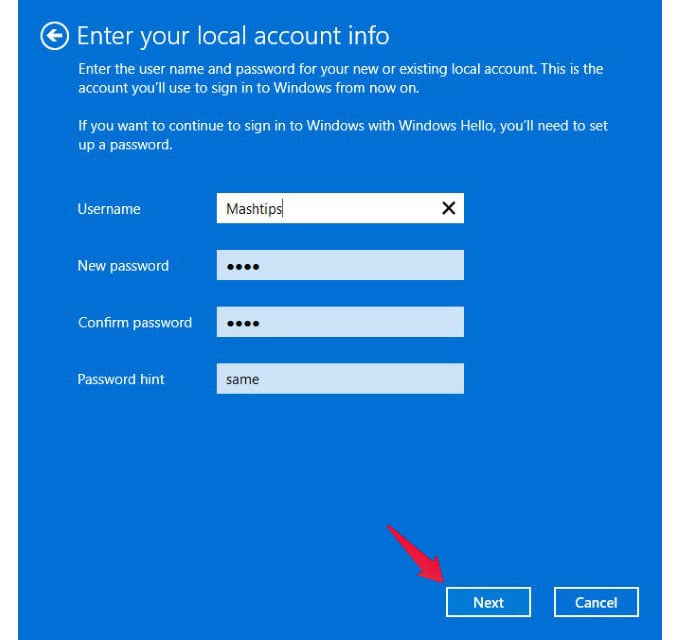
- When you’re done, click Next.
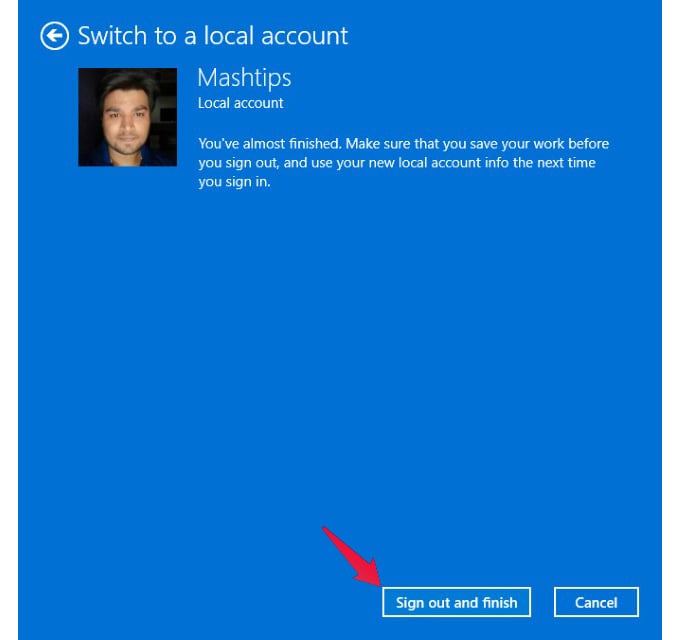
- On the next page, click Sign out and finish.


Make sure you don’t have any unsaved files open before you click the Sign-out button. When you’re signed out, you can sign in with your local account on Windows 11.
Related: 11 Things to Do After Installing Windows 11 on Your PC
Create Local Account on Windows 11
The method above removes your Microsoft account and turns it into a local account. If you just want to create a local account on Windows 11 and keep your Microsoft account as well, you can do that too.
- Open the Settings app from the Start menu or press Windows + I on the keyboard.
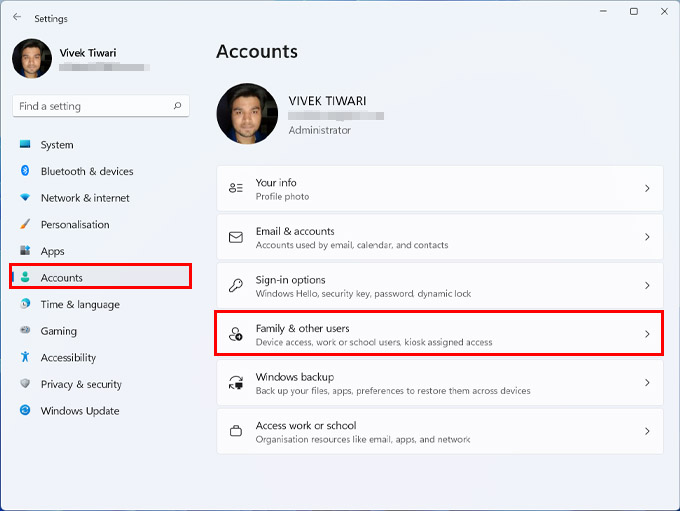
- Head over to the Accounts section from the left column.
- Click on Family & other users.
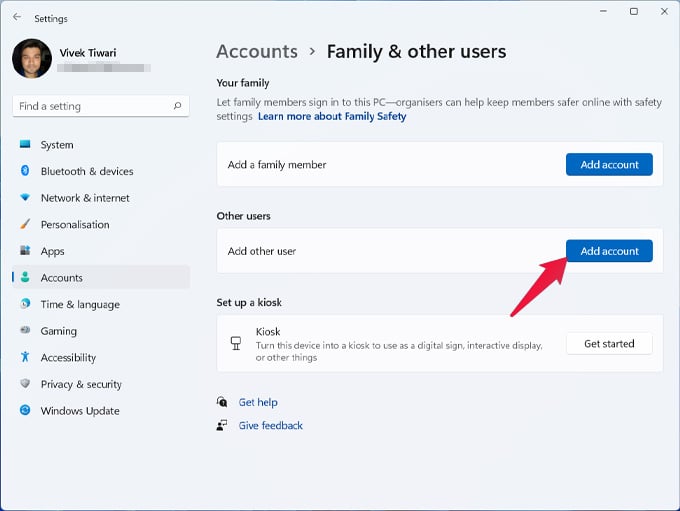
- Click on the Add account button under Other users. If you try to add a family account, you will be forced to use a Microsoft account again.
- In the pop-up window, click on I don’t have this person’s sign-in information.
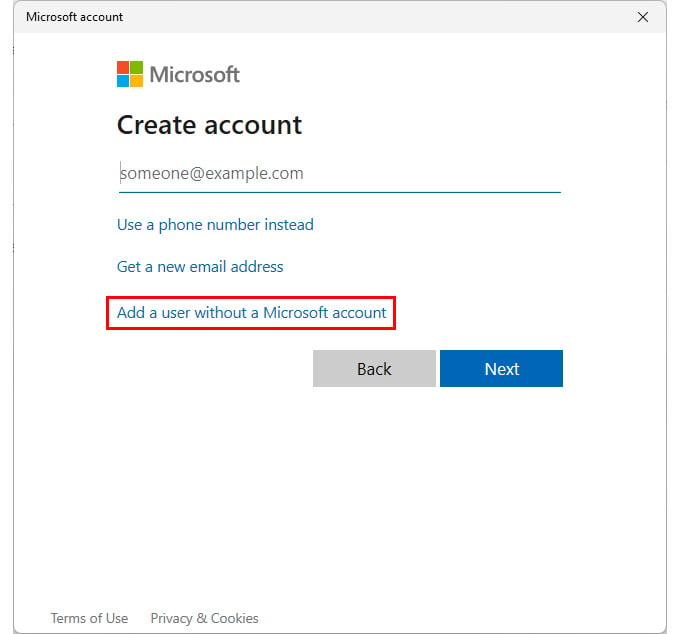
- Then on the next page, click Add a user without a Microsoft account.
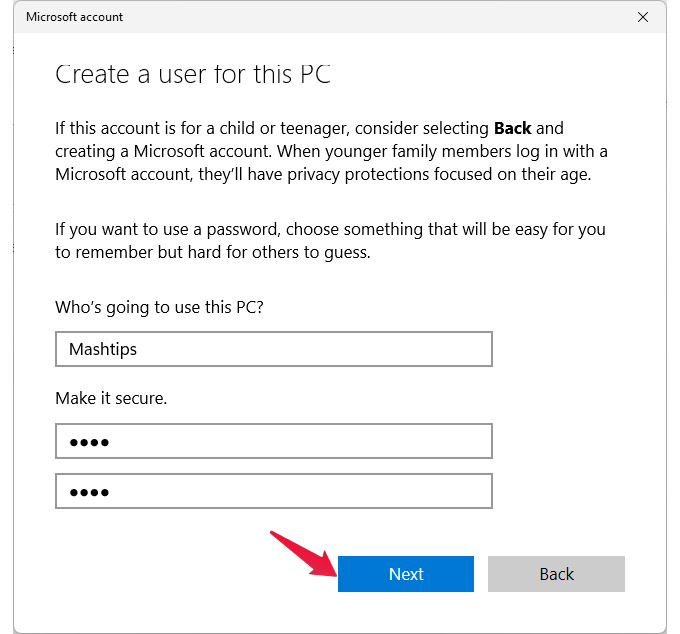
- Enter the credentials for a new local account, add some security questions, and click Next.

The local account will then be created, and you can manage it under the Other users section. 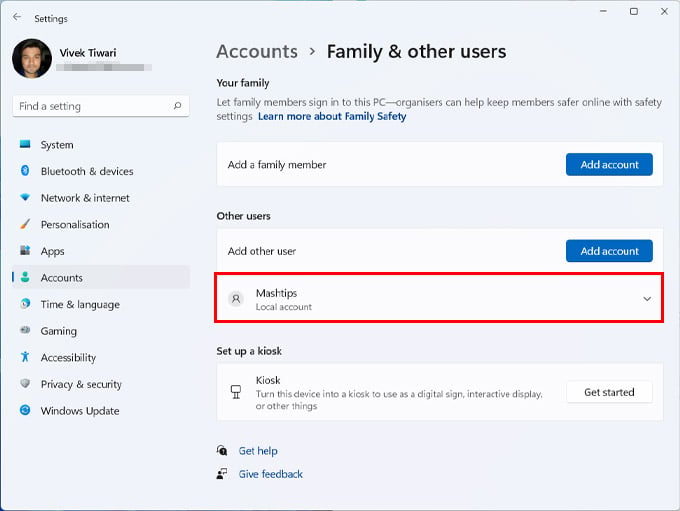
Related: How to Install Windows 11 Without TPM 2.0 on Unsupported PCs
Ever since smartphones took off, Microsoft has been trying to make Windows similar to those. They first removed the option to Sign in with a local account during the initial setup on Windows 10 Home edition. So the removal from Windows 11 is merely a continuation. Fortunately, for now, you can still sign in with a local account on Windows 11. But setting up a fresh installation of Windows 11 with a local account might still be a pain.


