
If you already own Windows 10 and have a compatible PC, you will get the free upgrade to Windows 11 soon. For those of you who already have installed Windows 11, things are a bit different from Windows 10 and you may be confused at some points. That’s why we vouch to make a few changes in Windows 11 to make it more familiar.
Let’s begin.
- Settings to Change After Installing Windows 11
- Update Drivers
- Create System Restore Point
- Move Windows 11 Taskbar Icons to Left
- Change Windows 11 Taskbar Size
- Customize Windows 11 Taskbar
- Get Back Windows 10 Start Menu
- Customize Windows 11 Start Menu
- Remove Unnecessary Files
- Set Data Usage Limit
- Enable Battery Saver Mode
- Enable Autocorrect Text Suggestions
Settings to Change After Installing Windows 11
Windows 11 is not too much different than Windows 10 in many things. But the looks and feels have changed, which might take a bit for you to cope up with. Let’s take a look into some important updates you should make on your PC after installing Windows 11.
Update Drivers
Windows 11 is a major update, and it is possible that some of your device drivers might be incompatible. Unlike other major desktop operating systems, Windows does not ship with device drivers built-in. Neither does it install those drivers during installation.
Before Windows 10, you would be hunting for drivers online on your device manufacturer’s website. Fortunately, Microsoft has at least integrated driver updates to Windows updates since Windows 10. Therefore, you can easily install necessary and available drivers via Windows update.

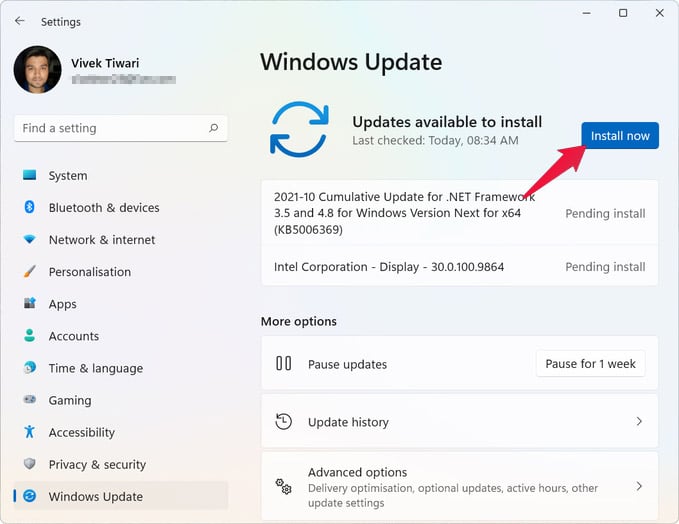
- Open the Settings app.
- Click on Windows update at the bottom of the left column.
- On the right, click on the Check for updates button to check for driver updates.
- If driver updates are available, click on the Install now button.
Create System Restore Point

You’ve updated to a brand-new version of Windows, and you’ll probably be making a lot of changes. It would be a great idea to create a system restore point before you mess something up. It might actually be the first thing you should do after installing Windows 11.
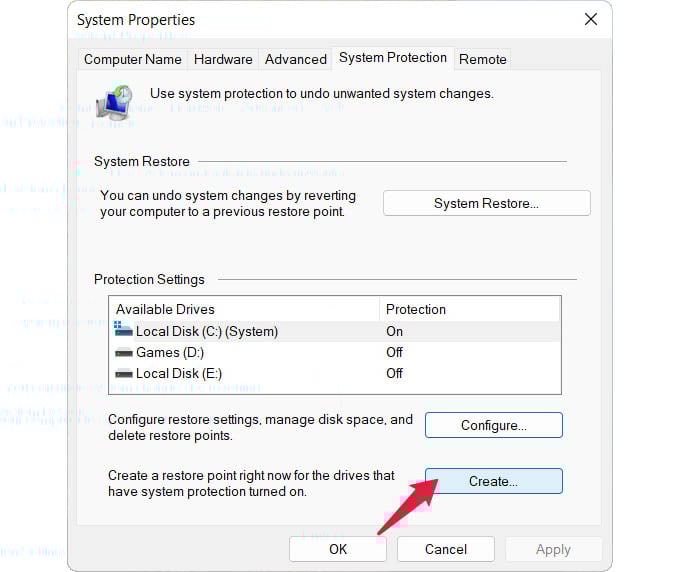
- Press the Windows key to open Start menu and search for “system restore“
- Click on Create a restore point in the search results.
- In the System Properties window that opens up, click on the Create… button.
The process to create a System restore point is exactly the same on Windows 11 as it always has been. For a more detailed guide, you can refer to this link.
Move Windows 11 Taskbar Icons to Left

Windows 11 takes a lot of inspiration from Chrome OS and actually brings all taskbar icons to the center. Even on Chrome OS, though, the app menu button is still on the left. On Windows 11, however, Microsoft decided to move the Start button to the center as well. This is a problem for your muscle memory that expects the start button on the left. This is also a problem because anytime you open an app that wasn’t on the taskbar before, all the icons shift towards the right.
This shifting also moves the start button, and you can never be sure where it is without looking. So, there are good reasons to want to move the start button back to the left. To do that you will have to move all the taskbar icons to the left. Windows 11 does not offer the option to only move the start button.
You can find a detailed guide on how to move Windows 11 taskbar icons to the left by following this link.
Change Windows 11 Taskbar Size

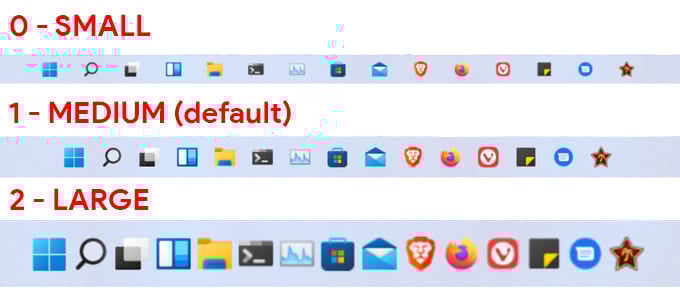
Windows 11 adds many important features to the platform, but it also takes away some. The new Windows 11 taskbar is especially lacking in features compared to previous versions of Windows. For instance, there is just one size for the taskbar and taskbar icons and there is no option to change taskbar size in the Windows 11 settings.
Till Windows 10, users were always allowed the option to have small taskbar icons and thus reduce taskbar size. Using a registry hack, though, you can change taskbar size on Windows 11 between small, medium, and large. The large option was not available on Windows earlier. To get the detailed steps, follow this link.
Customize Windows 11 Taskbar
There are many other ways to customize Windows 11 taskbar that don’t involve changing its size or moving the icons. For instance, you can add new icons to the taskbar and to what Microsoft calls the Taskbar corner. It’s basically what we know as the system tray.

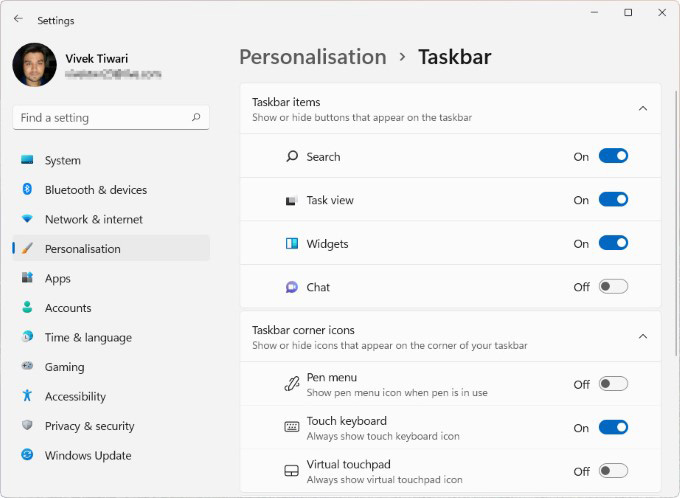
- Right-click on an empty space on the Taskbar.
- Select Taskbar settings.
- Click on Taskbar items, Taskbar corner icons, or Taskbar corner overflow to expand those sections.
- Taskbar items section lists the Search, Task view, Widgets and Chat (Microsoft Teams) which appear in the center, to the right of the Start button.
- Taskbar corner icons are built-in Windows 11 features such as the Windows ink feature, now called Pen menu, the Touch keyboard and a toggle to turn the Virtual touchpad on or off.
- Taskbar corner overflow contains all the system tray icons added by third-party apps installed on your system.
- Toggle on any icons you want to see on your Taskbar.
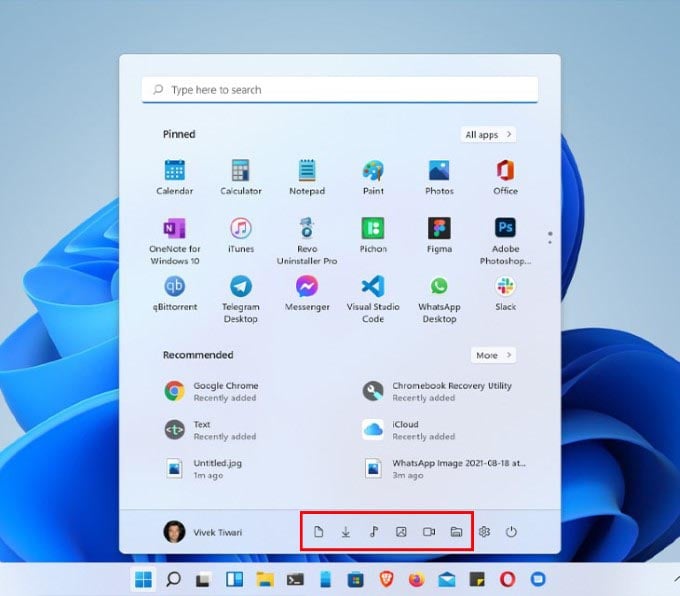
Get Back Windows 10 Start Menu
The new Windows 11 Start Menu gets rid of tiles altogether in favor of app icons. This change might not suit everyone, especially since recent Windows 10 updates had already made the start menu more visually appealing while also keeping the functionality. In many ways, the new Start Menu can feel like a downgrade. You can’t group apps into folders, you can only see 18 pinned apps at a time, it cannot be resized, and there are no tiles to display quick information.


If you aren’t a fan of the new Start menu, for the time being at least, you can switch back to the Windows 10 start menu. We have published a detailed guide on how to do that here.
Customize Windows 11 Start Menu

If you do plan on keeping the new Windows 11 start menu, you can still add to its functionality by adding start menu folders. For now, this is the only way to customize Windows 11 Start menu, apart from pinning and moving app icons. To get detailed instructions on how to add start menu folders in Windows 11, click here.
Remove Unnecessary Files
When you upgrade to a new version of Windows, there are a lot of old and unnecessary files stored on your drive that you no longer need. Sometimes it is even a good idea to get rid of the stored cache for the built-in apps that might have been updated and may run into issues. But the biggest chunk of files you don’t need comes from Windows itself. After an update, Windows stores the older version in a folder called Windows.old.
These are not exactly unnecessary files. Windows 11 does this so that if you run into any problems during the upgrade, you can always revert to the way things were. Once you have updated to Windows 11 though, and you are sure everything runs fine, it is a good idea to get rid of the old files.

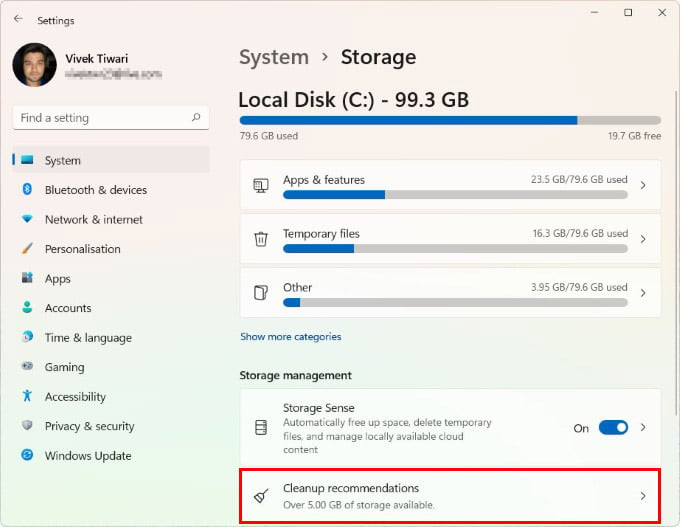
- Open the Settings app.
- Go to System > Storage.
- Click on Cleanup recommendations.
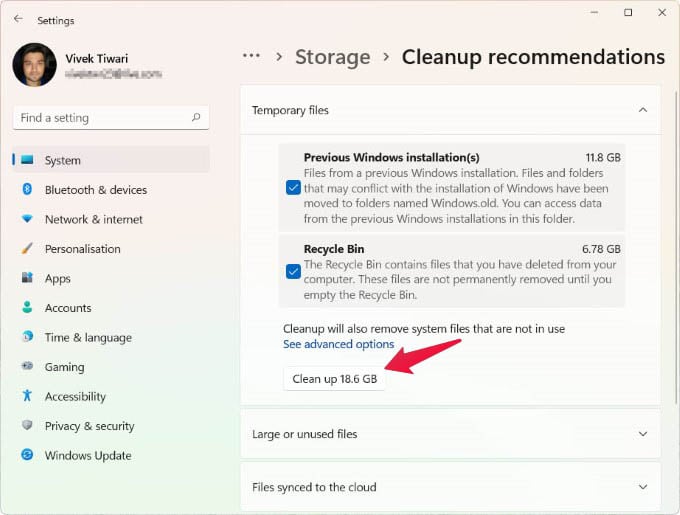
- Check Previous Windows installation(s) and any other files you don’t need, such as Recycle Bin.
- Click on the Clean up button below.

Set Data Usage Limit

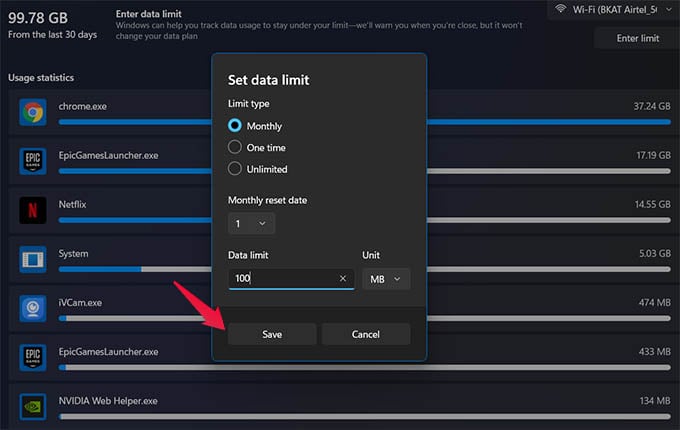
Most modern operating systems consume a lot of data between the app and system updates. But not everyone has unlimited data plans. Windows 11 lets you set data limits just like your smartphones so that you never end up using more data than you intended. To learn how to set data usage limit in Windows 11, click here.
Enable Battery Saver Mode

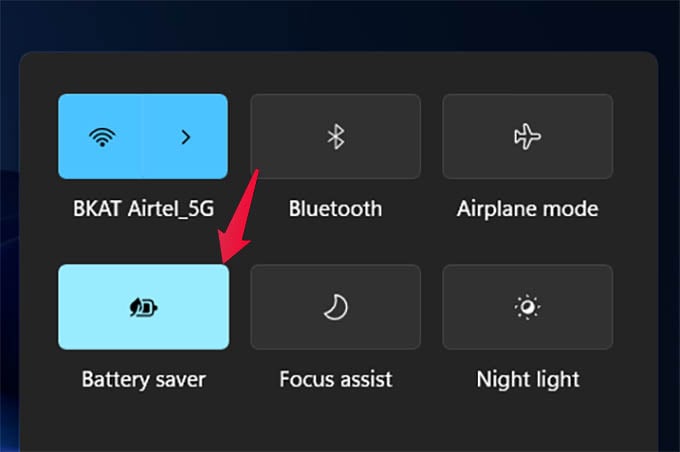
Like Windows 8 and 10 before it, Windows 11 has been made with mobile devices such as laptops and tablets in mind. Since these devices are not always plugged in, battery life is a huge factor. Windows 11 offers a battery saver mode, just like Windows 10. It’s also just as easy to turn on, albeit a slightly different experience. To learn more about how to turn it on and configure it to get maximum battery backup, follow this link.
Enable Autocorrect Text Suggestions

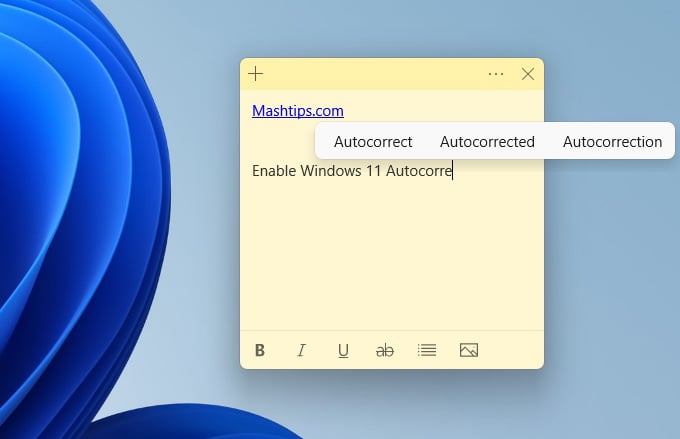
We’re all used to typing suggestions on our mobile devices with a touch keyboard. These suggestions are a little impossible to do on a physical keyboard since it can’t change. Microsoft has, however, found a way to give you autocorrect suggestions even when using a physical keyboard. It’s definitely a good idea, but it can use some ironing out in future updates. We already have an elaborate tutorial on the topic, which you can find here.
There are even more things to do on Windows 11. It is a big version update, after all. The 11 things mentioned above, though, cover the most popular features that and options that users might want, coming from Windows 10. If you want even more things to do after installing Windows 11, you can check out all our Windows 11 related articles.


