What do you usually do when you need to resize an image from your computer? Open Photoshop or any other photo editors? Windows PowerToys has an easy image resizer, which you can also call a right click image resizer. That’s because it lets you resize images by selecting a right-click context menu entry.
We have talked a little about Windows PowerToys before, in an article where we used PowerToys to enhance the Windows 10 snap assist feature. Now, let’s see how to enable right-click image resizer in Windows 10.
Install Microsoft PowerToys
Microsoft PowerToys is a free utility for Windows 10, from Microsoft, for its power users. However, you don’t necessarily have to be a power user to enjoy some of its features. This is especially true in the case of this easy right-click image resizer.
If you are casual users who blog often or often have to resize images, you would very much love this feature. But to get the said feature, you’ll need to install PowerToys which you can download from the link below.
Download: Microsoft PowerToys
Visit the link above and click on the exe file under releases, named something like PowerToysSetup-64.exe. Double-click on the file when downloaded and follow on-screen instructions to install it.
Related: How to Supercharge Windows 10 Snap Assist
Enable Right Click Image Resizer
Now that PowerToys is installed on your system, you will need to enable the easy right click image resizer from it.
- Right-click on PowerToys in the Start Menu.
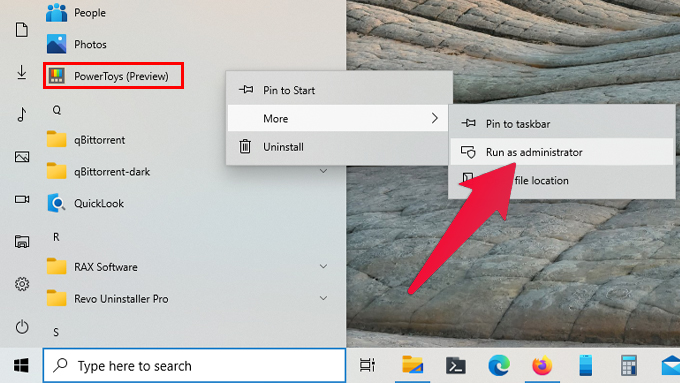
- Go to More and click Run as administrator.
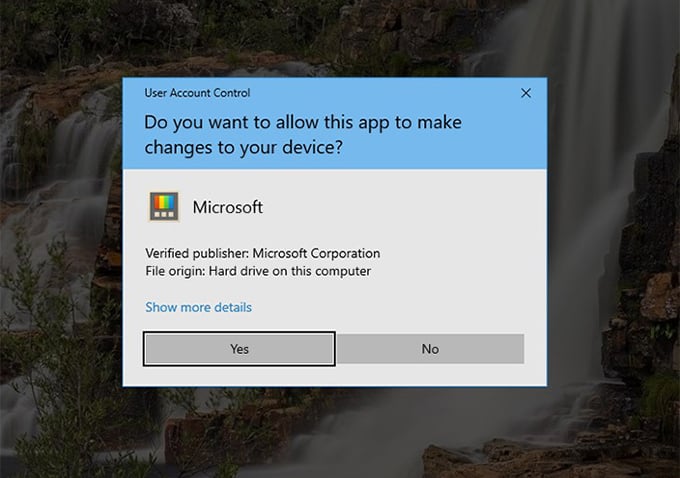
- Click Yes when the Windows 10 User Account Control dialog box pops up.
- Once PowerToys is up and running, turn on the toggle navigate to the General section from the left column.
- Turn on the toggle next to Always run as administrator.
- Next, navigate to the Image Resizer section from the left column.
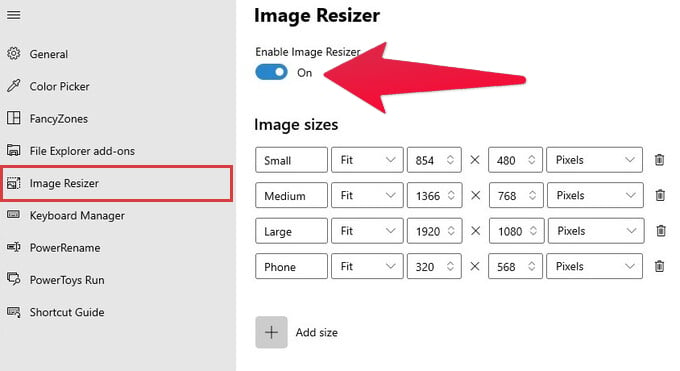
- On the right, turn on the toggle under Enable Image Resizer.
Related: 10 Best Photo Viewer for Windows 10 PC
Right Click to Resize Images on Windows 10
With the image resizer enabled in PowerToys, you can now find the option to resize images in the right-click context menu, anytime you right-click an image. Here are the steps to easily resize an image in Windows 10 with a right-click.
- Browse to the image you want to resize using File Explorer.
- Right-click on the image.
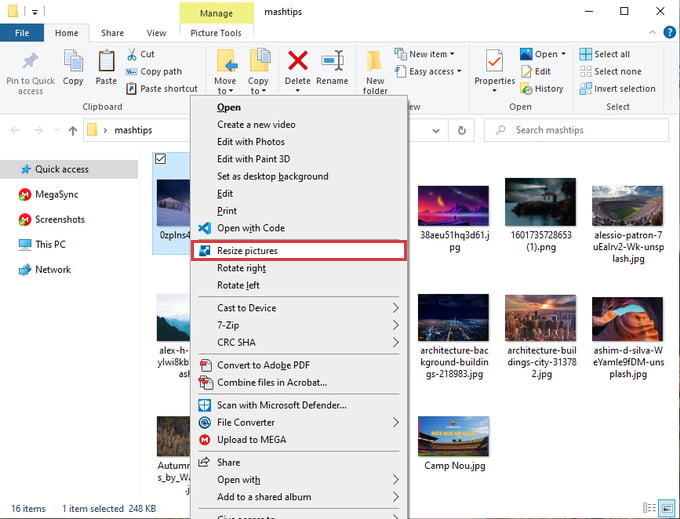
- Select Resize Pictures.
- Select any of the available sizes or enter a Custom size.
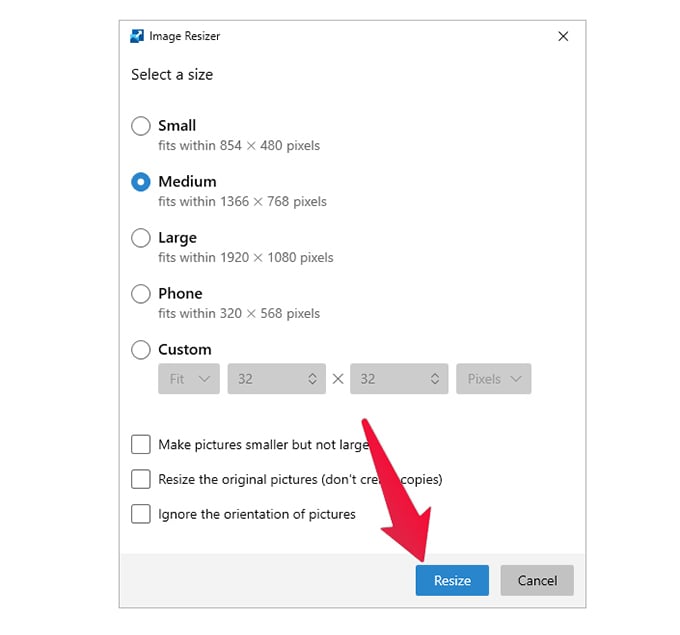
- Check any other options that you might want to enable and click on the Resize button.
And that’s all it takes now. You should find your resized image right next to the original, unless you checked the option to overwrite the original image.
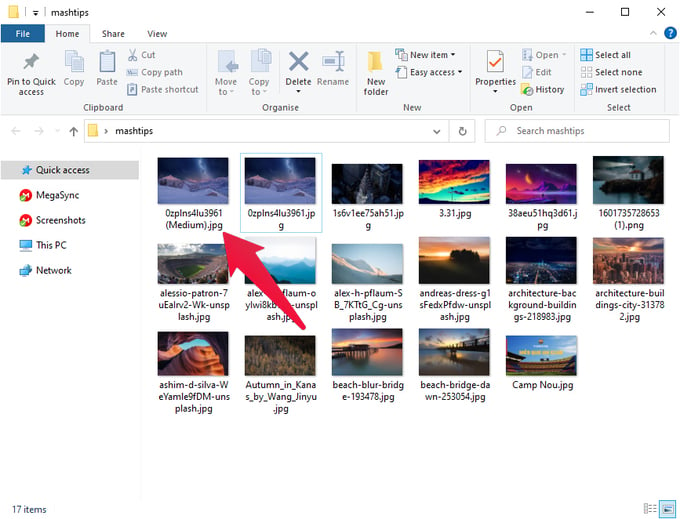
The Windows 10 right-click image resizer is certainly not perfect. If you’re a new user you might find it confusing that there is no clear option to preserve the aspect ratio. But the app does it by default anyway. So even if you choose a Medium (1366×768) size, the image will be resized in a way that preserves its aspect ratio. The larger value between the height and width of the image is taken as the reference, and the other value is adjusted accordingly.
Related: How to Find Mouse Pointer in Windows 10 If It Goes Missing
So, if your image’s width reaches the chosen width limit first, the height will not change any further. Similarly, if your image’s height reaches the chosen height first, the width will not be changed any further.
The Windows 10 PowerToys right-click image resizer tool makes it easier for you to resize any image in no time just by right-clicking the file. Stay in touch for more Windows 10 tips like this.

The resizer still isnt there