Windows 11 has a brand new Start menu. You may already miss the classic Windows 10 Start menu. If you miss the start menu from Windows 10, you can have it back on Windows 11. Yes, you can enable Windows 10 Start menu in Windows 11.
It is hard to cope up with the new Windows 11 if you are so fond of the Windows 10 Start menu with tiles and app lists. Let’s see how to get Windows 10 start menu on Windows 11 PC.
Enable Window 10 Start Menu in Windows 11
The Windows 11 Start menu is pretty good, but there are some drawbacks. For instance, there is no option to resize it as of now. So, you can only see so many pinned apps at once. Whereas on Windows 10 you could resize and fill the whole screen with pinned apps and tiles. If you’d like all of that, here’s how to enable the classic Windows 10 Start menu in Windows 11.
- Click on the Start button or the search button and type regedit or Registry. Open the “Registry Editor” app from the search.
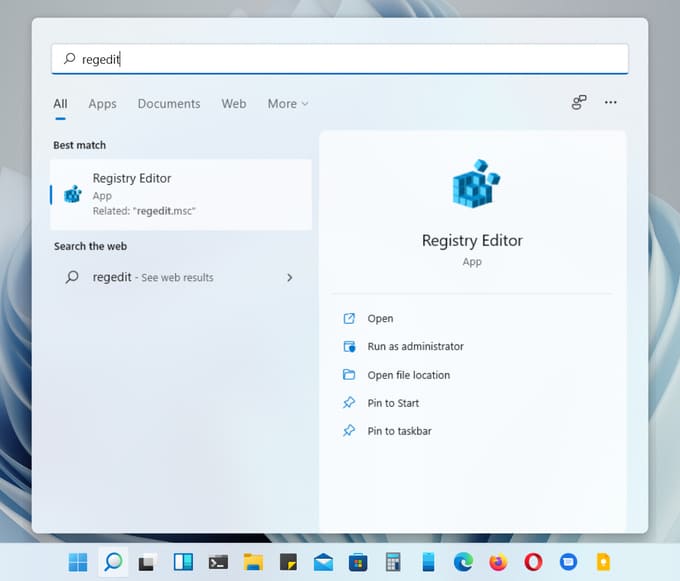
- Navigate to the following address from the left column, or copy and paste it into the address bar at the top.
HKEY_CURRENT_USER\Software\Microsoft\Windows\CurrentVersion\Explorer\Advanced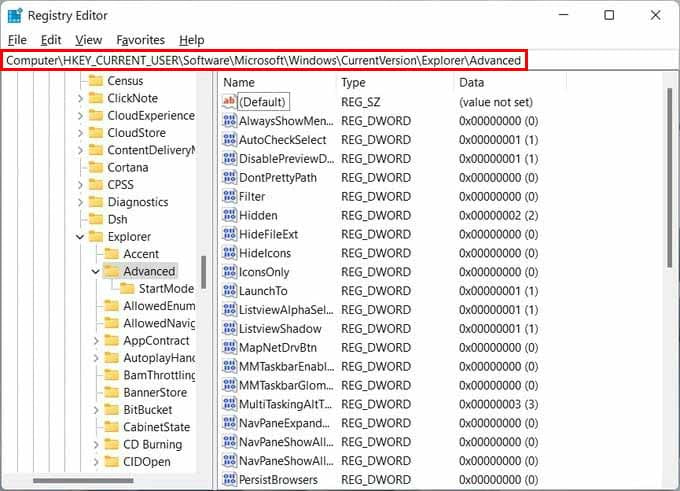
- Right-click an empty space on the right and select New > DWORD (32-bit) Value.
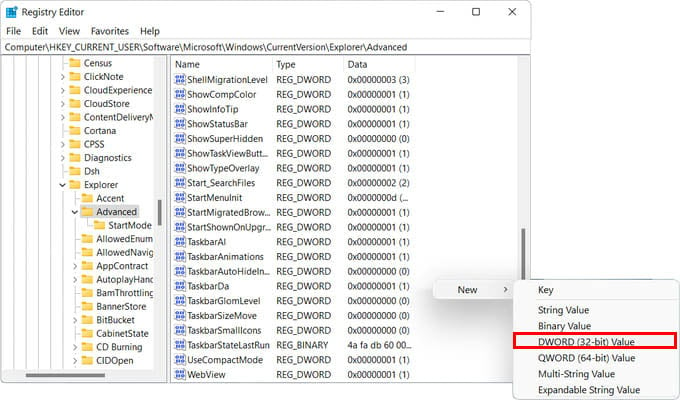
- Name the value as Start_ShowClassicMode.
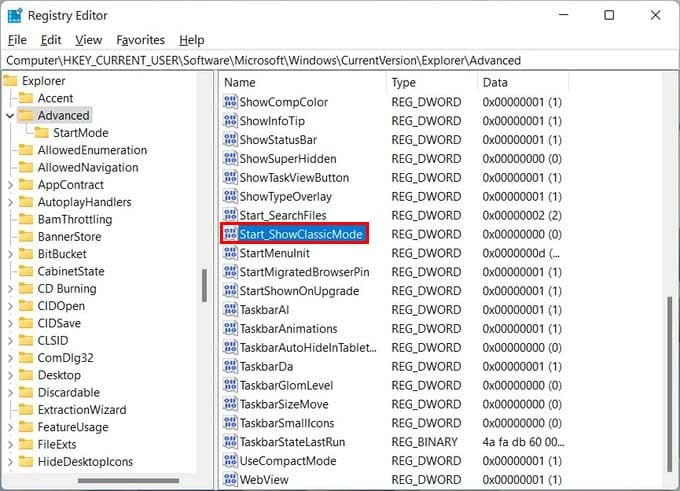
- Double-click on the newly created Start_ShowClassicMode value.
- Change the Value field entry from 0 to 1 and click OK.
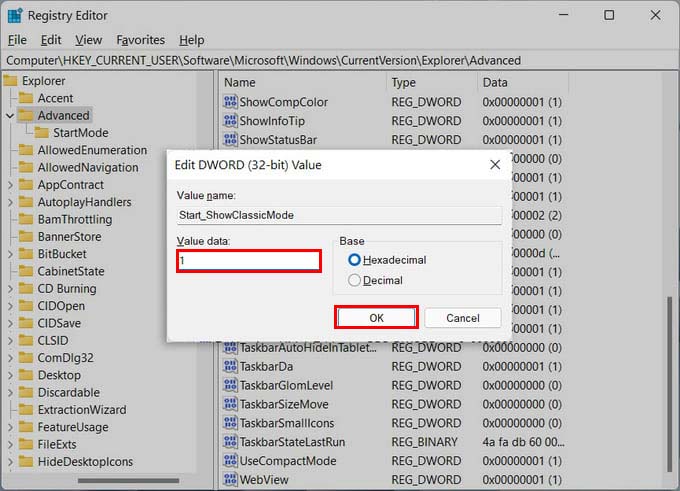
- You are all set. Now Sign out of Windows 11 and Sign in again.
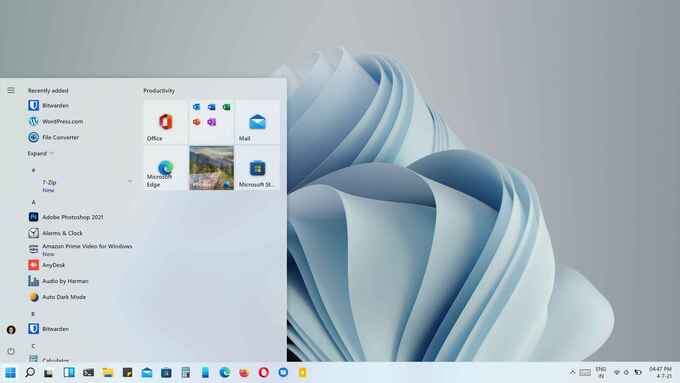
When you sign in and click on the Start button, you should now have the Windows 10 Start menu in Windows 11. To see the classic start menu in Windows 11 you can also simply restart Windows Explorer from the task manager and skip the last step.
Even if your Start button is at the center, the Windows 10 Start menu will only open from the left corner. So, you might want to move your Windows 11 Start button to the left as well.
Related: Move Windows 11 Taskbar Icons to Left or Center
Bring Back Windows 11 Start Menu
You may, at some point, want to experience the newer Start menu in Windows 11. Don’t worry even if you switched to the Windows 10 Start menu. You can revert your PC to the Windows 11 Start menu easily.
To remove the classic start menu in Windows 11, follow the first two steps mentioned in the section above.
That is, open the Registry Editor and navigate by pasting the following code into the Registry Editor address bar.
HKEY_CURRENT_USER\Software\Microsoft\Windows\CurrentVersion\Explorer\AdvancedOnce you’re there, follow these steps.
- Right-click on the Start_ShowClassicMode value that you earlier created.
- Select Delete.
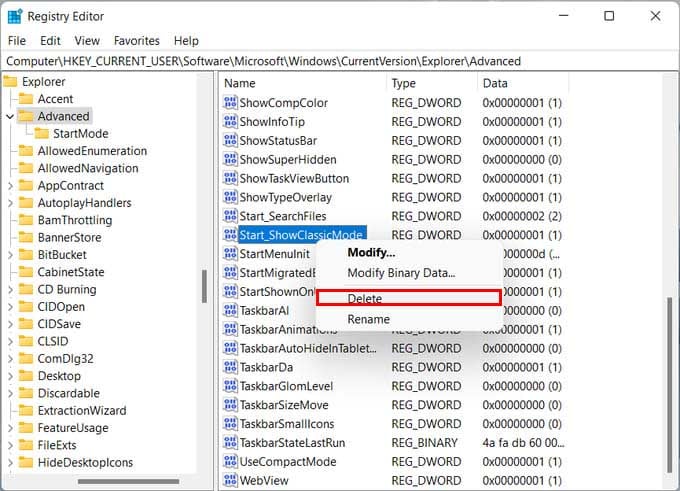
- Sign out of Windows and Sign in again, or restart Windows Explorer from the task manager.
You should now have the Windows 11 Start menu again. There sure are some advantages to having the Windows 10 Start menu in Windows 11. You can see all your apps by clicking on the Start button, as well as your pinned apps.
Related: How to Solve Duplicate Icons in Windows Taskbar and Start Menu Error
While on the Windows 11 Start menu, you have to click All apps to see all apps. The classic Windows 10 start menu also offers quick access to various personal folders, Settings, etc. These options are not available on the Windows 11 Start menu.
By all the above methods, you can have the Windows 10 Start menu in Windows 11 or simply keep using the new Start menu in Windows 11. However, the Windows 10 Start menu might look a little out of place on Windows 11. There are good and bad to both, but fortunately, you have the choice.
