Windows 11 comes with a light theme, blue accent, and a beautiful blue background. If you, somehow, do not like it, there are many other themes you can easily switch to. Microsoft has made it very simple and easy to change Windows 11 theme.
These Windows 11 themes allow you to quickly change the entire appearance of your desktop in one step. Let us see how you can change themes in Windows 11 and create your own themes.
How to Change Windows 11 Theme
Windows 11 default theme is what you see when you log in for the first time. Unlike older Windows versions, there is no Microsoft logo wallpaper this time. The new wallpaper is quite beautiful, though you can switch this theme on Windows 11.
In order to change themes on Windows 11, you need to launch the Settings app first. Once you are in the Settings app, you will have to go to Personalization > Themes. As mentioned earlier, though, Microsoft has made the process easier. The company has included a Personalize option in the desktop context menu that acts as a shortcut. Here is how.
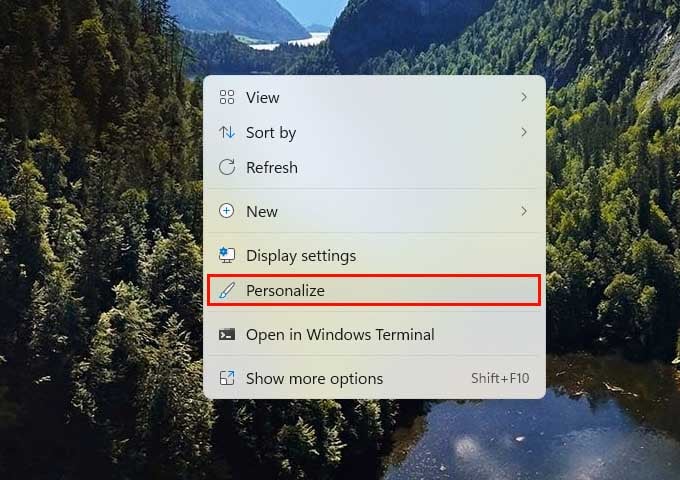
- Right-click anywhere on your PC desktop.
- From the context-menu, select Personalize.
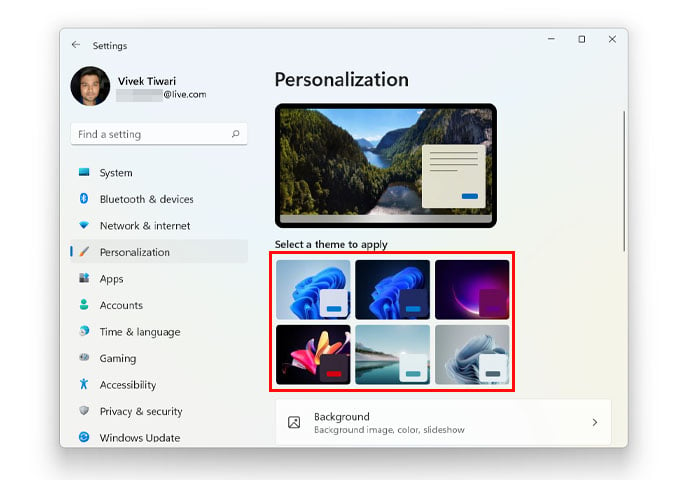
- This will open the Windows 11 Settings app directly in the Personalization section.
- The built-in themes are displayed right here, without having to go to the Themes section.
- Click on any of the available themes, and it will be applied immediately.
Related: Get the Best Out of Windows 11 Multitasking with These Settings
Create Windows 11 Custom Theme
If the built-in themes are not to your liking, or if you just want to experiment a little, you can create your own custom themes on Windows 11. This allows you to select an accent color of your choice, a wallpaper of your choice, dark or light mode, a cursor theme if you’ve got one, and a sound scheme. You can then save this combination as a new theme so that you can quickly switch back to it later. Follow the below steps to see how to create your own themes.
- Right-click anywhere on the desktop.
- Select Personalize from the context menu.
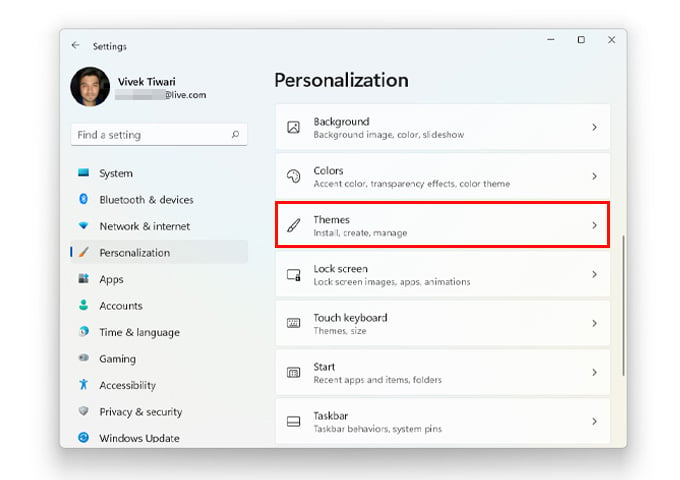
- In the Settings app that will open up, scroll down and click on Themes.
- Click on anything that you want to change from Background, Color, Sounds, or Mouse Cursor.
- Each link will redirect you to the Settings page or Control Panel page, where these settings can be changed.
- When you’re done creating your Windows 11 custom theme, click on the Save button.
- Type the name of the theme in the popup that appears and click Save.
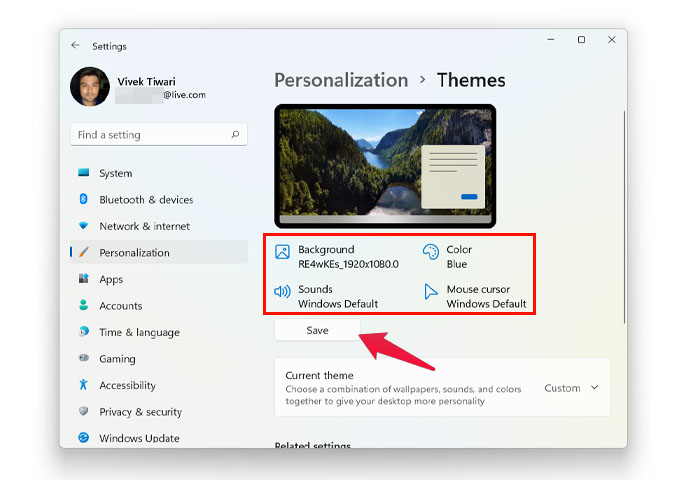
You can find your new Windows 11 custom theme in the Current theme section right below.
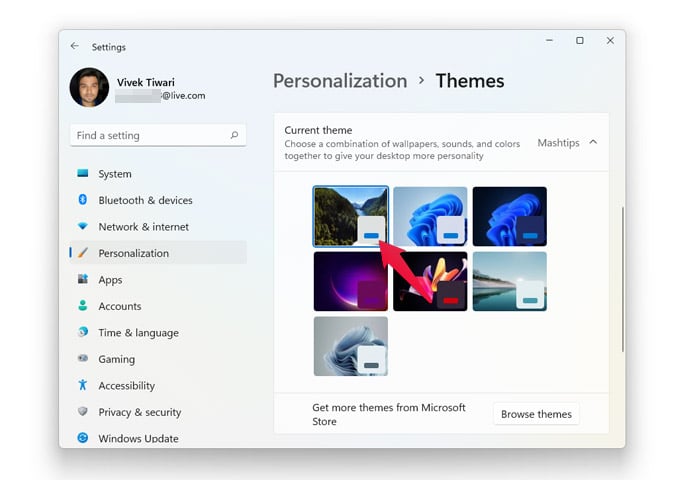
Clicking on it will switch your Windows 11 PC theme to your newly created one. You can always switch back to the system themes by choosing the other options on the same screen.
Related: Best Ways to Customize Windows 11 Taskbar
Get Third-Party Themes for Windows 11
If you’d rather not spend your time fiddling with theme options, there’s a simpler option. You can browse for third-party themes from the Microsoft Store.
Under Settings > Personalization > Themes > Current theme, you can click on the Browse button.
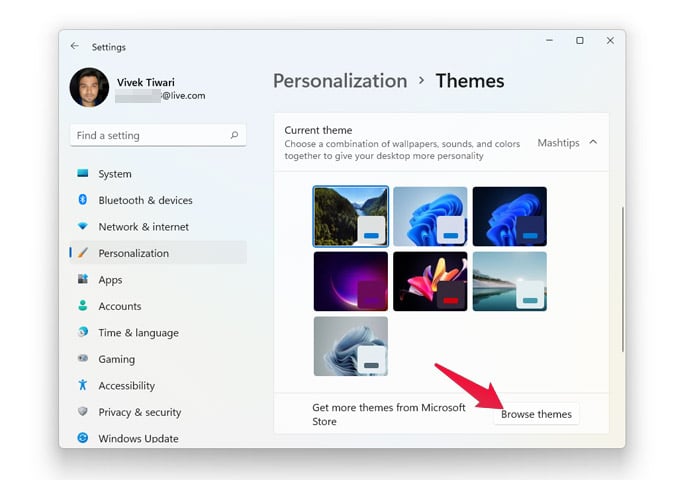
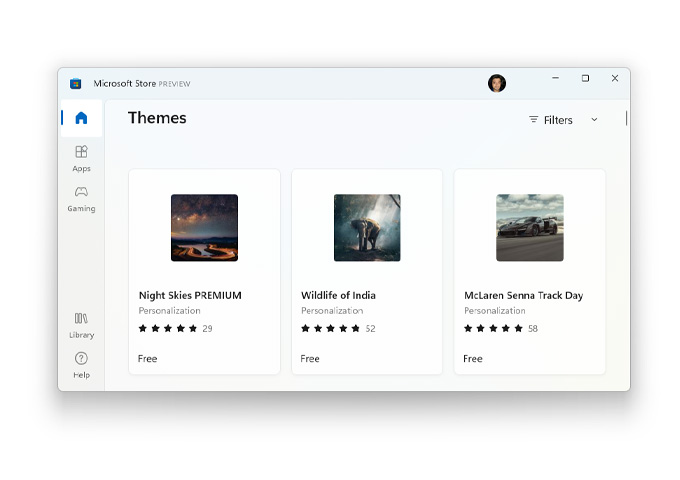
This will open up the Microsoft Store’s themes section. There are plenty of themes available here, many even free. You can install themes just like you install any apps from the store.
Related: You can Customize Windows 11 Widgets the Way You Want; Here Is How
Since these are all built-in theming options from Microsoft, you don’t have to worry about breaking your system. You cannot install a complete skin makeover on Windows 11 PC, unlike on Android phones. However, the theme customization options are quite good enough to make a change to the overall appearance of your PC.
