Laptop prices are slashed significantly. You can buy a low-cost laptop in a $150-250 price range for your school. Most of these Windows Tablet or Budget Laptops are built with 32GB or 64GB storage space. Ideally, a 32GB or 64 GB hard disk is enough to deal with your school assignments.
Let’s see how to expand Windows Laptop memory to an external SD card and set the default location on the SD card.
Why Do You Need More Windows Memory
Unfortunately, most of these budget-priced laptop users will end up with low memory warnings within a few months. There are a few reasons for these small memory space issues with your laptop. The first reason is these laptops are coming with “eMMC” or SSD for storage space. These drives will not provide exact 32GB or 64GB storage space. In reality, the available space will be 2-4GB less than these specified numbers.
The second reason is the Windows Installation Size. These 32 to 64 GB storage space is again split for Windows OS files and User files. The OS installation will consume 2- 6GB of space based on the OS version and build. In addition to this, the Windows update file will steal another 6 to 12GB space from your hard disk (hard to believe!). In Windows, you can disable Auto-update feature for Windows 10 Store Apps to save 1-2GB on your Hard disk.
If you have a Windows Recovery Partition, that will swallow another 4-6GB space for system recovery file. In a nutshell, for a 32GB laptop or Hard disk with Windows 10 OS, you can hardly get 10GB of free space if you are lucky enough!
There are a couple of solutions we mentioned before to extend storage space on your laptop and tablets. These techniques were cloud-based solutions that need a live internet connection. Here we are going to discuss a hardware solution that you can use to expand the storage space of the PC that does not need any internet connection to work.
Setup the SD Card to Use as Secondary Drive
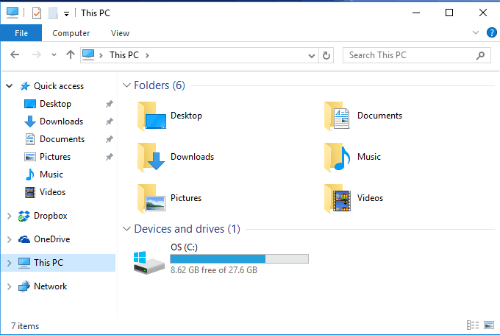
To begin with, first, insert an SDHC card into the slot and wait a few seconds until your system detects the card. If you don’t large size SD card, check here, you can get 128GB and above size SD cards for a considerable rate. You need to make sure the SD card is formatted into NTFS to save more than 4GB files just in case.
Related: These Gadgets can Extend iPhone Battery Life and Storage Memory in one shot
Check SD Card File System
When you explore to your PC / My Computer drivers, you can see the new SD card there, and make sure the SD card formatted NTFS format.
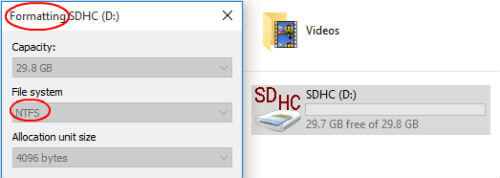 Explore to computer > Right Click on SD Drive > Properties > General > File System > make sure NTFS.
Format SD Card to NTFS
In case the card is not NTFS, please right click on the SD card from Windows Explorer and click on Format. Select the format to NTFS and provide an appropriate Volume Label before clicking on the Start button to format the card.
Change Windows Default Save Locations to SD Card
Once your PC starts to detect and display SDHC cards as a new drive in your laptop, the next step is to set the default saving locations for your documents, music, video, and Cloud Drives.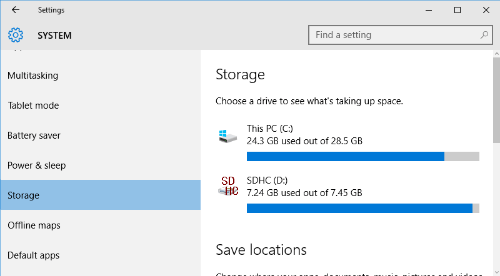
Set Local Windows Save Locations
To change the default savings location, click on Start > Settings > System > Storage. This window, you can choose the drive as a default location for documents, music, pictures, videos, etc. Change all these drives from C drive to SDHC Card drive.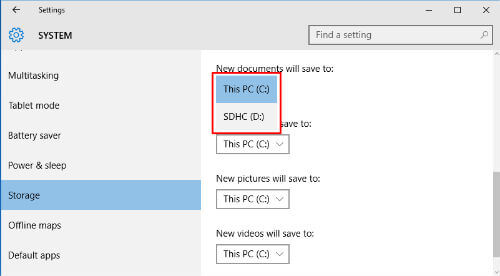
If you couldn’t see the second or SDHC drive on the pulldown menu, please make sure SD card detects on Windows OS and restart again to show up on this list.
Related: How to Change Default App Settings for Windows10
Set SkyDrive Save Locations
The local copy of the cloud drives is the next space-consuming factor. You can change the default saving location of Skydrive to this extended new drive by the following article How to Change Default Skydrive Location in Windows 8.1
Alternative registry Change Method
Instead of this manual procedure, there is an easy solution with Windows Registry Edit but a bit more technical workaround.
Please open Windows Registry and find out the Key HKEY_LOCAL_MACHINE > SOFTWARE > Microsoft > Windows NT > CurrentVersion > ProfileList and find the entry “ProfilesDirectory (%SystemDrive%Users).” Now replace the “(%SystemDrive%Users” with D:Users (use your SD Card Drive letter to replace D here).
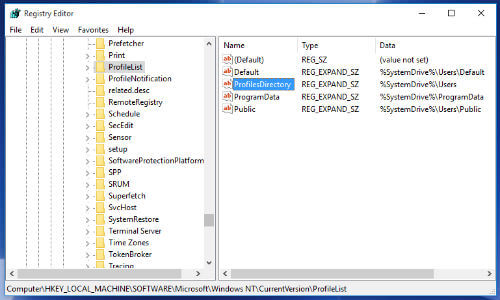
Now from Windows Control Panel > Users, create another user and login back with a new user. This time Windows will create this new user file on SD card drive. All the desktop files, internet cache, user profiles, and other user-related files will save in SD card instead of System drive (C:)
Related: How to Sync Windows Desktop and My Documents with Dropbox to Get A Real-time Backup
There is one another advantage for storing user files on the SD card. If just in case something happens to your Computer of OS, user files will be safe on SD Card. The only thing you have to do is to take out the SD card and insert it into another PC and start using your personal files. In this workaround, your valuable data is always portable and safe on the SD card. Since you depend on the SD card to save data, it is recommending to backup on the external drive and also don’t forget to buy a good quality SD Card.

An SD card as a default storage device? Well, I suppose that this is fine for small pieces of data like documents, photos, music, etc. But, I wouldn’t recommend it for more stuff. The read/write speeds of an SD card are horrible.
Yes, we recommend for user files, and that would be the photos, videos, and documents. The Class10 and above SD cards are offering good writing and reading speed, better than spinning hard drives.