Watermarks are needed to protect your documents from being stolen. If you are editing an important document in Google Docs and want to add a watermark to that, there are a couple of ways to do that.
In this post, let’s take a detailed look at how to add text and image watermark to your Google Docs file.
How to Add Image Watermark in Google Docs
Let’s say you are creating a project document for your company. Since it is copyright protected, you wish to add your company logo as background on all pages. Let’s see how to do that by using the image watermark.
Open any browser on your computer, go to docs.google.com and open the document you need to edit from your Google Drive.
In the document, click the Insert menu at the top. From the list of options shown, click Watermark.
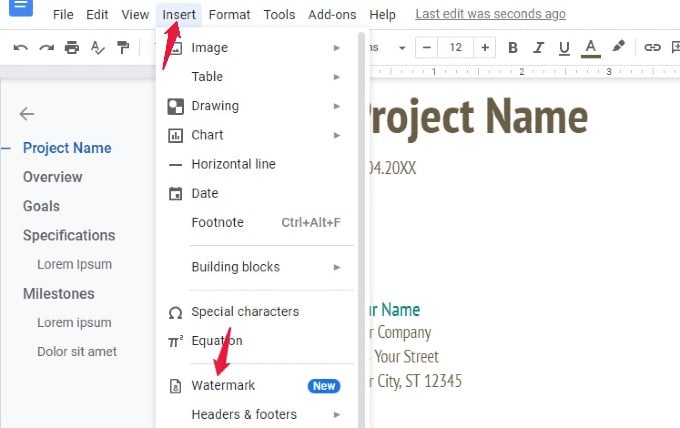
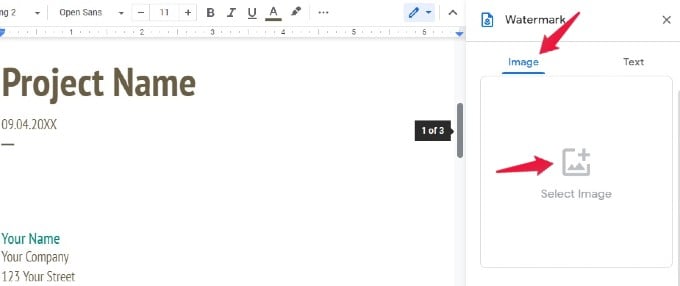
Here, you will see a new window titled Watermark on the right with two tabs Image and Text. Since we need to use the company logo as watermark, click the Image tab.
Then, click Select Image in the Watermark window.
Now, you will see a new pop-up window titled Insert watermark that displays various options like Google Drive, Photos, Camera, By URL, etc to select the image to use as watermark.
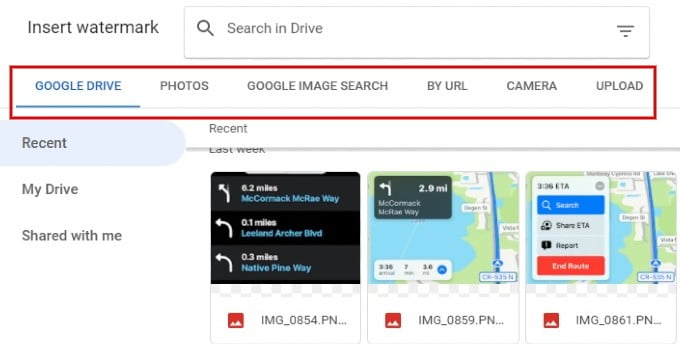
In this example, we have used By URL option to insert image directly from the website. For that, click BY URL, enter the URL of the image location and click INSERT IMAGE button.

Once your select and insert the image, you will be redirected back to the document. And, you can see that the watermark of the image has been inserted into your document.
By default, the image will be scaled to 100%. If you want to change that, you can click the Scale drop-down box and select your desired option. Also, if you want the watermark to be bright, you can deselect the checkbox Faded.
Finally, click Done to exit the watermark window.
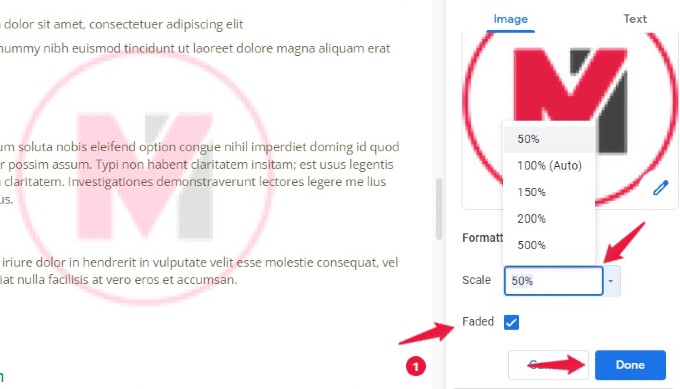
Now, the watermark will get inserted in all the pages of the document.
Related: 10 Best Free YouTube Thumbnail Maker Online
How to Add Text Watermark in Google Docs
Using images for watermarks will work well for company logos. However, if you want to add watermarks like Draft, Confidential, etc in documents, then you need to search for those images on the web. In such scenarios, you can make use of the Text watermarks and save time.
Open the document and navigate to the Watermark window as mentioned in the above section.

Click Text tab and type the text you want to add as a watermark in the text box provided. (eg.Draft)
Then, the formatting options will get enabled and you can change the font type and color. You can adjust the font size by clicking + and – buttons or by selecting one from the default list.
The watermark text will be inserted diagonally or horizontally based on the option you had selected. To adjust the transparency of the text, you can drag the slider from 0 to 100%.
Once you finish formatting the text, click Done.
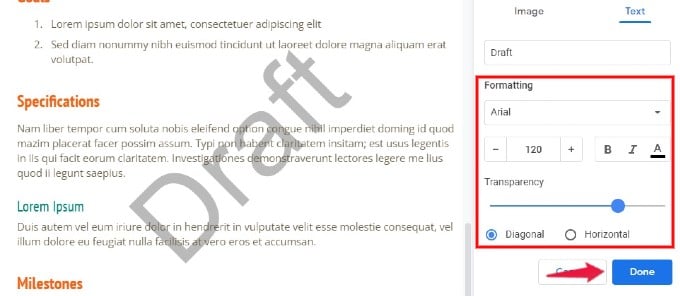
Now, you can see that the watermark text has been successfully added to all pages of the document. Even if you insert a new page, the watermark will get added automatically.
Related: How to Use Voice Typing in Google Docs
How to Edit Watermark in Google Docs
At any point in time, if you wish to edit the watermark you had added, you can easily do that. Follow the same steps and navigate to the watermark window as explained in earlier sections.
For editing image watermarks, click Edit icon on the Watermark window and replace the existing image with a new one.
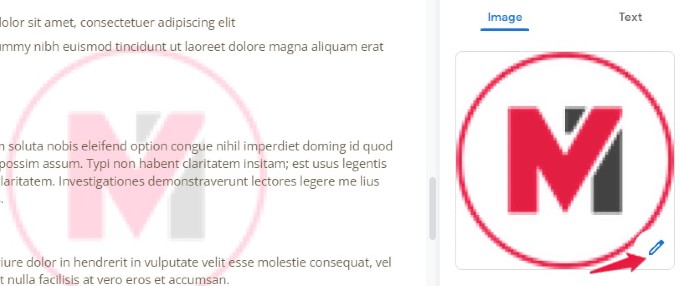
For text watermarks, you can just delete the text and add a new one in the Watermarks window.
Related: How to Save Attached Images from Google Docs to Computer and Phone
How to Remove Watermark in Google Docs
Do you feel that you no longer need the watermark in your document? Well, you can easily get rid of that in a single click.
In the watermark window, click the Image or Text tab based on the water you had created. Then, click the Remove watermark button located at the bottom of the screen.
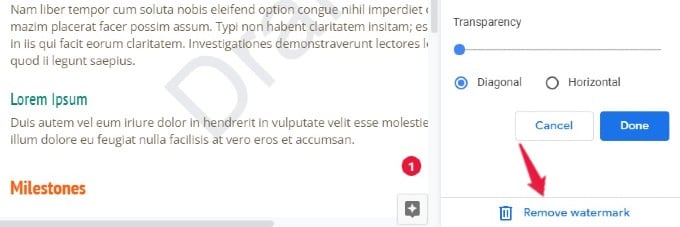
That’s it. You will not see the watermark anymore in your Google Doc.
We hope that this new watermark feature will come in handy for those who prepare confidential or legal documents.
