
Microsoft’s move towards a more modern Windows has been a slow one. The Settings app on Windows 11 has a lot of options, and most users will never feel the need to access the legacy Control Panel. This was not the case on Windows 10. However, Windows 10 did have links to legacy control panel items where necessary. If you want to disable Fast Startup on Windows 11, you might gt a bit confused.
That’s because, unlike Windows 10, there are no links to where you can do so in the Windows 11 Settings app. And even though the new Settings app has plenty of options, the ability to enable or disable fast startup is not one amongst those. Perhaps this is why the Control Panel is still around.
What is Fast Startup and Should You Disable It?
Fast Startup is a combination of shutting down and hibernation in that while your PC does shut down, it saves some data in a hibernation file on your hard drive, like it does in hibernation mode. Basically, everything that hibernation mode saves except the current login session and apps. So, system kernel, drivers, and current system state are all saved to the hard drive when you shut down your PC.
When you start it again, these get loaded into the RAM and the result, as the name suggests, is a fast startup. Because the system doesn’t have to restart services needed for File Explorer, Taskbar, etc. Fast startup is a Windows feature that has been around longer than Windows 11. Even though Windows 11’s settings app has a power options section, it does not include this feature, however.
Disable Fast Startup on Windows 11
Since we will have to use the Control Panel, this method also works on any version of Windows, not just Windows 11.
- Press the Windows key and type Control Panel to search for it.
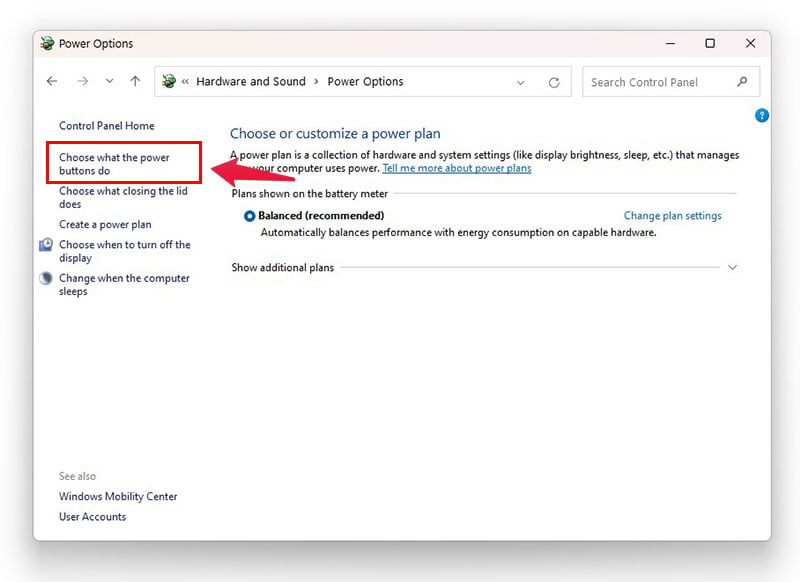
- Navigate to Hardware and Sounds > Power Options.
- Alternatively, you can search for Choose a power plan and click on the top result to open Power Options in Control Panel directly.
- Next, click on the link in the left column that says Choose what the power buttons do.
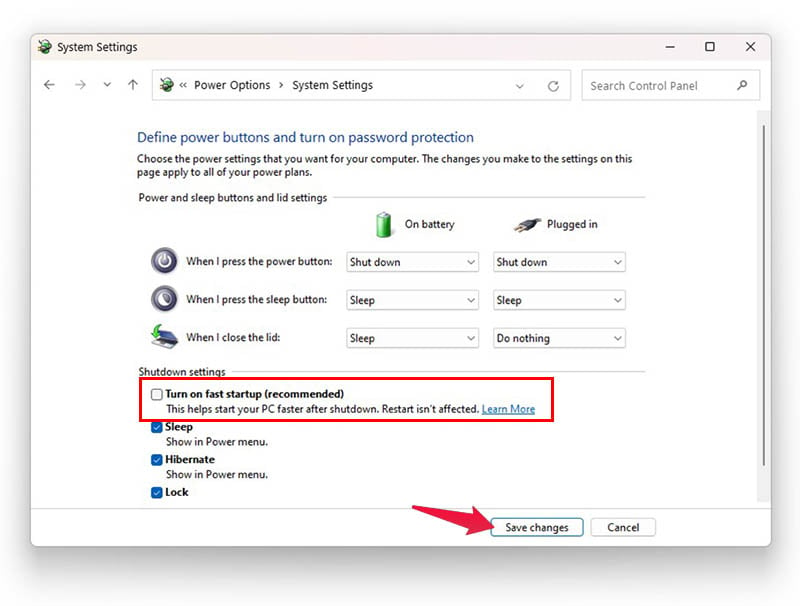
- On the next page, click on Change settings that are currently unavailable.
- Click on the checkbox next to Turn on fast startup (recommended) to uncheck it.
- Click on Save changes when you are done.
Why disable it?
There are cases where you actually might want to disable this feature. For one, when installing updates, your PC needs a proper shut down. This is why fast startup does not come into play when you Reboot Windows. But, if you are done for the day, you may not want to wait for your PC to reboot just so you can shut it down again. In that case, you might want to just disable fast startup. That way, you can click shut down and move away. The PC can install updates and shutdown when it’s done.
These days, Microsoft has gotten around to this problem by adding the option to install updates and shutdown when updates are available to be installed. But it can still give you troubles in managing encrypted disk images. It can also cause problems with trying to boot a disk image, access the UEFI/BIOS settings, etc. More importantly, with fast startup enabled, you cannot access your Windows drives from another OS if you are running a dual boot setup like me. So yeah, there are plenty of reasons to disable fast startup on Windows. And now you know how.