
Ubuntu 22.04 Jammy Jellyfish is out now. If you’ve been contemplating switching to Ubuntu, now is probably as good a time as any. You don’t even have to sacrifice anything. You can install Ubuntu from USB in dual boot alongside Windows 10 or Windows 11. This gives you the advantage of being able to use a more familiar OS when you really need to get things done fast and easy while you’re still learning your way around a new OS.
Let’s see how to install Ubuntu and Dual Boot Alongside with Windows 10.
Why Should you Install Ubuntu?
Both Windows 10 and 11 have come a long ways, but they are still just that, Windows. It’s the most popular desktop OS and generations have grown up on it, so it will probably remain popular for a while. But Windows has a lot of annoyances, with one leg in the modern world and one in the 90s. Windows is clunky if I had to use one word for it. We’ve all been taught in school that it’s user-friendly, but is it really? Something even as basic as installing and uninstalling apps takes so many clicks. Things are changing now with the Microsoft Store, but like I said, one leg in the modern world and another in the 90s.
Ubuntu, on the other hand, feels like a more modern desktop. It’s the most beginner-friendly Linux distribution, or at least one of them. It is definitely the most popular, which makes getting support for it on online forums much easier. Features like virtual desktops that Windows got quite recently have been present on Ubuntu and other Linux distros for quite some time.
There are many similar little features that make Ubuntu a joy to use, compared to Windows. New users can feel a little lost since it’s a whole different OS. You’ll end up using the command line more often than you might want, but as you get used to it, you’ll realize it’s much easier than you thought. Besides, what have you got to lose since, in a dual boot set up, you get to keep Windows, all your files, and you can just get rid of Ubuntu anytime you want to.
Requirements
- At least 25 GB of available space on the hard disk.
- A USB drive with a capacity of 4 GB or more.
Prepare Windows 11/10
In order to install Ubuntu on your Windows computer, you’ll first need some space on the hard disk, of course. The best way to do it is to create a separate partition for Ubuntu so that your Ubuntu installation does not mess with Windows in any way. The Ubuntu Live USB we’ll need for installation actually allows creating and managing partitions, but it’s safer to do this from Windows itself if you don’t want to lose any of your files.
- Right-click on the Start button and select Disk management.
- Click on Disk Management in the left column of the Computer Management window that opens.
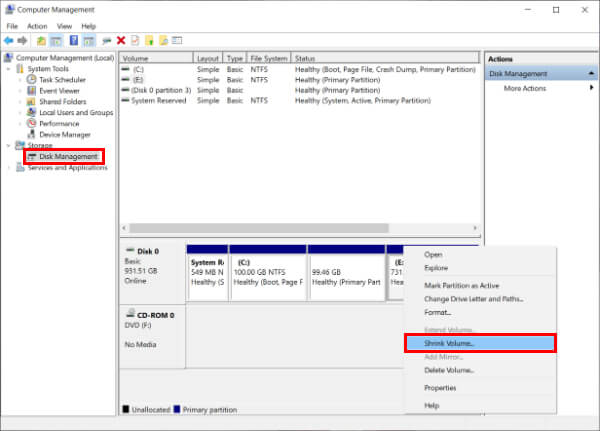
- Towards the bottom, you can see all the disk partitions. Right-click on the partition which has enough space or the partition that you would like to create a new partition from.
- Select Shrink Volume…
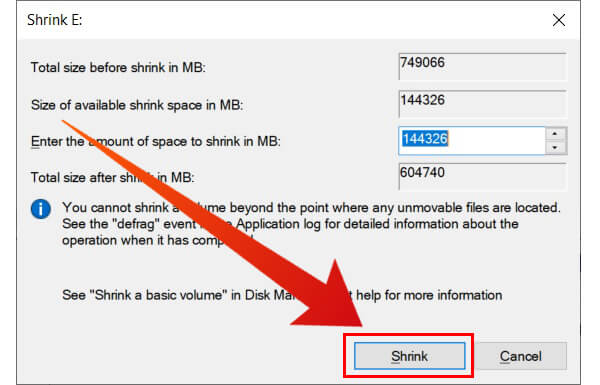
- Adjust ther numbers in front of Enter the amount of space to shrink in MB if you don’t want to use all the available space. For Ubuntu, a minimum of 25 GB should be quite enough if you don’t plan on installing many apps. If you want to use it daily and install all kinds of apps, 100 GB would be more than plenty.
- When you’re ready, click Shrink and wait for the process to finish.
- When it does, you should see a new unallocated partition.
Create a Bootable Ubuntu Live USB
Next on the list is creating a live Ubuntu USB that you can boot from. Since most laptops these days lack a CD-ROM, a live USB is more universal, not to mention faster.
- Download the latest Ubuntu ISO image from the official website.
- Download Rufus. Rufus is a utility that helps create bootable USB flash drives, such as USB keys/pen drives, memory sticks, etc.
- Insert the USB Drive in your computer.
- Launch Rufus.
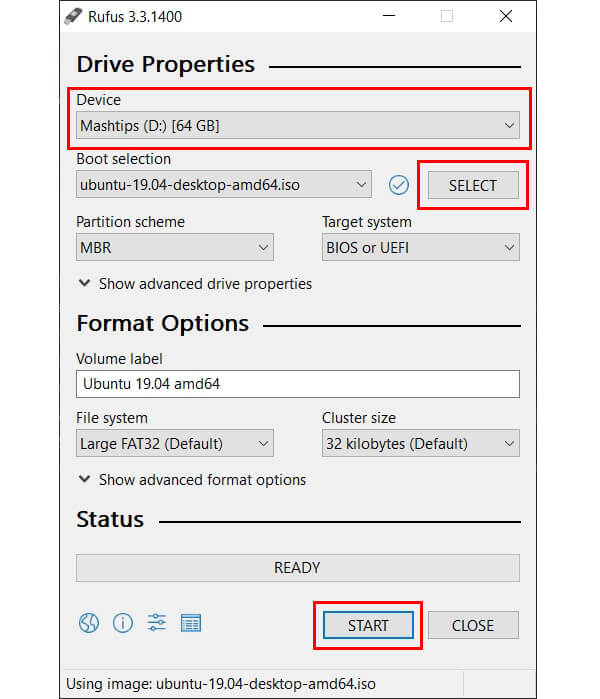
- Select your USB drive from the drop-down menu under Device.
- Click the SELECT button and select the downloaded Ubuntu ISO. Alternatively, you can just drag and drop the ISO onto Rufus.
- Leave all the other settings as default and click START.
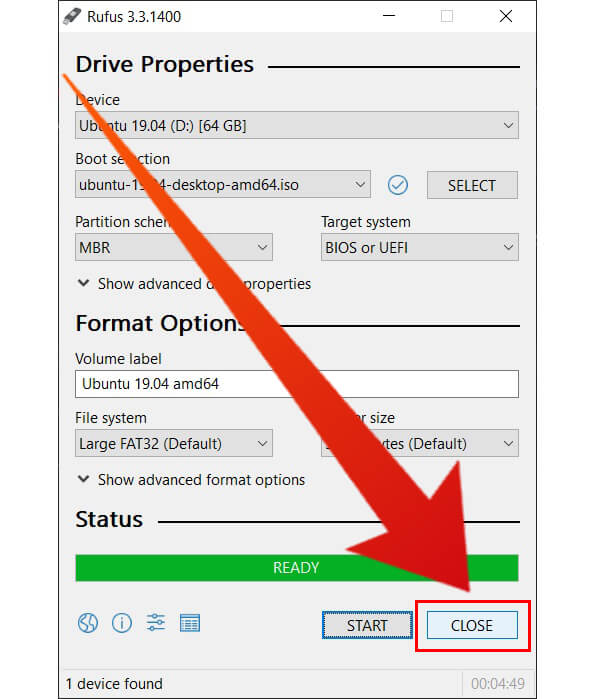
- It takes a while, but when it’s finished, click CLOSE.
Install Ubuntu from USB in Dual Boot with Windows 11 & 10
You now have to boot your computer using the bootable USB you just created. Depending on the make and build of your computer, the way to boot it using a USB will be quite different. Even computers from the same manufacturer don’t follow one strict method. So you’ll need to check about the specific method for your computer online. In general, the steps involve booting into the BIOS settings, where you can enable booting from a USB and move USB to the top of the boot order.
On some laptops and PCs, you can simply get to the boot menu by pressing a key combination right before the manufacturer logo appears or right after it. And then you can choose to boot from USB from the boot menu.
Ubuntu does offer to automatically create a dual boot system, letting you install Ubuntu in dual boot with Windows 10. However, sometimes it could possibly go wrong. The end result is that you lose all the data on your hard disk, including Windows 10 itself. It’s rare, but it is a risk not many people would like to take. This is why we use the manual installation method in our guide below.
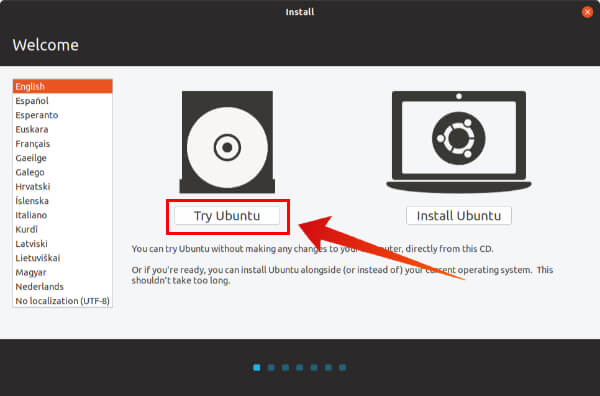
- Boot from the Live USB.
- Select Try Ubuntu. Even though you want to install Ubuntu, it would be a good idea to first try it and make sure it supports your hardware fully. Check if the Wi-Fi and Bluetooth work, for instance.
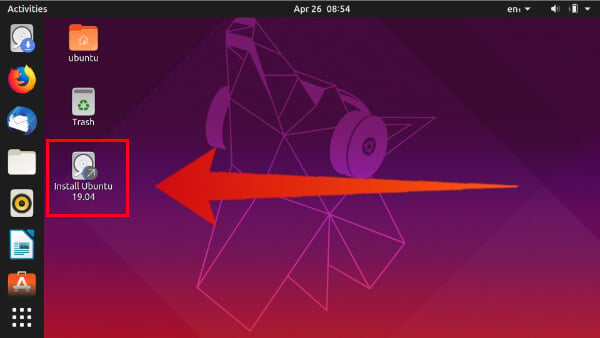
- When you’re ready, launch the installer from the desktop (Install Ubuntu).
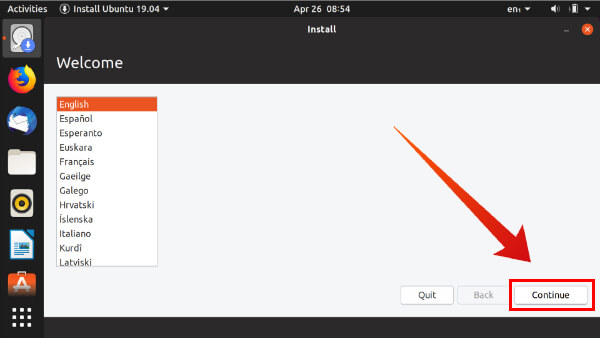
- Select your preferred language and click Continue. This is the language the installer will guide you through the process.
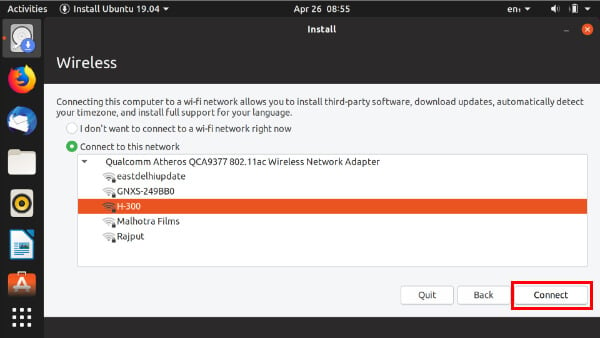
- When asked to connect to your Wi-Fi, do that and click Continue. It’s optional but recommended because it will allow the installer to check for updates and install them together with Ubuntu.
- It is recommended that you choose Normal installation when asked, and check the boxes next to Download updates and Install third–party software.

- Click Continue.
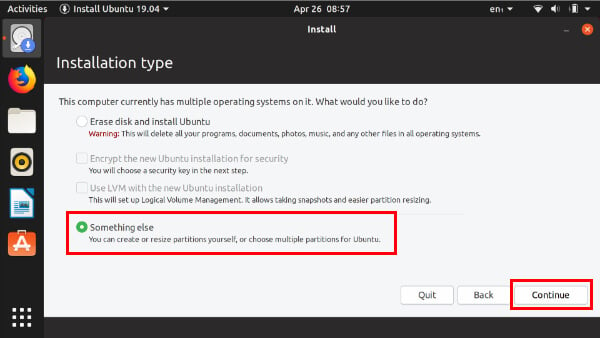
- Select Something else from the available options and click Continue again.
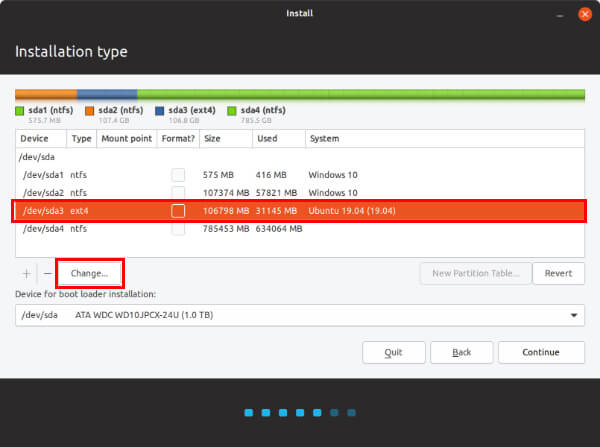
- Next, select the unallocated partition you earlier created.
- Click + to create a new partition or Change in case you already have an existing partition.
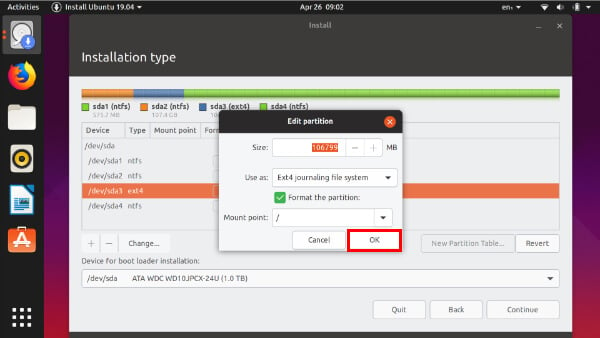
- In the pop-up box
- Select Ext4 journaling file system from the drop-down menu next to Use as.
- Check the box next to Format the partition.
- Select / as the Mount point from the drop-down menu.
- Click OK.
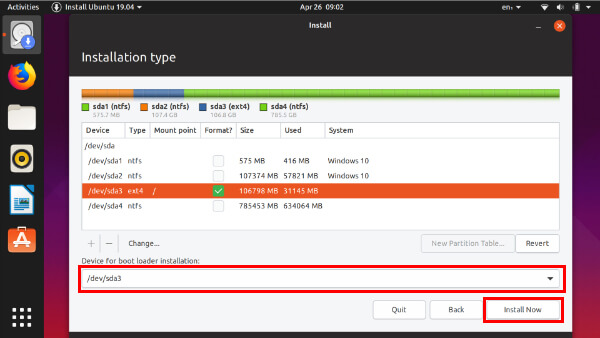
- From the drop-down menu at the very bottom, select the newly created Ext4 partition and click Install Now.
After that, the installer will start to copy files and install Ubuntu on the selected partition. While that happens you’ll be asked to configure a few things such as your time zone, create a user id and password, etc. All simple things.
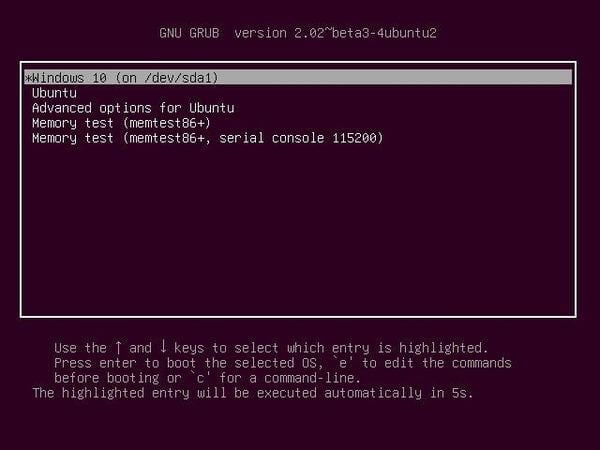
When the installation is complete, pull out the USB and click Restart now. When your computer boots up again, you should see the Grub bootloader menu, which lists both Ubuntu and Windows as available options to boot into.
I’m not able to click change after selecting the unallocated space.
Click +
You missed a step. Need to create EFI partition as well.
Bob, thank you for the feedback. would you please explain it? We checked the stesp again and don’t see the requirement for EFI partition step.
i am not getting the option after restart. It directly open the windows 10..
i followed all the steps.
Hi Suman, were you able to install Ubuntu? If yes, and you still don’t see the grub bootloader, you can try a boot repair and you will need your Ubuntu live boot flash drive for it. This happens sometimes, so nothing to worry about. Boot repair is a graphical tool and it will guide you with everything you need to do, while most of the things it will do for you. You can find help regarding the installation and how to use it here: https://help.ubuntu.com/community/RecoveringUbuntuAfterInstallingWindows