
Windows 11 update is now rolling out for many PC users but it is not as refined as the Windows 10 for some. If want to try it out first without losing the Windows 10, here’s how you can do that. You can dual boot Windows 10 and 11, on the same PC or laptop.
Let’s see how to dual boot your Windows PC with Windows 10 and Windows 11 side by side.
Content
- What Is Dual Booting on Computer?
- Check if Your PC Is Compatible with Windows 11
- Requirements for Dual Booting Windows 10 & 11
- How to Dual Boot Windows 10 and 11
- Booting into BIOS
What Is Dual Booting on Computer?
For the uninitiated, dual booting simply means having not one but two operating system on the same computer. Technically, you can have two copies of Windows 11 installed on the same machine. For many people, dual booting is a phase during which they learn and get used to a new OS, mostly Linux.
Your previous OS exists, in case you want to return to the familiarity for something or if you end up not loving your new OS. If you’ve been on the fence about Windows 11, it makes a lot of sense to dual boot Windows 10 and Windows 11 first, before you decide to jump ship. It also saves you the trouble of upgrading and downgrading. Because if you don’t like your new OS, you can just delete it easily.
Check if Your PC Is Compatible with Windows 11
Windows 11 has some pretty strict system requirements. The two that are likely to cause problems are Secure Boot and TPM 2.0. If you don’t know whether your PC has TPM 2.0 or not, you can follow this link and learn how to check. Even if your PC does not meet the minimum system requirements for Windows 11, you can still install it and see if the Windows 11 experience is good enough. It is better to know if your PC does meet the requirements or not, though, because you’ll later need to make choices accordingly.
Windows 11 minimum system requirements:
- 4 GB RAM + 64 GB storage
- TPM 2.0
- Secure Boot
Related: How to Install Windows 11 Without TPM 2.0 on Unsupported PCs
Requirements for Dual Booting Windows 10 & 11
Before installing Windows 11 alongside the Windows 10 or vice versa on your laptop, make sure you have a few things ready.
1. Windows License: To dual boot Windows 10 and Windows 11, you obviously need licensed copies of both. Microsoft does offer free trial versions that you can use without having to activate Windows, though. You can get a working Windows 11 ISO from Microsoft.
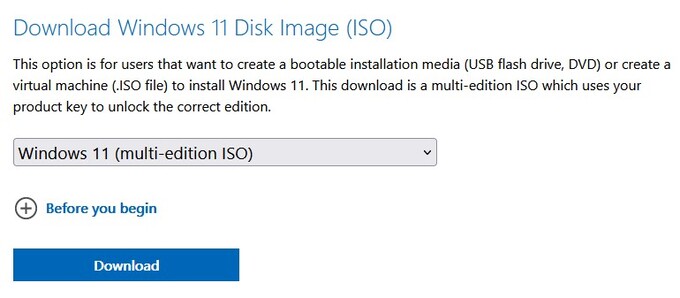
Download: Windows 11 ISO
2. Bootable USB Drive: The next thing you’ll need is a USB drive which has at least 8 GB of space. The USB drive will have to be made bootable. This can easily be done manually, but there are free apps that make it even easier, especially for beginners. One such app is called Rufus, which is free and open source. You can download it for free from the link given below and install it with a double-click on the downloaded file.

Download: Rufus
Rufus is our choice because you don’t even have to install it. It can be placed anywhere on your PC, on a USB drive, or hard disk, and it can run directly from there. The only downside is you cannot easily find it in the start menu since it was never installed. But if you are keeping the downloaded Rufus EXE file on your PC, you can always right-click on it and select Pin to Start.
Related: 11 Things to Do After Installing Windows 11 on Your PC
How to Dual Boot Windows 10 and 11
Dual Booting Windows 10 and 11 needs installation of the second OS on your computer, which needs some expertise. You can, however, dual boot Windows 11 and 10 side by side going through the steps below. Note that any errors or mistakes during the installation process can cause losing all your personal data so, make sure to backup your data before dual booting.
Step 1: Create Bootable Windows 11 USB
When you have the Windows 11 ISO and Rufus, it is time to make sure you can boot Windows 11 from a USB drive.
- Plug the USB drive into your PC.
- Launch Rufus.
- Your USB should already be selected under Device, but use the drop-down menu to select it in case it wasn’t.
- Next, click on the SELECT button and select the downloaded Windows 11 ISO. You can also drag and drop the ISO file into the Rufus window.
- Rufus will configure the ideal settings for you automatically, and if you don’t know what you’re doing, it’s best to keep it that way.
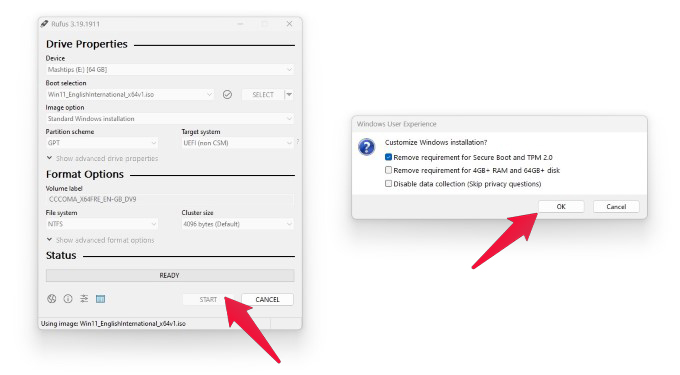
- Click on the START button.
- Rufus will then offer you some choices. Check or uncheck the boxes according to your needs and click OK.
- On the warning dialogue that appears, click OK again.
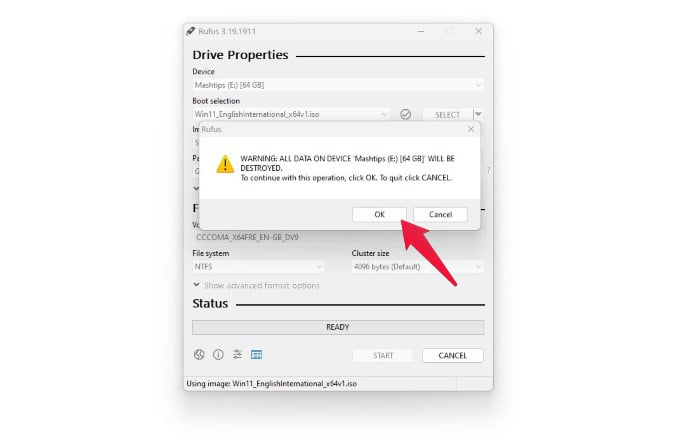
Installing Windows 11 on the USB can take some time, depending on the read/write speeds of your USB as well as the hard disk in your PC. When it’s done, you’ll see a green bar on Rufus that says READY.

Related: How to Install Ubuntu from USB & Dual Boot Alongside Windows 11 or 10
Step 2: Prepare Your PC to Dual Boot Windows 10 and 11
Now that you have a USB you can boot from, you need to prepare your PC. Basically, you just need to create a partition to install Windows 11 on. Creating a separate partition for Windows 11 means it does not affect your existing Windows 10 installation.
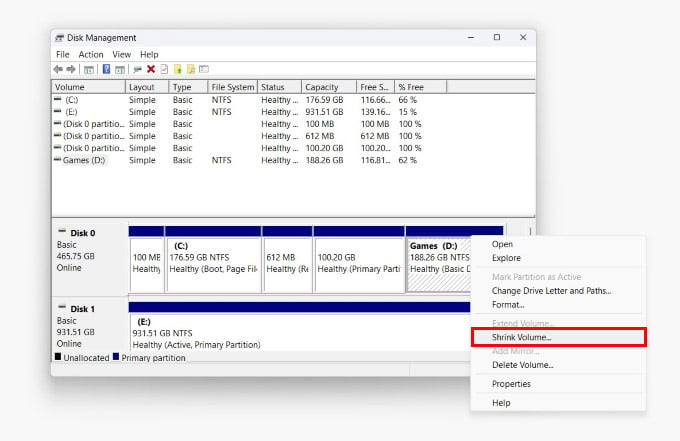
- Right-click on the Start button and select Disk management.
- In the disk management console, right-click on the disk or disk partition that you have at least 64 GB free space on.
- Select Shrink Volume…
- Use the input or drop-down next to Enter the amount of space to shrink in MB to adjust the amount of space you want to shrink.
- Click Shrink to shrink the volume.
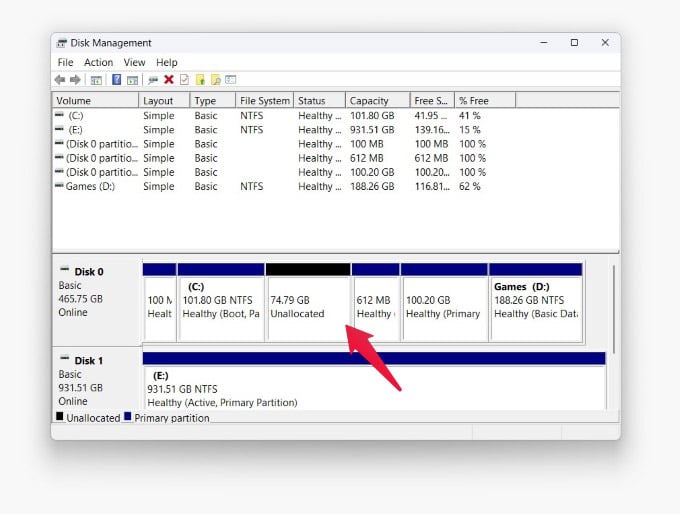
By default, all the available space that can be shrunk is selected, which you definitely don’t want. So, make sure you adjust the shrink value as per your needs. Shrinking takes a bit of time depending on your hardware. When it’s shrunk, you will see an unallocated space denoted with a black bar right next to the shrunk volume.
Step 3: Dual Boot Windows 10 and Windows 11
Now that you have a bootable Windows 11 USB and a separate partition to install it, you can finally start installing it. The separate partition, which as of now is unallocated space, ensures that you can dual boot Windows 10 and 11. When you install another copy of Windows 10 or 11 on this new partition, it does not wipe your existing installation.
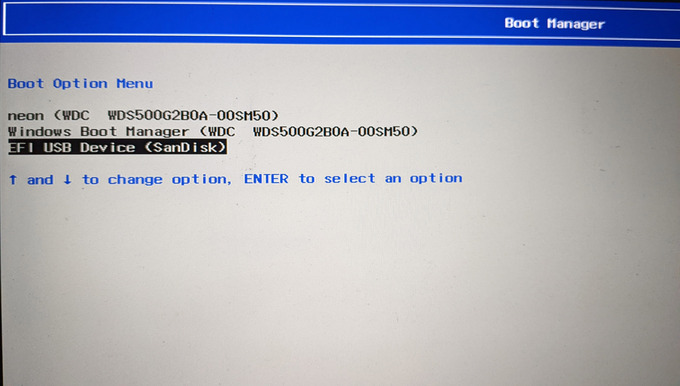
- Make sure your PC is turned off and plug in the bootable USB drive into your PC.
- Press the power button to turn it on.
- Before the boot logo shows up, press F12 to access the boot menu.
- Select the bootable USB drive from the boot menu.
- In the setup, select your preferred language and click OK.
- Click Install Now and accept the terms of license.
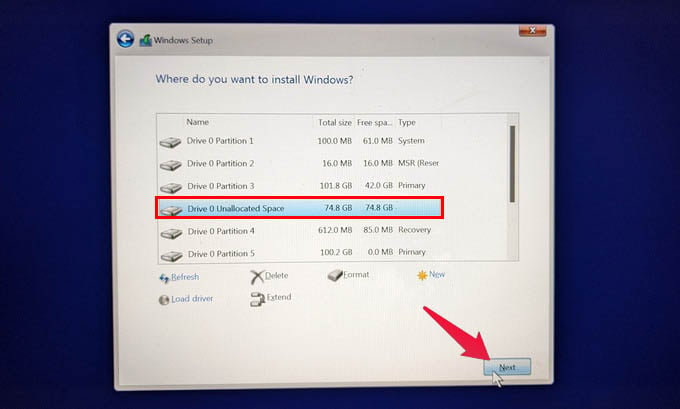
- On the next screen, choose Custom: Install Windows only (advanced).
- When you get to the screen with a list of available drives, select the Unallocated Space.
- Click Next.
The setup will begin copying files and installing them. That can take a while, depending on the speed of your USB drive and your hard disk.
When it’s done, restart your PC and you should be able to choose which version of Windows you want to boot into.
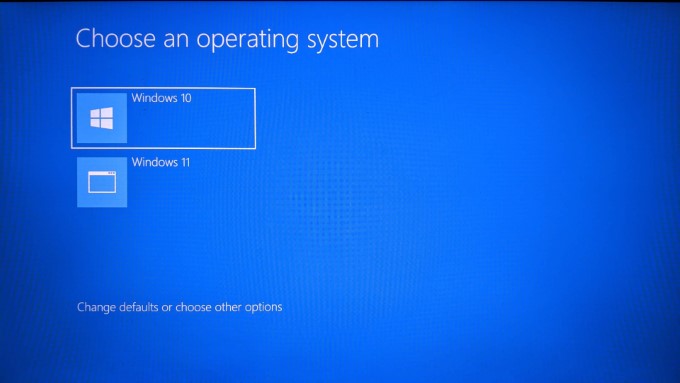
You’ll need to choose quickly because you blink, and you’ll miss it.
Related: How to try a New Operating System without Harming PC?
Booting into BIOS
Different PCs have different versions of BIOS and different ways of getting into it. Similarly, they have different keys for accessing the boot menu. Generally, pressing F2 or F12, sometimes F10, before the manufacturer logo shows up after pressing the power button will do it. But you might have to search online for the specific way it happens for your PC. These are also typically the buttons to access the BIOS menu.
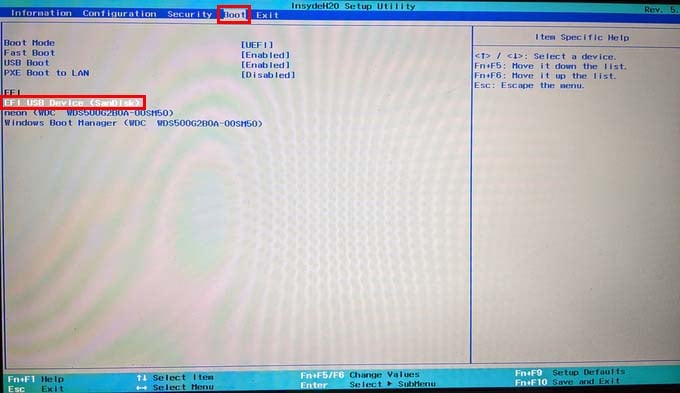
If you don’t know how to access the boot menu on your laptop, getting into the BIOS can help.
A universal way to get into BIOS is from within Windows. Open Windows Settings app and go to Windows Update > Advanced options > Recovery > Advanced Startup. Click on Restart Now. When your PC boots up, go to Troubleshooting > Advanced Options > UEFI Firmware Settings.
Related: What Is Windows Sandbox and How to Use It
Again, different laptops have different BIOS settings, but generally you should find what we’re looking for under the Boot tab. Here, you can follow on-screen instructions to bring USB to the top of the boot order. Once you exit and save the changes, your PC will just boot from the USB automatically if it’s plugged in.