
There is no need to have an expensive computer hardware for a good gaming experience. You can have your Windows 10 computer and tweak the PC for the best gaming experience. However, gaming on Windows 10 can give you a hard time if you don’t optimize well. By default, Windows 10 is coming with pre-packaged software and settings ideal for average users. There are some setting and changes that you can do to get the best gaming experience from Windows 10 PC.
Here, we are sharing the best tweaks and settings to optimize Windows 10 for a better gaming experience.
Turn off Auto Updates
Once a twitch streamer got ‘Windows is updating’ screen out of nowhere when he was streaming and playing Counter-Strike: Global Offensive. Such situations can be avoided if the background update feature is disabled. If you disable Windows background update and downloading of updates, it will also give you out a slight fps boost and a better gaming experience.
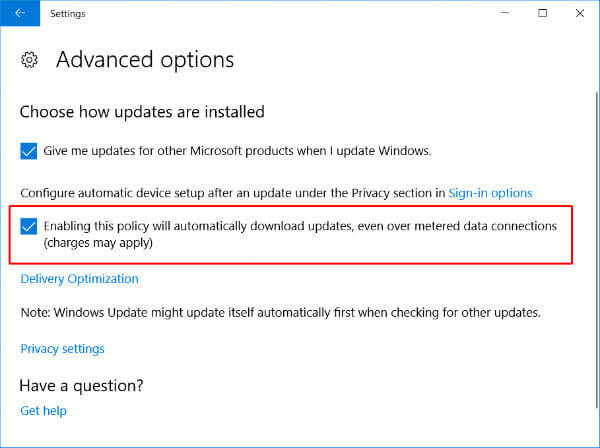
Click on the search bar and type Settings‘ and hit Enter. Now go to Update and Security > Advanced Options. Uncheck the policy which claims to download Windows 10 updates automatically. Always check for Windows updates manually every week, so that you don’t miss out any new features and security patches from these updates.
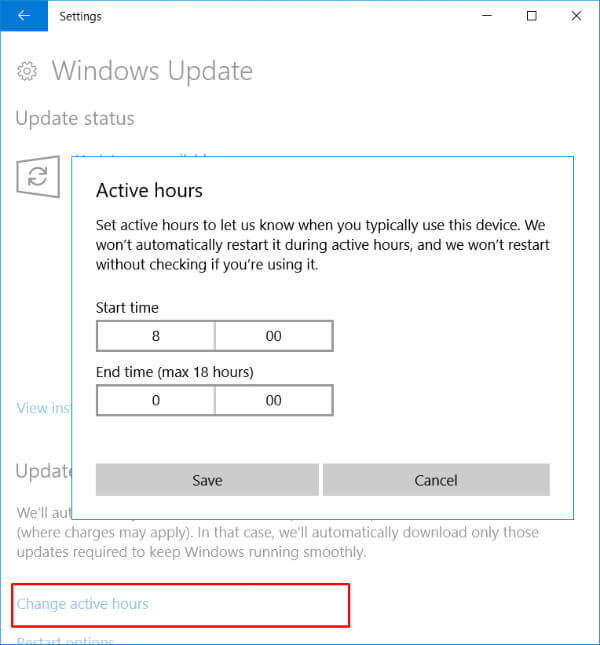
In addition to this, you can set Active Hours on Windows 10 to not update on those hours. Select ‘Change Active Hours’, and customize the Active hours time and save it. Now your windows PC will not start updates automatically without any prior notifications or warnings on these time schedule.
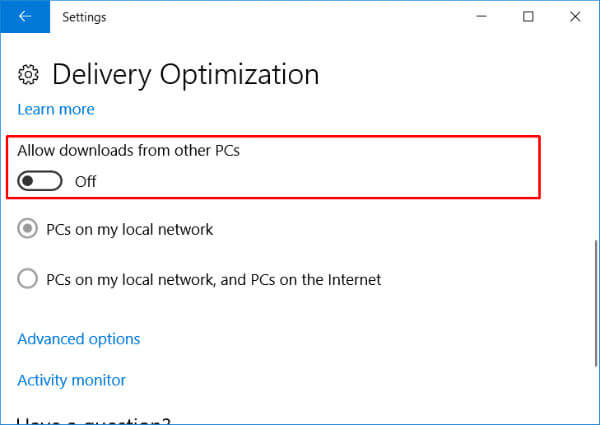
After this, scroll down to find Delivery Optimization. Here, toggle ‘Allow downloads from other PCs‘ to off. Doing this step will make sure that your PC doesn’t contact any other random PCs for downloading updates in the background.
Uninstall the Bloatware
Bloatware in Windows 10 is the unwanted apps which occupy space and memory by starting useless services. To remove this program, you have to open the control panel by typing “Control Panel” in the Search bar. Now you can select Uninstall the program that allows you to get rid of those apps which are not in use.
Windows 10 is coming with some preloaded apps like Xbox, Skype, Groove, 3D Builder, etc in the system. You can remove these games and preloaded windows apps with a simple command. Go to Search bar and type Windows PowerShell, right click on it and select Run as Administrator.
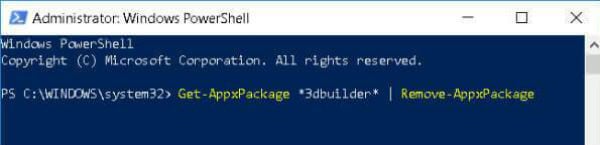
To uninstall any particular app, type Get-AppxPackage *AppName* | Remove-AppxPackage” and hit Enter. Suppose you want to remove 3D Builder, then the command will look like Get-AppxPackage *3dbuilder* | Remove-AppxPackage”.
Clean Temporary files
There might be some temporary files which create itself for quick access to the services. You must get rid of these files for more space and smooth gaming experience. To do this, press ‘Windows + R‘ button and type %temp% in Run window. The temp folder will open with all temporary files that saved on Windows 10 hard disk. You can manually delete everything, select all folders and files and press ‘Shift + Delete” button. Do the same step once again by typing temp in Run window, which opens local Windows temporary files. Delete everything in that folder if you are running short of space.
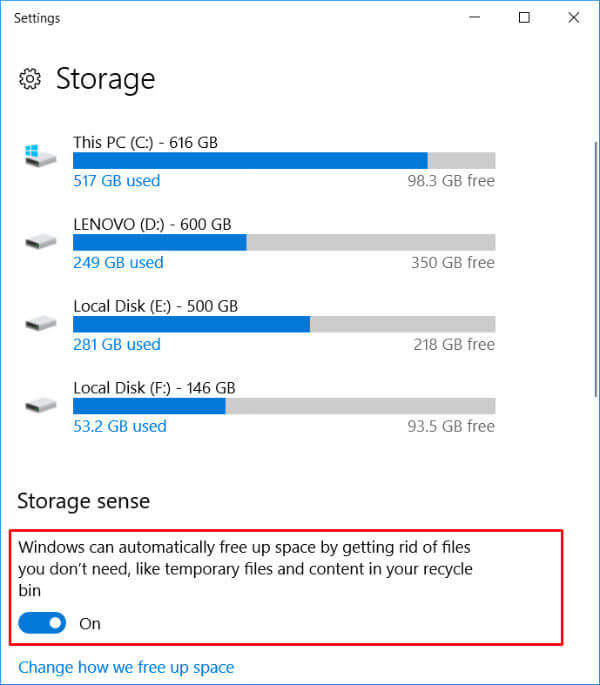
In Windows 10 operating system, you can also activate Storage Sense which will automatically clear the temporary files and folders. To perform this, type Storage in the Search bar and Enter and toggle the Storage Sense to On.
Optimize Windows 10 HardDisk
Defragmentation is a process where all the data is organized in a proper manner that will improve the disk performance. Data is stored in blocks and when similar kind of blocks are separated from each other, it leads to fragmentation. Consider it as organizing your bookshelf with all the similar kind of books in one place.
In the search bar, type for Defrag and select ‘Defragment and Optimize Drives‘. Select the drive which you want to defrag and click on ‘Optimize’.
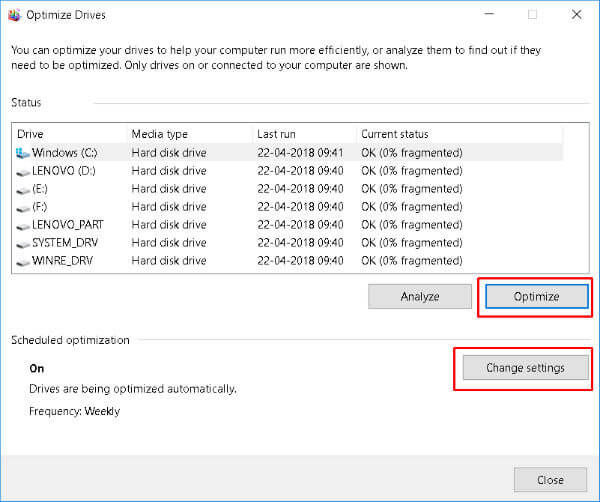
After the optimization is complete, you may choose to schedule to defrag weekly to repeat the same process in every week to makes sure your hard disk is organized and performing at the best level. Go to ‘Change settings‘ and choose daily, weekly or monthly under frequency.
Editor’s Note: Please refrain from this step if you use a Solid State Drive (SSD). Doing these optimization steps might damage your SSD.
Related: How to Maximize SSD Life Span & Performance; Avoid These 7 Mistakes
Turn Off Mouse Acceleration
When mouse acceleration turned ON, the pointer does not have any relation to how far you were actually moving the mouse. It makes the travel distance of cursor on the screen relative to the velocity of physical mouse movement rather than the moved distance. In short, making the same distance movement with two different speeds will give you two different results. In the gaming scenario, the actual movement distance will be better for good control of the mouse.
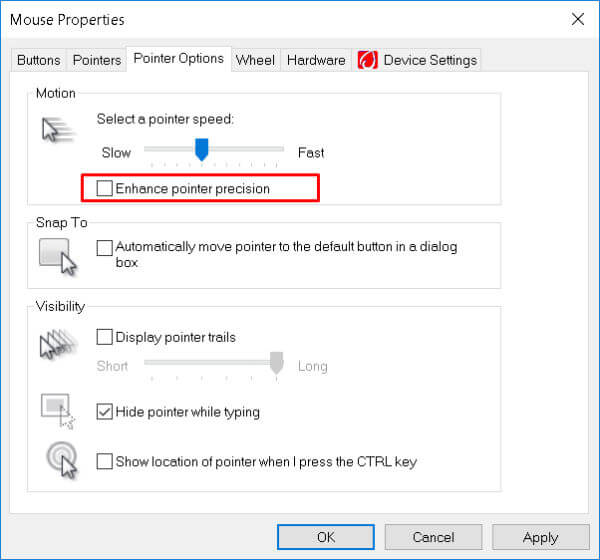
To turn off the mouse acceleration, search for the ‘control panel‘ from the taskbar search. Change view by: setting from category to small/large icons. Now, select ‘Mouse‘ from the Pointer Options tab. Uncheck the Enhance pointer precision.
Unpark CPU Cores for Gaming Performance
CPU cores park itself after a certain time, mostly when the system is idle and goes to the power saving mode. To make it gaming ready and always ready to work, download any of the Unparking Utility and install it.
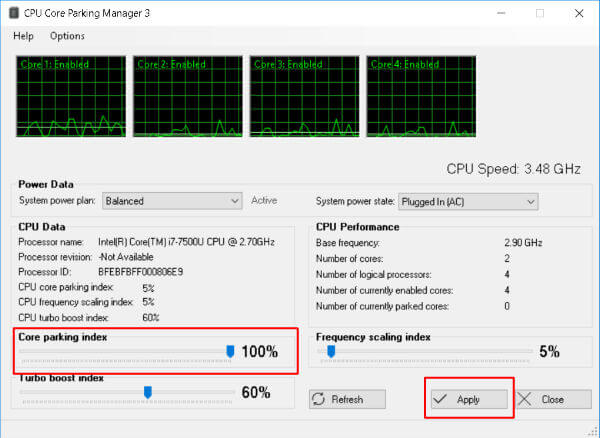
For example, you can download the CPU Core Parking Manager and install on Windows. After installing this, slide the core parking index to 100% and click on Apply.
Disable Nagle’s Algorithm
Here, we will do some registry tweaking by editing the Windows registry. Before doing it, we encourage you to back up the registry. Nagle’s algorithm looks over how the packets are transferred. This Algorithm basically collects multiple packets and makes it one giant packet and then transfers it over the internet. But, in online gaming, you don’t want to wait for forming a huge packet and transmit everything at once. This might result in loss and chokes during Gameplay.
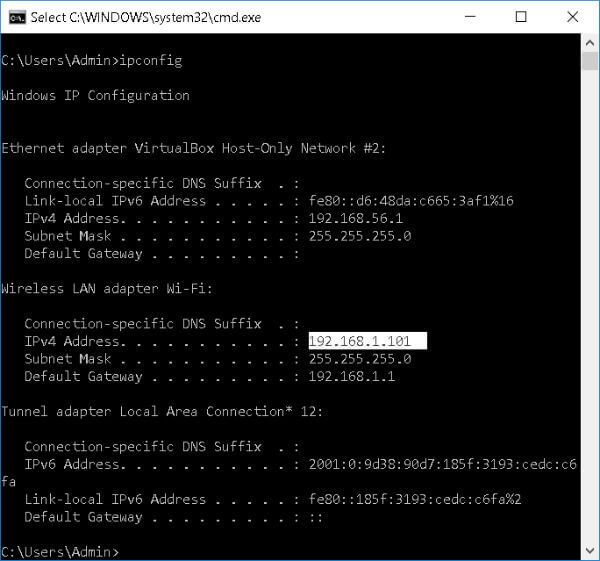
To fix this, you need to know what your IP Address is. If you have no idea about which IP Address is assigned, press ‘Windows + R’ and type <codeCMD and hit Enter. In Command prompt, type ipconfig and press Enter.
Now, press ‘Windows + R‘ again and type ‘regedit’ and click OK. Navigate to “HKEY_LOCAL_MACHINE > SYSTEM > CurrentControlSet > Services >Tcpip > Parameters > Interfaces > {your ID}“.
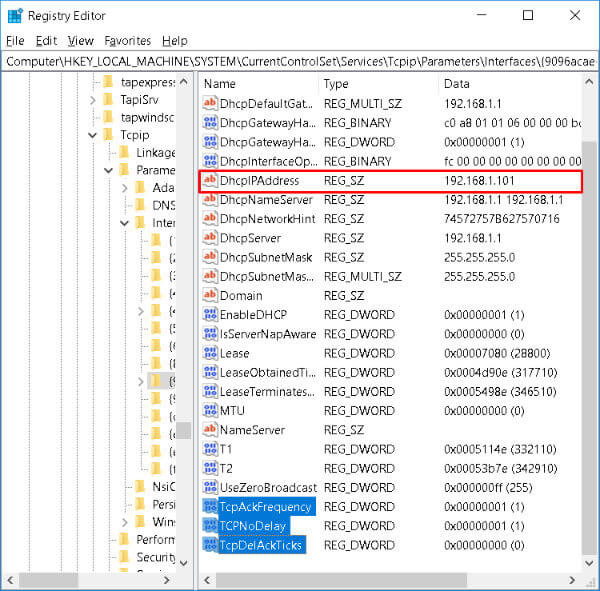
To search for your ID manually, check all sub-folders to locate the IP Address. Create new values by doing a right click to select New and hover over to ‘Dword (32-Bit) Value‘ and select it. You have to create a total of 3 new values with names “TcpAckFrequency” value – 1, “TCPNoDelay” value – 1, “TcpDelAckTicks” value – 0.
Change CPU Priority
Yo can make your system more resposnive by chnaging the priorty of systme priorty. MMCSS or Multimedia Class Scheduler Service is at the disposal of applications to ensure a priority based distribution of CPU and GPU power. Normally, the applications can only utilize up to 80% of the CPU and the rest 20% is distributed among the low priority background services. This tweak is to unlock the maximum potential of the CPU power.
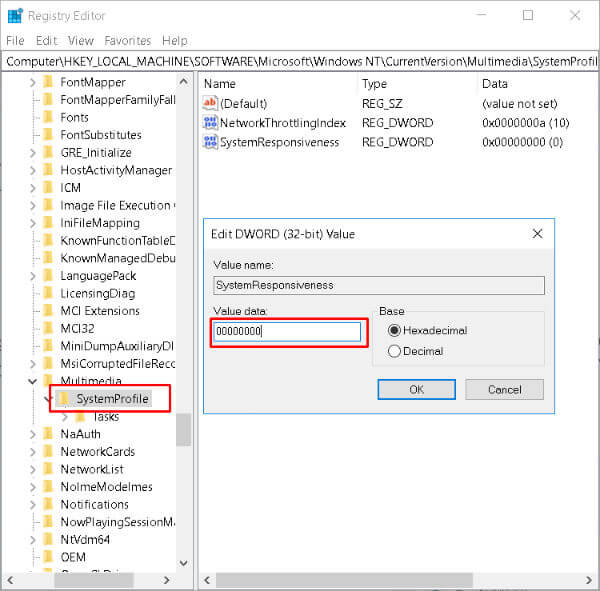
Go to the Registry Editor (as mentioned in the previous step). Navigate to “HKEY_LOCAL_MACHINE > SOFTWARE > Microsoft >Windows NT > CurrentVersion > Multimedia > SystemProfile“. Create a new Dword (32-bit) Value and name it ‘SystemResponsiveness’. Set the Hexadecimal value to “00000000“.
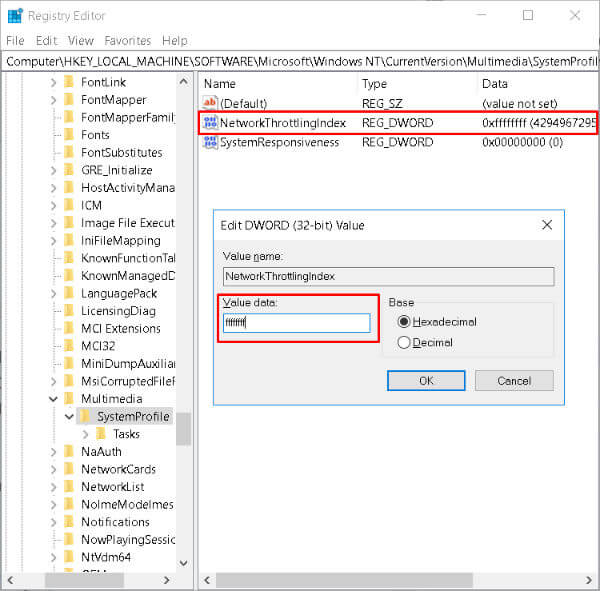
One more change which need to done here is to Disable Network Throttling. This means that you are removing the limit on default data transfer speeds which windows 10 imposed. Create a new Dword value “NetworkThrottlingIndex” (if it’s not already present) and set the hexadecimal value to “ffffffff“.
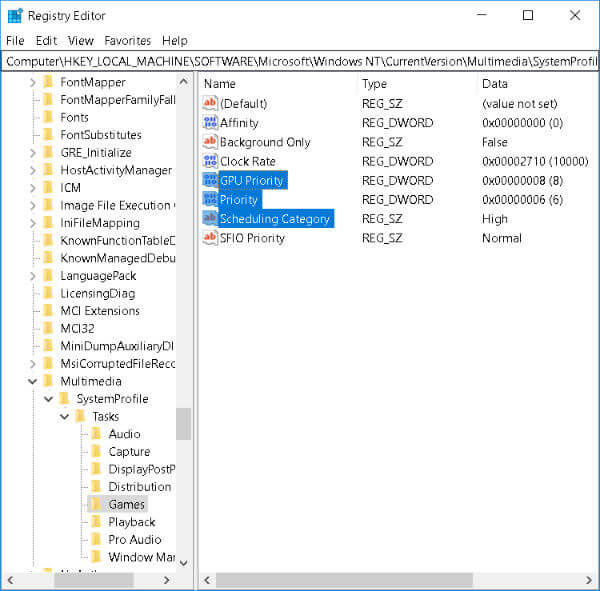
Now, to get more out of your PC, navigate to “SystemProfile > Tasks > Games“. Here, you have to do three registry value changes. Firstly, set “GPU Priority” to ‘8‘. Second, set “Priority” to ‘6‘ and finally change the “Scheduling Category” to ‘High‘.
Disable Startup Apps and Services
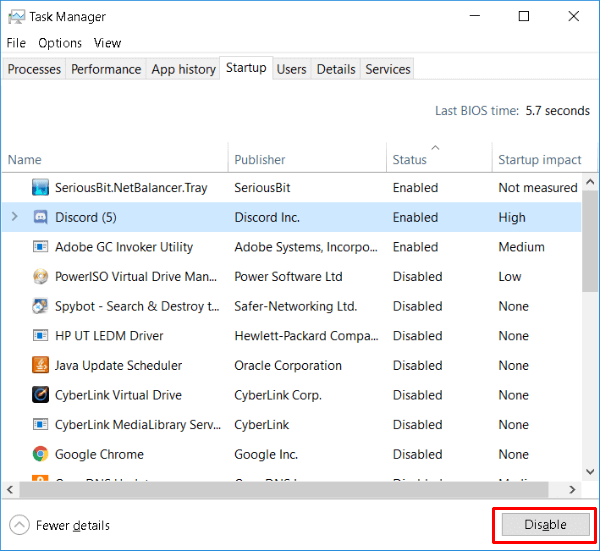
There are some apps which loads as soon as you boot the computer, called startup apps. Some times, you don’t need to laod all these start-up apps load in your system to use the system resources unnecsaarly. You can disable them by pressing ‘Clt + Shift + Escape’ and switching over to the Startup Tab. Now, disable all the apps which are not necessary.
Now, Let’s disable some background services which are not important. Go to Search bar > type “settings” there and select it. In System > Notifications and Actions, toggle everything to OFF. If you want any specific app notifications, then switch it to ON.
Then go to ‘Privacy‘ and in General, toggle everything to OFF. In Background Apps, turn all the applications to OFF. In Feedback & Diagnostics, turn Feedback Frequency to Never.
![]()
To turn off the useless services in a more advanced manner, you can download specific programs for it. Eg: SpyBot Anti Beacon. If you want, download SpyBot Ati Beacon or similar program and install by following the on-screen instructions. Open the application and click on Immunize. This will make sure all the Data mining apps and hidden services stay off unless you actually want to use any of them.
Update Graphics Drivers
This is an important step for gaming optimization in Windows 10. You have to check and update the graphics card drivers regularly. To do this, head over to the graphics card maker official website and look for the updates in the download section. Choose to auto-detect the graphics driver version and download the updates if it suggests one. You can get the latest driver files for your graphics card and here is the link for AMD Drive Download and Nvidia Driver Files.
Tweak Windows 10 PC for Gaming
There are few more things you can do including CPU cloaking that has to be very cautious to proceed. However, when you want to have a true gaming experience, you have to tweak the Windows 10 for the best experience. There will always be a moment when you think that your PC is not gaming ready and need to get a new one. Before doing that, try out the above-mentioned ways to boost and improve your gaming experience.