
Taking screenshots on your Android phone is not a big deal. But when you connect your phone to the car and use Android Auto, how do you save screenshots? It does not have an easy way to let you take screenshots. When you want to share the screenshot to troubleshoot an issue, it becomes a big problem.
In this article, we will show you how to take a screenshot on Android Auto interface of your car.
How to Take Android Auto Screenshot
Android has always hidden many of its features under the sleeves. Same with the screenshot feature on Android Auto. In order to take a screenshot on Android Auto, you have to dive into the developer settings. Find out how.

- Connect your phone to Android Auto on your car.
- Open the Android Auto app on your smartphone.
- Tap the hamburger menu icon on the top left of the screen.
- Go to Settings.
- Scroll down to the bottom from the settings window.
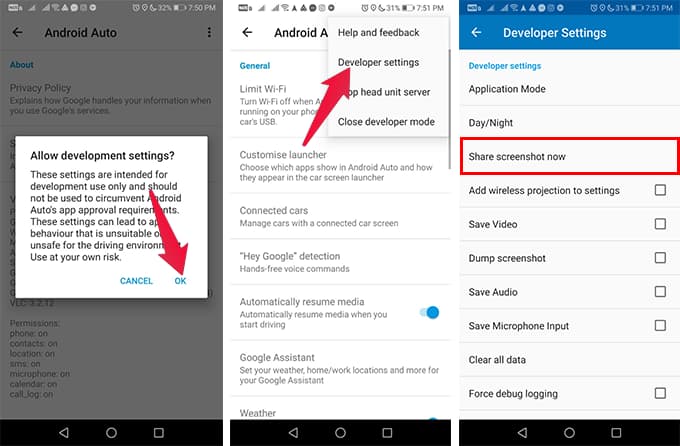
- Tap “Version” 7 times continuously to enable Developer Mode.
- Tap OK on the popup window.
- Now, tap the three-dots menu icon on the top right corner.
- Go to Developer Settings.
- From the next screen, tap Share Screenshot Now.
Related: 10 Best Android Auto Head Units and Apple CarPlay Stereo
Now, you can share the screenshot of the Android Auto screen from your car on your Android smartphone.
As of now, there is no other way Google enables us to take screenshots on Android Auto. Stay tuned to find out when Google releases a shortcut for that, like on Apple CarPlay.