As soon as you sign in to your fresh copy of Windows 11, OneDrive turns on in the background. It can be annoying when you use another cloud storage service or even if you use OneDrive but don’t want to sync desktop shortcuts to OneDrive. At least Microsoft lets you disable OneDrive and even remove and uninstall OneDrive if you want.
Folder backup was an optional “feature” on Windows during the setup process. If you opted in, Windows would back up your Desktop, Documents, and Pictures folders to OneDrive. Now, it is just on by default, and you never get the chance to opt-out until OneDrive has already started syncing things.
Another problem with it is that it backs up all the desktop shortcuts you have as well. So, when you sign in to a new device, you have empty desktop shortcuts on your desktop. That’s because those shortcuts lead to a program or file when they were backed up, but your new device may not have those installed.
Pause OneDrive Sync
If you don’t want to completely disable OneDrive, you can just pause the syncing for some time. After a certain time, the syncing will resume. This can be helpful when you need the bandwidth for something else, such as an online game.
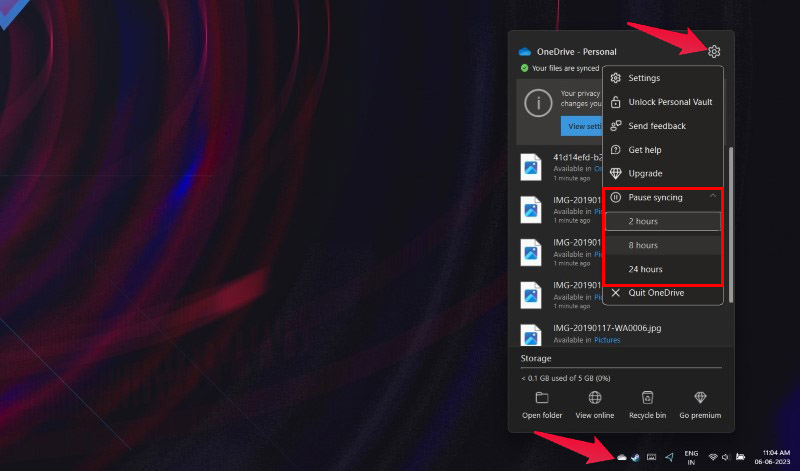
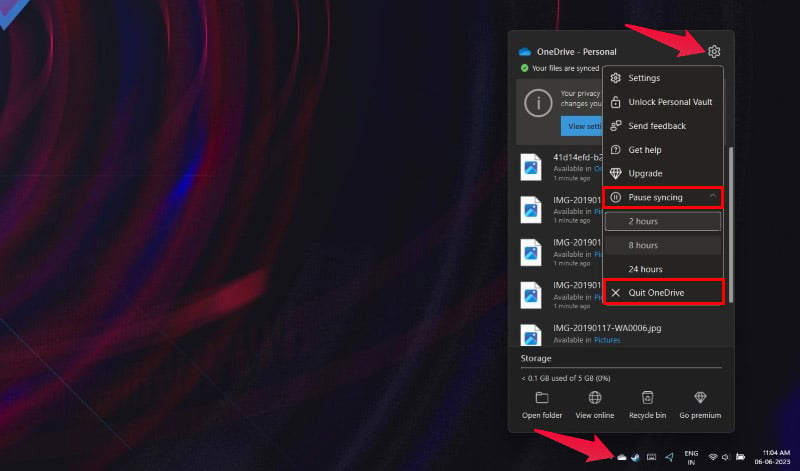
- Click on the OneDrive icon in the system tray.
- Next, click on the Settings icon in the top-right.
- Click on Pause Syncing to expand the menu item.
- Select any option from 2 hours, 8 hours, or 24 hours.
You can also Quit OneDrive so that it will resume syncing whenever you either launch OneDrive again or restart your PC.
7 Best Cloud Storage for Photos to Store and Backup Your Images
How to Turn Off OneDrive Sync
There is also a more permanent solution, and that is to turn off the OneDrive folder sync completely. You can choose to turn it off only for folders you want or turn off OneDrive folder sync altogether.
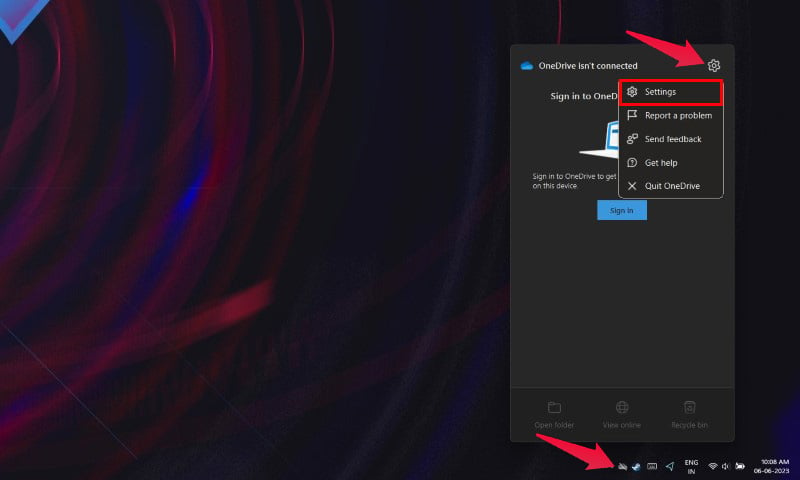
- Click on the OneDrive icon in the system tray.
- Click on the Settings icon.
- Select Settings.
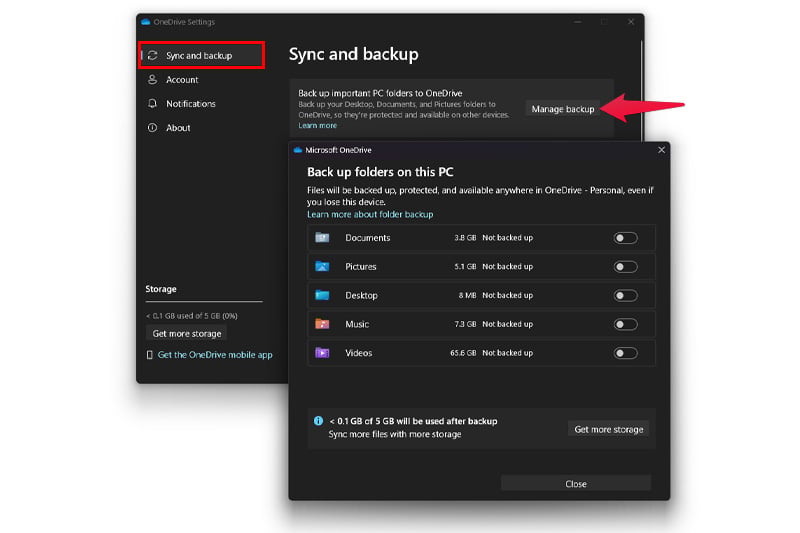
- From the Sync and Backup section, click Manage Backup.
- Toggle off all the folders.
Disable OneDrive Automatic Startup
Whatever reasons you may have, if you wish to disable OneDrive, you have several options. One is to disable OneDrive, i.e., not let it run automatically.
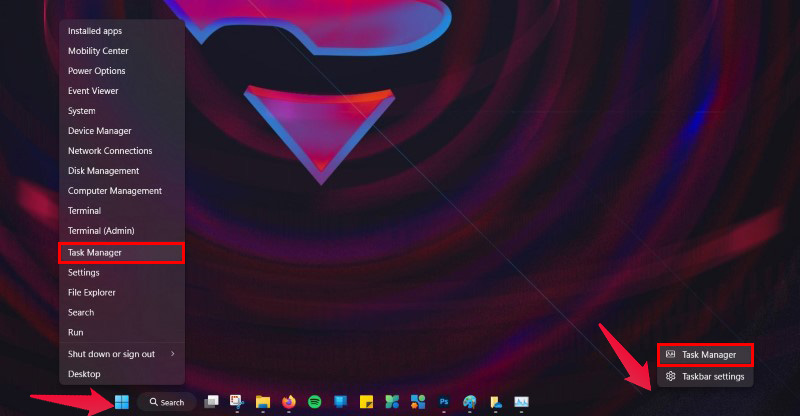
- Right-click on the Start button or the taskbar.
- Select Task Manager.
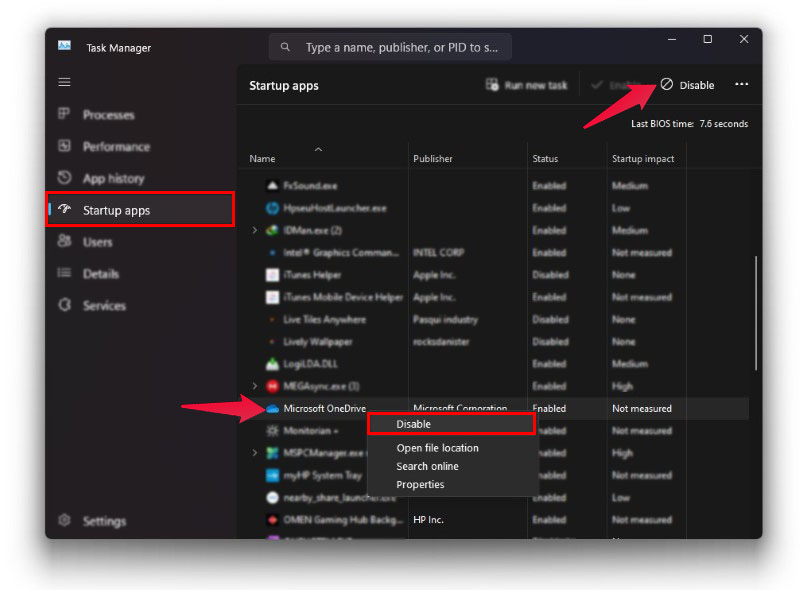
- Select Startup Apps from the left column.
- Scroll down and find Microsoft OneDrive.
- Now Select it and click Disable at the top, or right-click on it and select Disable.
Once you’ve done that, you can click on the OneDrive icon in the system tray again, click on the Settings button and select Pause syncing > Quit OneDrive.
Click Close OneDrive on the confirmation popup that appears.
Revolutionizing Command Line Experience: Introducing Windows Terminal and Customizable Background
Remove or Uninstall OneDrive
If you don’t use OneDrive at all and want to stop Windows from constantly trying to push OneDrive to your face, the best way is to get rid of it completely. For now, Microsoft lets users uninstall OneDrive.
- First, quit OneDrive from the system tray icon if it is running, as mentioned above.
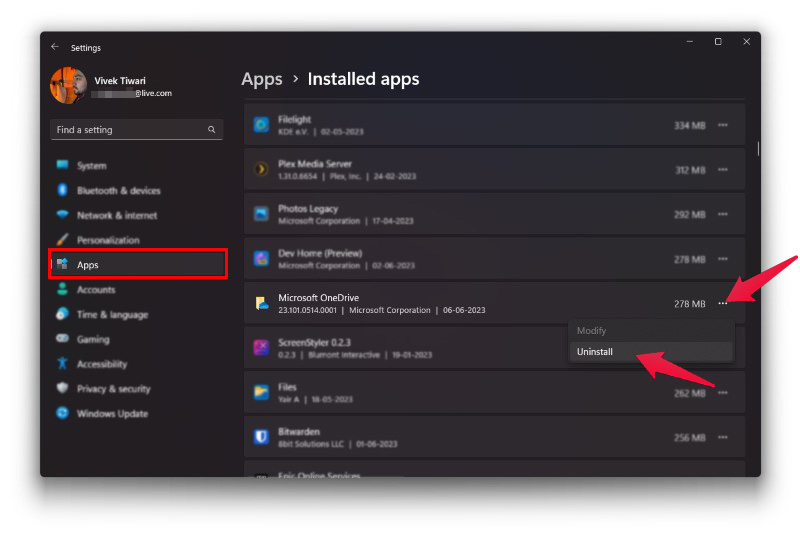
- Open the Settings app by pressing Windows + I on the keyboard or from the start menu.
- Select Apps from the left column.
- On the right, select Installed apps.
- Find OneDrive and click on the three-dot menu button next to it.
- Select Uninstall to remove OneDrive.
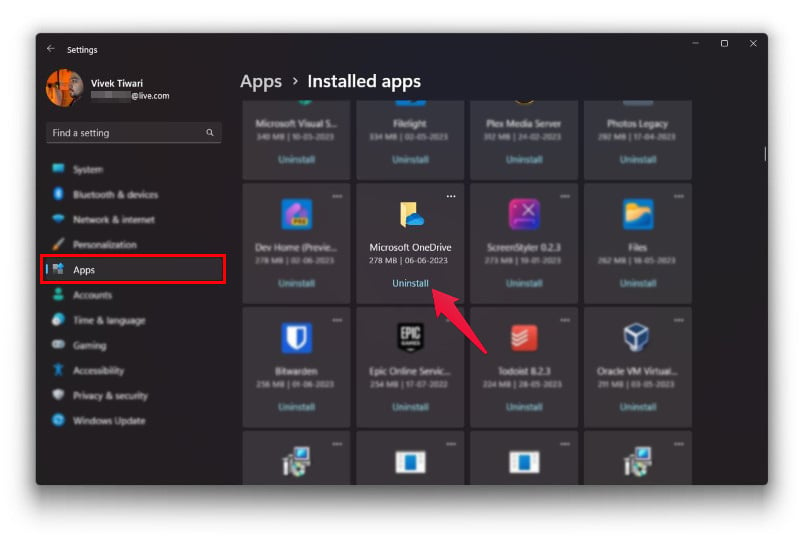
Depending on your preferred layout here, you may just see the Uninstall option directly. In that case, just click Uninstall instead of the menu button.
Although it is annoying, if you happen to be one of the few people that actually use OneDrive to sync their files and folders, OneDrive is not necessarily a bad service. The only downside is that compared to Google Drive’s 15 GB of free storage, OneDrive only gives you 5 GB. And I’m not even going to mention how some other cloud storage services like Mega let you earn up to 50 GB of lifetime storage without paying at all.
