Regardless of what graphics card we have installed on, some games and apps sometimes open with Intel HD Graphics or the lesser powerful video card. You can put an end to this with Windows 11. It is possible to assign GPU for each app in Windows 11 so that you get the maximum performance with any app and game you like.
Let’s begin.
Select Default GPU for Apps in Windows 11
Whether you have an Nvidia or AMD GPU, you can choose a graphics card for individual apps so that After Effects or Photoshop does not open with the slow Intel HD Graphics the next time you open. On Windows 11, you can do this straight from the Settings app.
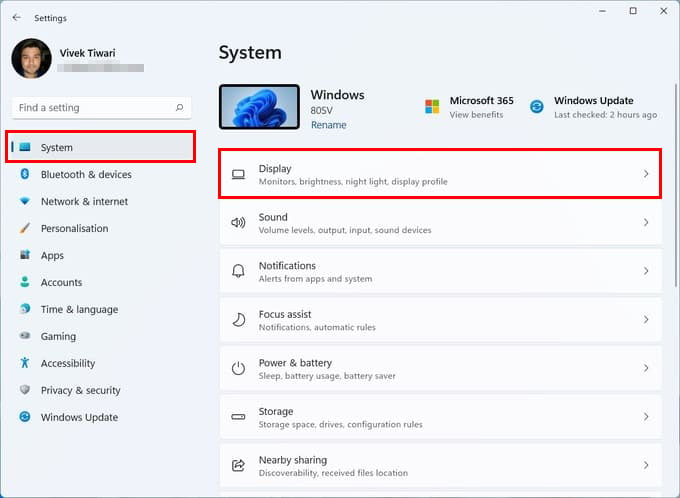
- Press Windows + I on the keyboard to open the Settings app.

- With System selected on the left column, select Display on the right.
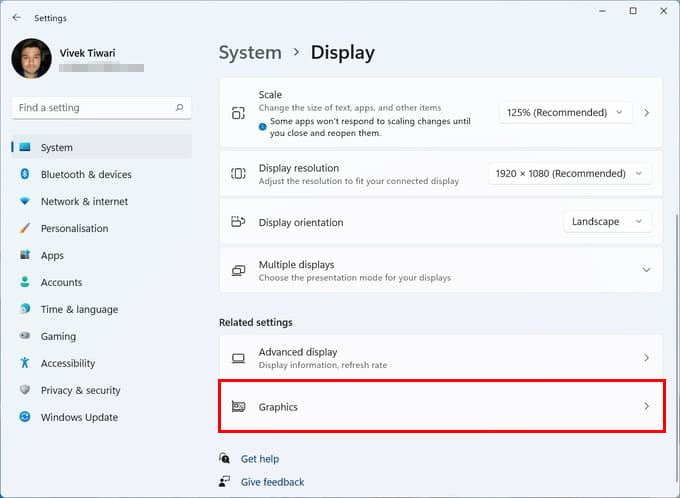
- On the bottom, under Related settings, select Graphics.

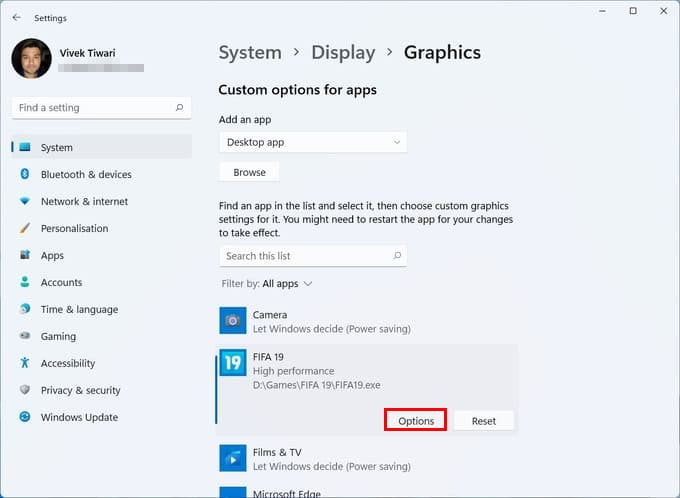
- You will find a list of all apps that have been configured automatically or by you on this page.
- Click on an app and then click on the Options button to choose graphics card for the selected app.

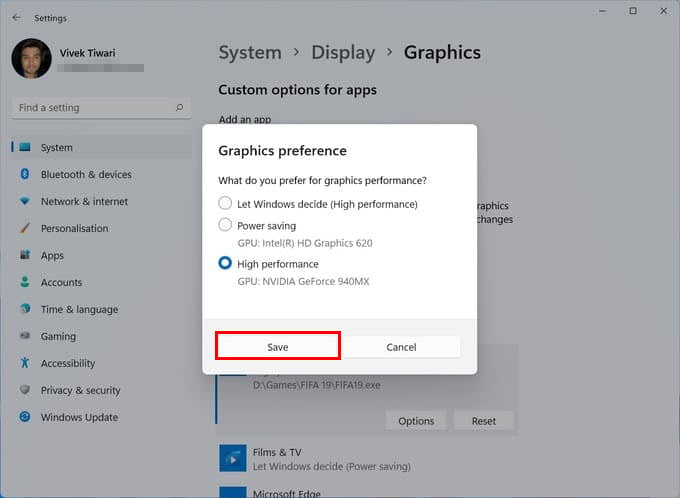
- From the pop-up, select your default graphics card preference for the app.

- Click Save when done.
If your desired app is not on the list, you can look for them manually. From the drop-down menu, select whether you want to choose a graphics card for Desktop apps or Microsoft store apps, then click Browse.
Microsoft Store apps are easier to find since Windows simply provides you a list. For desktop apps, you’ll need to find and select the EXE file, probably located somewhere in the Program Files or Program Files(x86) folders within the “C: Drive.”
Related: How to Use Windows 11 Battery Saver Mode to Get Maximum Battery Backup
With the automatic driver updates in Windows 10 and 11, you no longer have to worry about the drivers while installing a new hardware component. With the new handy option to change the graphics card for each app, Windows 11 becomes much easier to handle tasks in any case.
