The USB drives are popular nowadays since they are small (and are continuing to become smaller), ultra-portable, have high storage capacity and high transmission speeds. A USB drive can be as low as 2GB and high as 1TB in storage capacity. All these features make the USB drive a convenient external storage device.
There is one major downside to USB drive though, the security. The small size is making them easy to lost, which may end up in the wrong hands. Thus the sensitive data inside the drive is at risk and accessible to those who hold it. There are solutions available to protect the contents of the USB disk by employing different strategies. Mainly two methods are there to protect USB drives. Software-based encryption and Hardware-based encryption.
Software Based Encryption
Software-based encryption is apparently the cheapest method available for a user when it comes to USB encryption. Software-based protection is achieving mainly in three ways:
Password Protect Individual Documents in USB
The first method is to password protect USB contents (especially documents) individually. Most documents, whether it be a word document, spreadsheet or PowerPoint, are creating by using MS Office or similar applications. The key to locking these documents with a password also lies inside these applications itself. Here is how to do the same.
Consider Microsoft Word for instance (this method is applicable for all MS office applications). In Microsoft Word click on the File > Info > Protect Document.
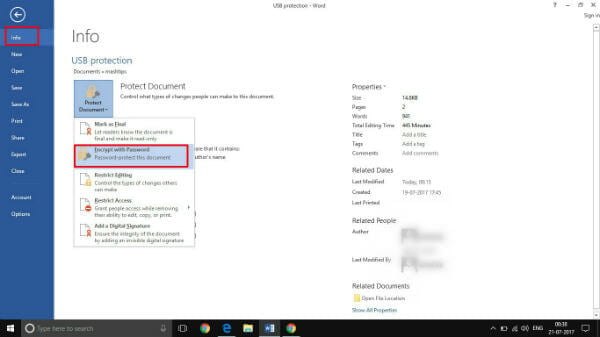
From the drop-down menu select ‘Encrypt with Password.’ Enter the preferred password in the window that appears.
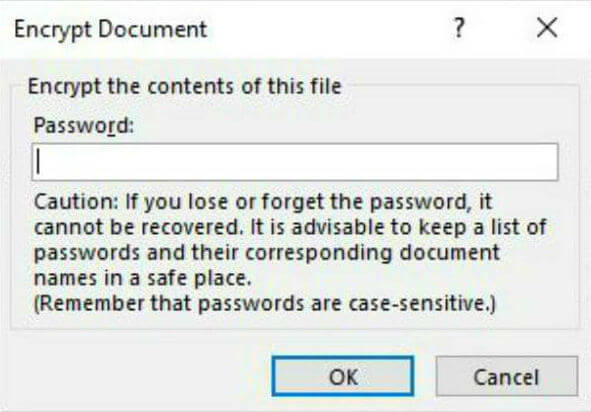
Do note that Microsoft office 2013 version is used in the illustration; similar options are available from Microsoft office 2007 and higher.
For protecting other files which are not of document type or not compatible with Office applications, we can create an archive with password protection. This method allows us not only to safeguard distinct files but also the folders to contain various types of data in it. To safeguard USB contents using password protected archives, the software like 7zip can be utilized, Download and install 7zip.
Once you have installed 7zip, right click on the file or folder in the USB that is to be protected. Select ‘7zip’ option, and then the ‘Add to Archive’ option. Enter a convenient password in the Add to Archive window that appears.
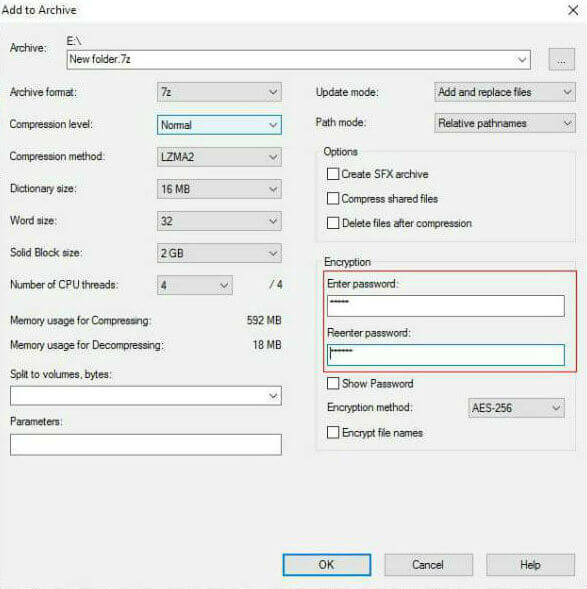
Though these methods are describing USB drive files here, it is also applicable to the files on the Hard disk.
Create Password Protected Partition
Several tools are available to encrypt and protect the USB data using passwords. But, the majority of them requires administrator permissions to do this. This would be troublesome if the protected USB content is to be accessed on a PC that you do not have administrative access.
Rohos Mini Drive is a drive which can perform encryption/password protection even without administrative permissions. The free version of Rohos Mini Drive can password protect and encrypt up to 2GB in a USB drive. It is coming with a portable Rohos Disk Browser which you can install directly on your pen drive. So no additional software is required to be installed on local systems.
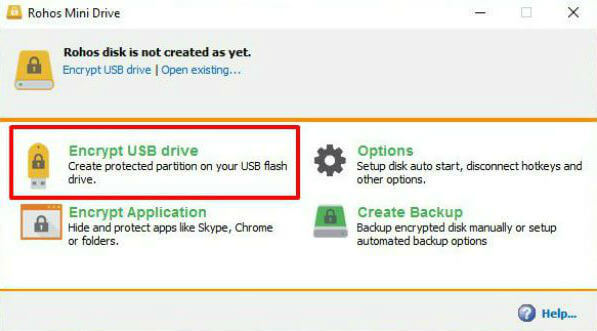
After installation, open the Rohos Mini Drive. From the start screen, select ‘Encrypt USB drive’ and then select the drive that needs protection. Assign a password and click ‘Create disk.’ This will create a virtual drive, which is password protected and encrypted, inside your USB drive.
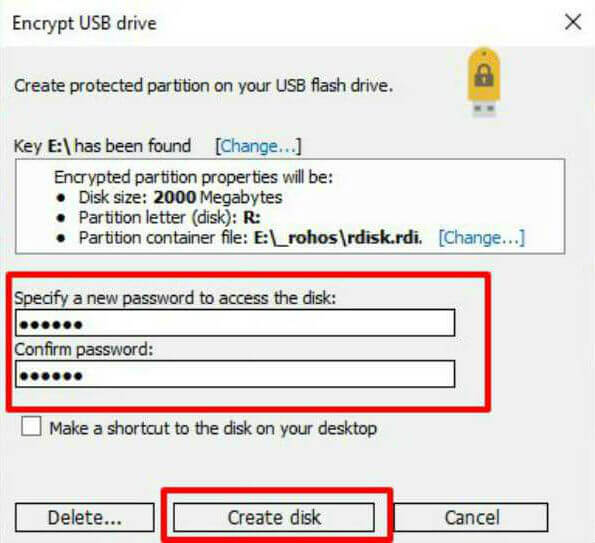
Double-clicking on the Rohos.exe file in the root folder of the pen drive will open the encrypted partition. Enter the password, and Rohos disk will mount as an additional disk so that you can access the secured data.
Also Read: How to Remove Write Protection & Format Write Protected USB Drive
Password Protect the Entire USB
There are several third-party tools available to password protect or encrypt a whole USB drive. One such tool is VeraCrypt, which is a portable app (runs directly from the pen drive). Unlike Rohos Mini Drive, Veracrypt requires administrative permissions. Download the free version of Veracrypt, which can encrypt only up to 2GB of storage space.
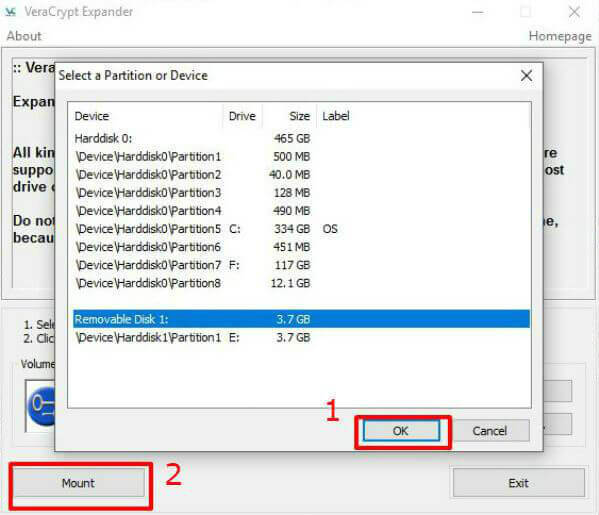
After installation of VeraCrypt on the USB drive, launch the app. A window displays all the available drives, from which the drive has to select for storing the data. Then click ‘Mount’ button which will open the ‘VeraCrypt Volume Creation wizard.’ After selecting the ‘Encrypt a non-system partition/drive’ option, click next.
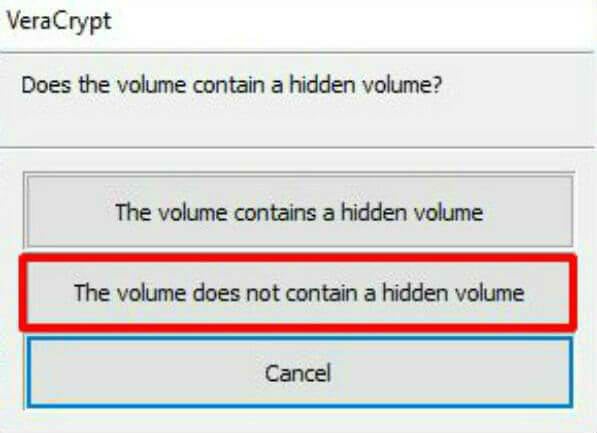
In the next wizard select whether the USB drive contains any hidden volume or not. In the following window enter the password and click ‘OK.’
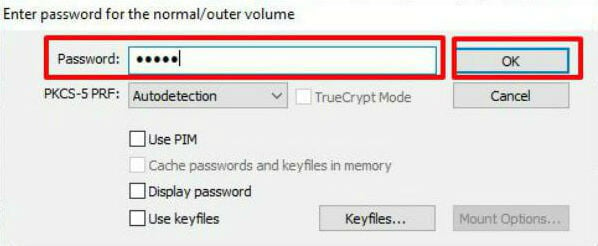
Now the mounting process will start, which would take some time according to the capacity of the USB drive. After mounting the USB, you can start using the drive to secure data.
Hardware-Based Encryption
Even though software based encrypted USB drives provide a significant level of protection to the data, they might compromise the security at times. Such security issues will resolve by using hardware-based encryption. Encrypted USB drives are worth a try if the USB data is critical to secure.
Onboard Encryption
Unlike software-based encryption, the hardware encrypted USB drives are not depending on the host device to store password and encryption key. Such type of data is storing in the disk itself. The encryption process is offloaded from the host and will be doing by the onboard processor. For that reason, there is no need for installation of any third-party software on host devices. This avoids the hustle of updating encryption software from time to time.
It is normally found that one method to hack/compromise the encrypted USB data by software encryption is altering the number of unlocking attempts. This can be achieved by an expert if the password and encryption key is stored in host device memory. The hardware encrypted USB devices are making this approach much difficult since the encryption key and password are storing on the USB itself. The encryption is always ON since the encryption is tied to the specific drive, which ensures protection that an encrypted software USB cannot provide.
Biometric Protected USB Drives
USB drives with biometric protections are also available in the consumer market nowadays. Such flash drives provide the protection based on mainly one biometric parameter: the fingerprint. This can achieve the protection of higher degree since fingerprints are unique to every person. Such protected USB drives do not come cheap and may not be advisable for day to day usage. There is an IMEEK Fingerprint Encrypted Flash Drive 32GB available from Amazon for $35.00.
The security of ordinary USB drive’s is at high risk if necessary steps are not taking. Using the freeware method to protect USB data is a convenient and affordable method that anyone can make use of. One can either choose to preserve USB contents distinctly, create encrypted USB partition or even password protect USB drive entirely according to their convenience. If the USB data is valuable, it is worth to invest in hardware-based encrypted USB drives. Such drives can eliminate the risks that software based encrypted USB drives possess.
