Ever wished if you could get captions for every audio and video you play on your PC? Well, your wish came true, at least while using Google Chrome. You can now enable live captions for any audio or video you play in Google Chrome. You might have seen such captions in YouTube videos. Now get the same with every single media you play on Google Chrome on your PC or Mac.
In this post, we’re going to show you how to enable the Google Chrome Live Captions feature and get live subtitles for all media playing.
Enable Live Captions on Google Chrome
First, make sure you’re on the latest version of Chrome whether you use Windows, macOS, Linux, Chrome OS, or any other desktop OS. Google’s new Live Captions are available on Google Chrome browser version 89 and above only.

- Visit any website that has audio or videos and play it.
- In this example, we’ll be using one of our own YouTube videos: iMessage Trick: You Can Set Out-of-Office Auto Reply on iPhone – YouTube.
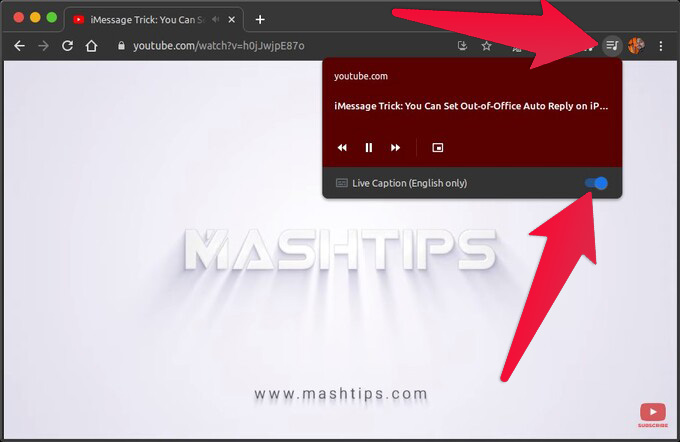
- Once the video or audio starts playing, you’ll see the media control button on the Chrome toolbar.
- Click on the media control button.
- Turn on the toggle at the bottom of the media controls titled Live Captions (English only).

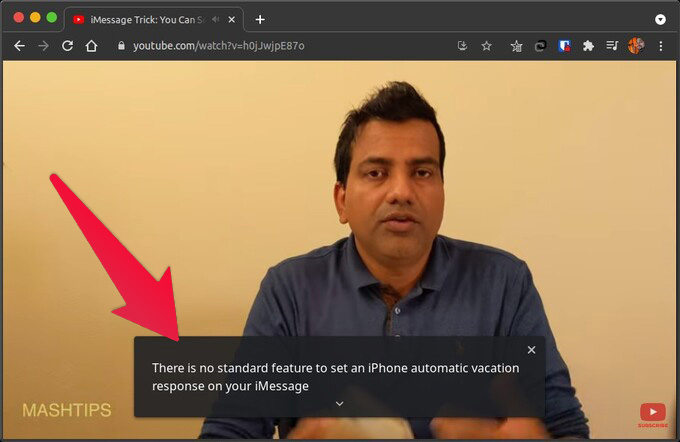
Once turned on, Chrome will download the speech recognition data. When that’s done, you’ll begin to see auto-generated English subtitles for the audio or video being played. Sometimes, you may have to reload the web page after the download for the subtitles to appear.
Related: How to Stop an App from Using Cellular Data on Android
Since the speech recognition data is downloaded, the transcripts are not required to be sent to Google servers. This is a good thing if you’re concerned about privacy.
The Live Captions window can be expanded to see more by clicking on the downward caret icon at the bottom of the window. You can even get the feature in Spotify or any other music streaming site as well. Play a podcast and turn on live captions to read the podcast content. The Chrome live captions will appear only on the respective web page.
