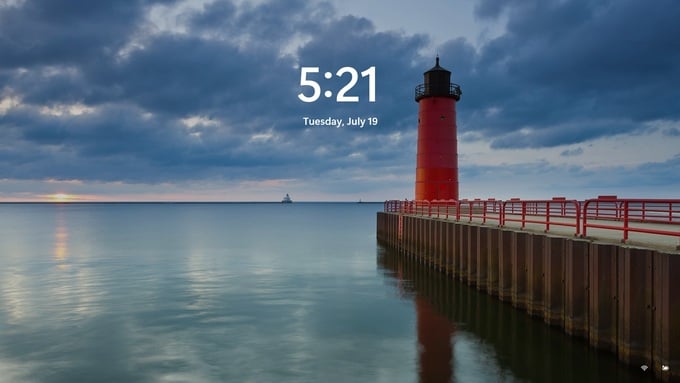
Windows 11 and Windows 10 have an annoying lock screen. You need to press a key or click to make the lock screen wallpaper disappear and start typing the passcode. If you find this annoying on the Windows lock screen, let us see how to disable the Windows 11 lock screen.
Let’s get started.
Why Should You Disable Windows 11 Lock Screen?

The experience can be fixed easily by Microsoft by allowing to type the password directly on the lock screen. But think about this, why is there a lock screen on your PC in the first place?
It’s probably useful for tablet devices, but most people don’t have Windows tablets. More people believe the earth is flat than use Windows tablets. For most people, the lock screen’s only purpose is to look beautiful with Windows Spotlight wallpapers and to add another step to logging into our PCs. And that’s why your life would be one click easier if you just disable Windows 11 lock screen.
How to Disable Windows 11 Lock Screen with Registry Edit
There are several ways to disable the Windows 11 lock screen, but none are quite official. That is to say, Windows 11 does not offer this as a feature in the Settings or anywhere else. You can disable the screen from locking once you’ve logged in, but you can’t disable the lock screen altogether. The situation is the same on Windows 10 as well.
A simple registry hack is a universal way to do this. Because the other method involves using the Group Policy Editor, which is not available for Windows 11 Home. The Home edition is what you typically get if you’ve ever bought a PC with Windows.
Editor’s Note: Making changes to the Windows registry is risky and can result in crashes and other unwanted results. It is advised that you don’t change things you’re unsure of.
- Click on the start button or press the Windows key and type regedit.
- Open Registry Editor from the search results.
- Click Yes on the User Account Control prompt that appears.
- Copy and paste the following address in the address bar or navigate it from the left column.
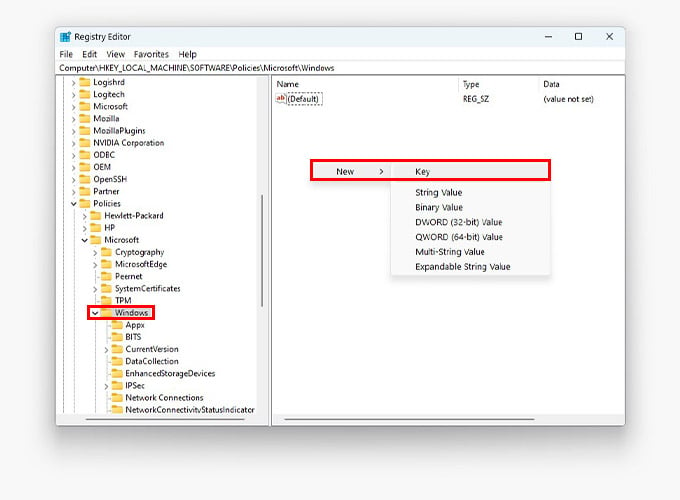
HKEY_LOCAL_MACHINE>SOFTWARE>Microsoft>Windows - With Windows selected on the left, right-click the space on the right.
- Select New > Key.
- On the left sidebar, rename the new Key as Personalization.
- Again, right-click in the space on the right, with Personalization selected on the left.
- Select New > DWORD (32-bit) Value
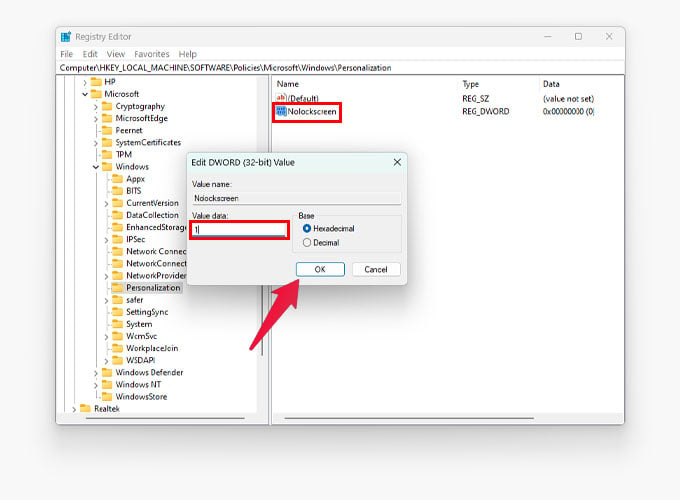
- Name it Nolockscreen.
- Double-click the newly created Nolockscreen DWORD and set its value to 1.
- Close the Registry Editor and restart your PC.
When your PC boots up again, you will have disabled the Windows 11 lock screen. Your PC should boot directly to the login screen. The lock screen also appears every time your PC is locked due to inactivity. And then you have to get rid of it before you can type in your password and get in. With this registry hack on, you can directly start typing your password when you return to your locked PC.
Related: Unlock Easy Multitasking on Windows 11 with These Window Management Tips
Remove Blurred Background on Windows Login Screen
Finally, you got rid of the useless lock screen and can now get into your computer faster. However, Windows 10 or 11 were designed to have a lock screen. There is even a dedicated settings page for customizing the Windows lock screen.
Since you’ve disabled the lock screen, you can no longer change the lock screen wallpaper. And since the login screen is the blurred lock screen wallpaper with an input field, you also can’t change the background on the login screen.

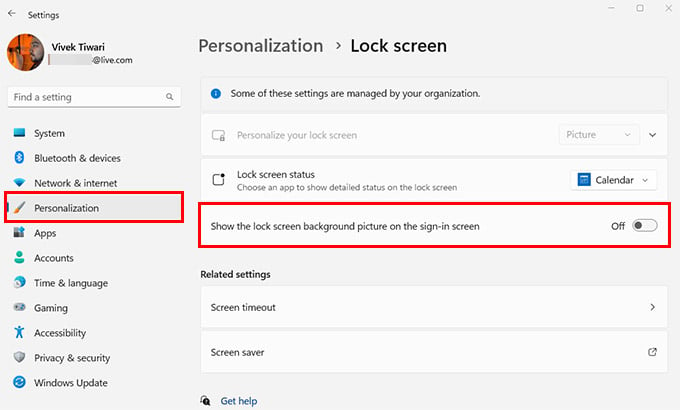
If you go to the lock screen settings page, it will say, “Some of these settings are managed by your organization.” The wallpaper controls will not be accessible. If you want, you can completely remove the blurred wallpaper from the login screen, though. For that, go to Settings > Personalization > Lock screen. Here, toggle off Show the lock screen background picture on the sign-in screen.
Once you remove the lock screen and blurred background, you will see a minimal login screen on your Windows PC. No more useless images and lock screen slideshows before unlocking your PC.


