
Windows has always been better at window management. Other than simply minimizing and splitting windows on your Windows 11 PC, there is more to window management. The new window snap-layout in Windows 11 is one such option and there are many you should explore.
Let’s find out some of the coolest window management tricks on Windows 11 to get the best out of it.
How to Minimize All Windows Except the Active Window
Ever been in a situation where your desktop is cluttered with too many open Windows? It can happen to most of us. On Windows, all you need is a bit of shaking. The feature is disabled by default. Below is how you can enable window shake to minimize all other windows feature on Windows 11 PC;
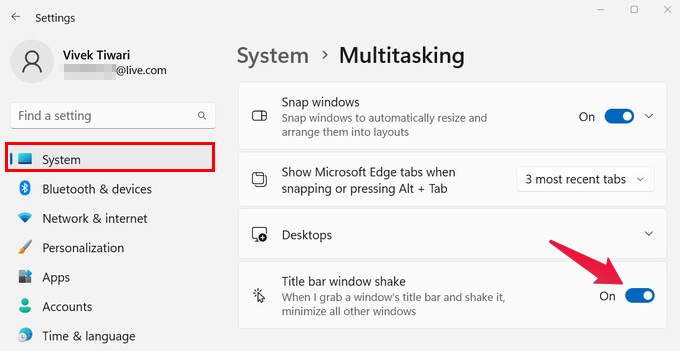
- Open the Settings app from the Start Menu or by pressing Windows+ I on the keyboard.
- From the left navigation column, select System.
- On the right, go to Multitasking.
- Turn on the toggle for the Title bar window shake.
Now, when you have many windows open in the background, click and drag the window title bar. Then, shake the window faster on the screen a couple of times. You will then see all other windows minimizing automatically except the one you just shook.
Related: How to Change Windows Folder Color Easily and Organize Them Better
Drag Window to Snap Layout
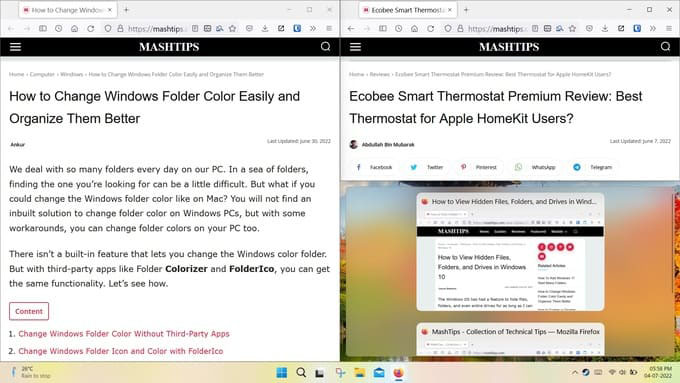
On Windows, you can drag a window to the left or right screen edges to snap it to that half of the screen. You can then pick another window to snap to the other half of the screen. The feature exists since Windows Vista and it gets an upgrade in Windows 11 as well.
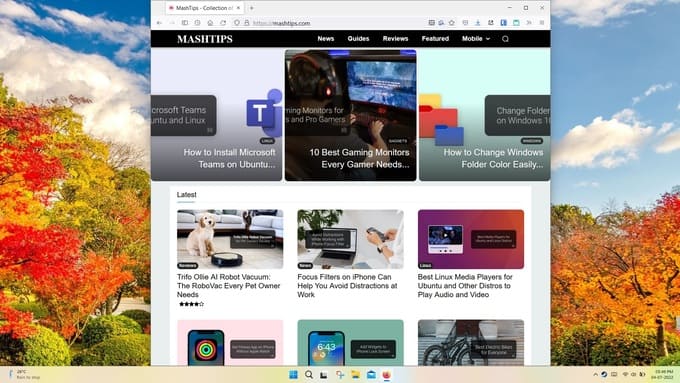
To snap two windows side by side on your PC, drag one window to the left or right edge of the screen (make sure the mouse cursor touches either edge). Once the first window snaps in, you can select the second window and they both will fit side by side.
You can also drag the window to any corner of your screen to snap the Window to that quarter of the screen.
In addition, you can drag a window to the top edge of the desktop to maximize it. Furthermore, you can resize and drag the top edge of a window to the top edge of the desktop to maximize the window vertically. You can also do this by resizing the bottom edge of the window to the bottom edge of the desktop.
Use Snap Assist Layouts for Window Snapping
While window snapping was available on previous Windows versions, Windows 11 comes with a snap assist that lets you arrange multiple windows side by side in just one click.
MacBooks already have the macOS split-screen option for using two windows side by side at the same time. The new snap assist layouts on Windows 11 are somehow similar but made much easier. Let us see how to snap windows using snap assist in Windows 11.
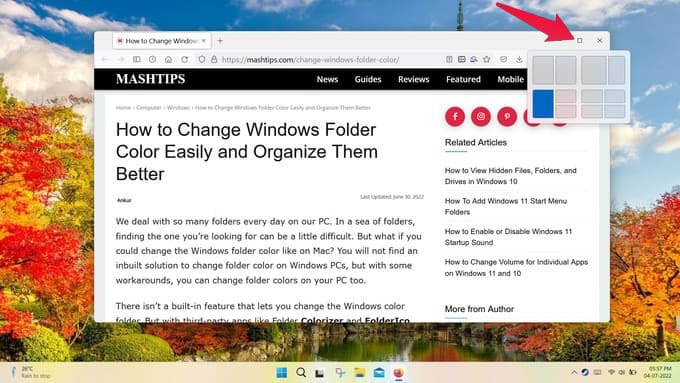
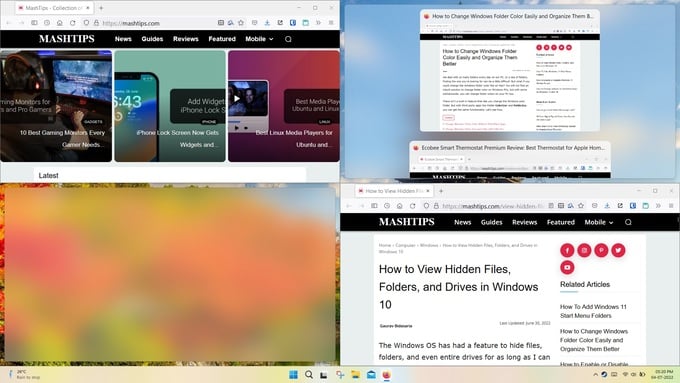
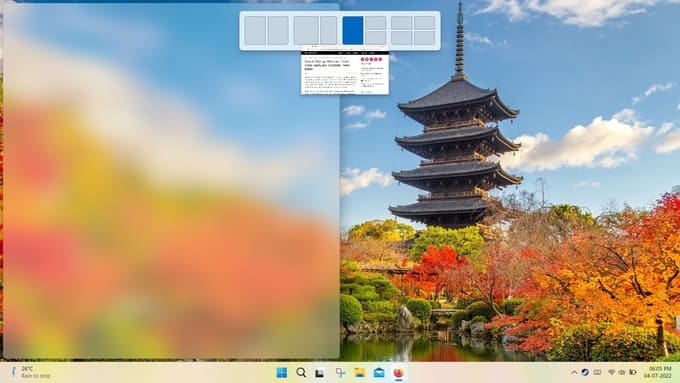
You can view the different layout options by hovering the mouse over the maximize button or restore button on a window. After that, simply select the placement for the window within the available layout options (see the above screenshot). Windows will then allow you to select other windows to fill up the remaining places in the layout, as shown below.
Another way to make use of Windows 11’s new layout feature is to drag the window to the top edge of the desktop. But don’t release it there. When you drag the window to the top edge, all the different layout options appear. Now, simply drag the window into any of the layouts to place it.
Related: Bing Search Brings Back Windows Desktop Gadgets; Here’s How to Get It
Window Snapping with Keyboard Shortcuts
A Windows 11 tips and tricks list would feel rather incomplete without some handy keyboard shortcuts. Window snapping is helpful but if you’re a power user it can seem a bit slower to set up. But if you know the right keyboard shortcuts, you can have your Windows set up just right in less than 3 seconds.
- Snap window left or right: With the Window you want to snap selected, press and hold the Windows key. Then, press either the left or the right arrow key to snap the window to that edge. So the keyboard shortcut to snap a window to the left or right half of the screen would be Windows + Left arrow or Windows + Right arrow.
- Snap window into a corner: Once you’ve snapped a window to the left or right, you can also move it to the corner. With the window selected, press Windows + Up arrow or Windows + Down arrow. After that you can just move the window into any corner using the arrow keys while keeping the Windows key pressed.
As a bonus tip, you can also maximize and minimize windows with keyboard shortcuts. To maximize a window, press Windows + Up arrow. If the window is already maximized, it will snap to the upper half of the screen instead.
To minimize a window, press the Windows Key + Down Arrow key. If the window is maximized when you do this, it will be restored first. You’ll then have to repeat the shortcut to minimize it.
You can learn more about Windows 11’s multitasking features and the different window snapping features from our guide for multitasking in Windows 11. In case you did not know, the split window is available on Android phones and even iPads.