
Just because you left your iPhone locked doesn’t mean others can’t access it. There are ways con men can get a hold of your personal information, notifications, and incoming messages without you knowing. It can be a colleague or a friend who might access your phone when you are distracted.
There is no one-step solution to this. But we have found all possible ways others can access your iPhone even when it is locked, and here are the ways to close them.
- Hide Text Messages from Lock Screen
- Disable Message Reply in iPhone Lock Screen
- Hide Notifications Content from Lock Screen
- Disable Spotlight Search from iPhone Lock Screen
- Block Siri From Making Calls While Locked
- Block Siri on iPhone Lock Screen
- Stop Others from Creating Notes While Locked
- Disable Home Controls in Control Center
- Turn Off Control Center Access While Locked
- Enable Require Attention for Face ID Unlock
- Lock Apps on Your iPhone with Face ID
- Temporarily Disable Face ID for Safety
- Set Your iPhone to Self Destruct
- Remove Unauthorized Cars from CarPlay
- Use Privacy Screen Gaurds to Safegaurd From Prying Eyes
Watch the video here:
Hide Text Messages from Lock Screen
Even if you do not want to hide all app notifications from the iPhone lock screen, there is something you cannot avoid at all – text messages. When you get text messages, they will be shown right within the lock screen notifications. Generally, this is no big deal if you just don’t care about others seeing your text messages through notifications. But, when you get OTP or verification codes in your phone as text messages, this stands in the way as a loophole.
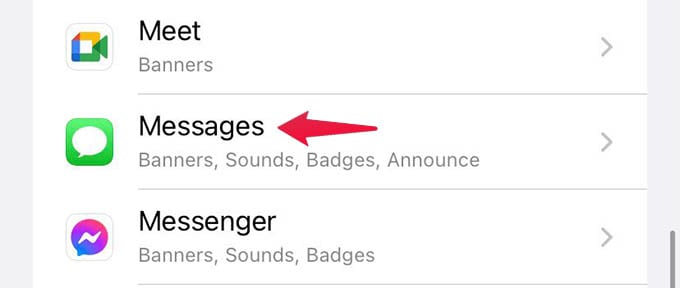
To avoid others from seeing your text messages on a locked iPhone, you should disable message previews for the iPhone Messages app. For that, open Settings > Notifications on your iPhone.
Now, scroll down and select the Messages app from the screen.
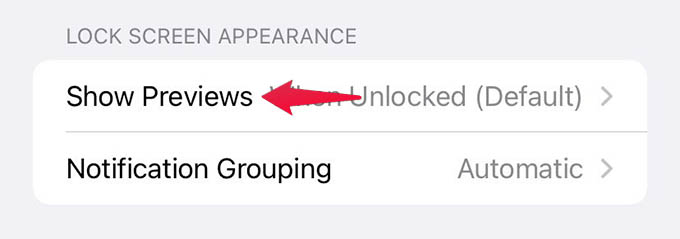
Tap Show Previews from the next.
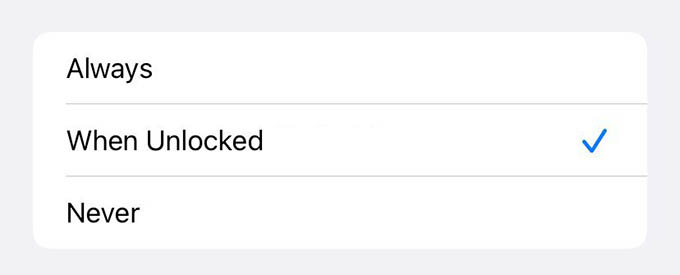
Choose “When Unlocked” to block message previews while your iPhone is locked.
Going back to the previous screen will save the setting. Now when your iPhone is locked, you don’t have to worry about others seeing the OTPs and verification codes from text messages without your knowledge. Changing this setting will not stop any incoming text message alerts from ringing.
Disable Message Reply in iPhone Lock Screen
Your messages are never protected even if your iPhone is locked. Don’t believe me? Go ahead and see a message notification from your iPhone lock screen. You could now read the message just received. Feeling worried? Now, long-press the notification, and there you see the whole chat in the locked iPhone. Well, that’s scary. People can read your whole chat history with this method without even unlocking your iPhone.
To fix this, you should disable the message replies from the lock screen. Let’s see how to do that.
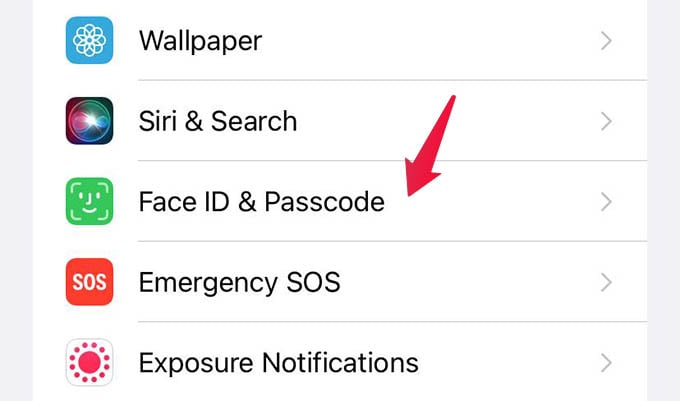
First, open iPhone Settings > Face ID & Passcode.
Go ahead by entering your lock screen passcode. Once you are there, toggle off the “Reply with Message” option.
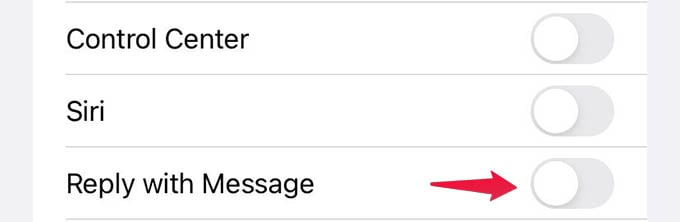
Once you disable this, everyone except you will be blocked from expanding the notifications and reading your whole chat history.
Hide Notifications Content from Lock Screen
Notifications appearing on the lock screen make it easier for you to check messages and alerts without unlocking your iPhone. The same thing can turn out to be a way for con men to go through your messages and app notifications.
You can disable it from the iPhone settings so that nobody will be able to read your notifications or messages in any way. Disabling the notification content from the lock screen will also disable all the above settings including text message previews and replying.
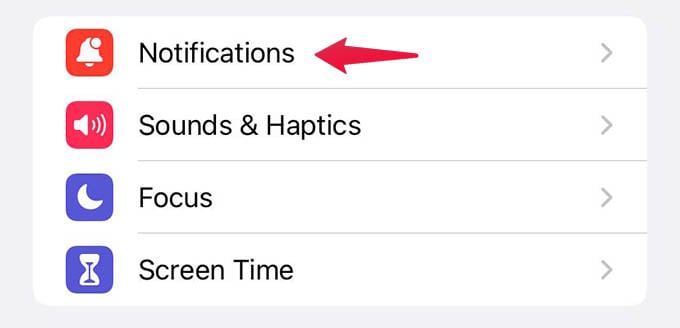
To hide notifications content from your iPhone lock screen, open the Settings app and go to Notifications settings.
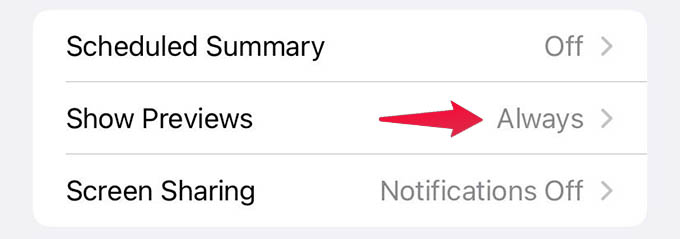
Select the “Show Previews” option.
From the next screen, choose “When Unlocked” and go back to the old screen to save the changes.
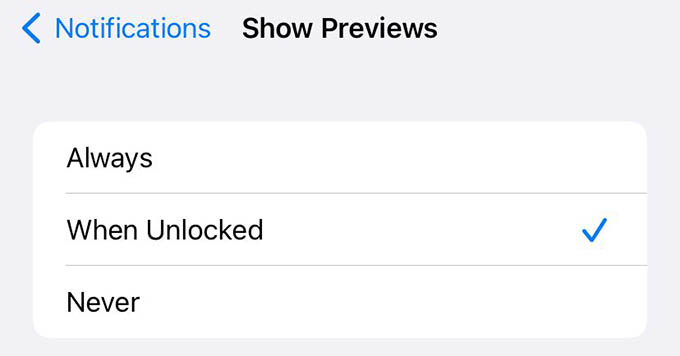
Now you will see only the app name along with the notifications while your iPhone is locked. The notification contents will be hidden unless you unlock the device. This will ensure privacy even if you leave your phone near to someone who might snoop into your notifications.
Disable Spotlight Search from iPhone Lock Screen
Did you know that your iPhone has a search function even on the lock screen? Anyone can simply swipe down on the lock screen to open the spotlight search. Then type anything and you will get the search results without even unlocking your iPhone.
Luckily, the Spotlight search does not show any personal or device data on the lock screen. Only web search results are shown on the iPhone lock screen. See our guide to know how to turn off searching from your iPhone lock screen.
Block Siri From Making Calls While Locked
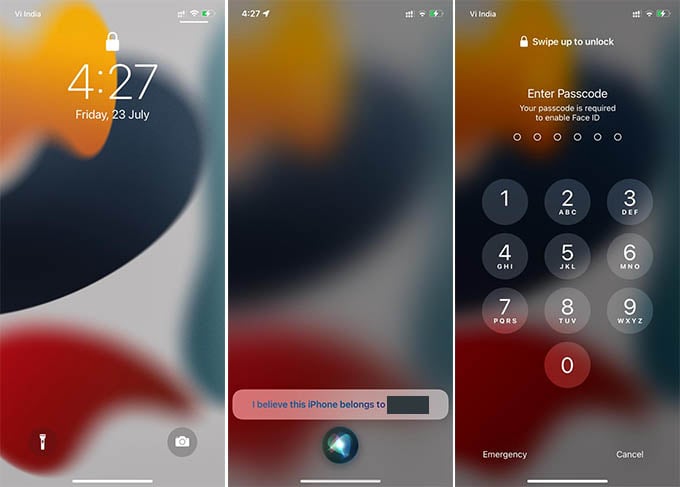
Someone who takes your iPhone can long-press the side button to trigger Siri and say “Dial [contact-name]” or “Dial [number].” Guess what happens? Siri dials the contact or the said number without even confirming the person. This means anyone can dial any number without your knowledge.
Although it is a convenient option that you can dial anyone without even unlocking iPhone, people can take advantage of it and can cause damage to your life. To prevent this, go ahead and see how you can block Siri from making calls on a locked iPhone.
Block Siri on iPhone Lock Screen
Stopping Siri from making calls is quite enough to avoid any damages others could cause you through the personal assistant. Still, there are things Siri can do while iPhone is locked. You can do things from setting alarms to search the web without even unlocking the iPhone. The best way to prevent this from happening is to disable Siri entirely on the iPhone lock screen.
To do that, open Settings and go to the Face ID & Passcode option.
Disable “Siri” from the next screen and there you go.
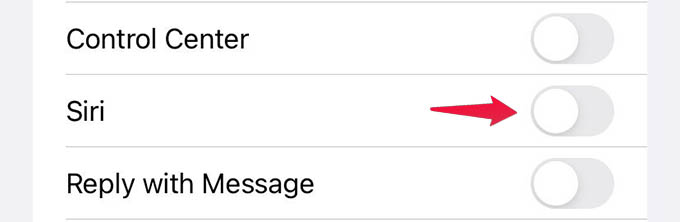
When Siri is disabled from the iPhone lock screen, the personal assistant will not popup either you long-press the side button or say “Hey Siri.”
Stop Others from Creating Notes While Locked
The option to create notes from the Control Center even on the locked iPhone is not a harmful feature to have. But it is enough for someone to ‘bomb’ you with new notes when you leave your iPhone on the desk. To prevent this from happening, you can disable note creation on your iPhone while locked. Let’s see how to do that.
Open iPhone Settings and go to Notes.
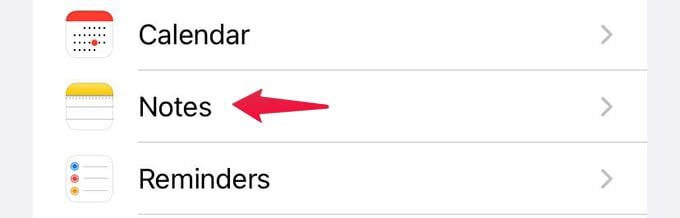
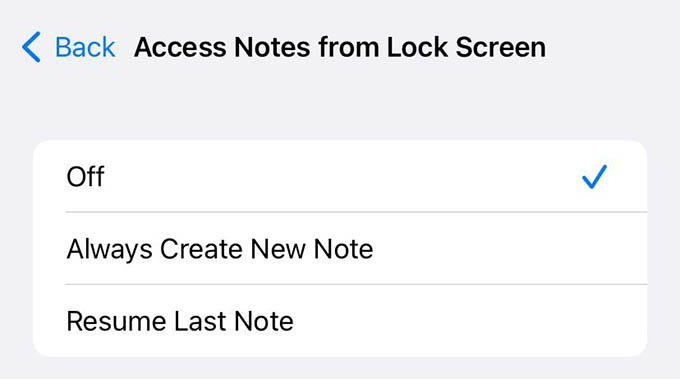
Scroll down to the bottom and select “Access Notes from Lock Screen.”

Then choose “Off” from the next screen to turn off Notes access.
Disable Home Controls in Control Center
It is understandable that you want to use the control center from the iPhone lock screen. But it’s not the same if you have HomeKit accessories and HomePod connected to your household. The Home controls appear in the Control Center. From there, you can control your household accessories with one click, and keeping them on the lock screen is not a good idea. Let’s see how to disable Home controls from the iPhone control center.
On your iPhone, head to Settings > Face ID & Passcode.
After entering the screen lock passcode, toggle off the “Home Controls” option.
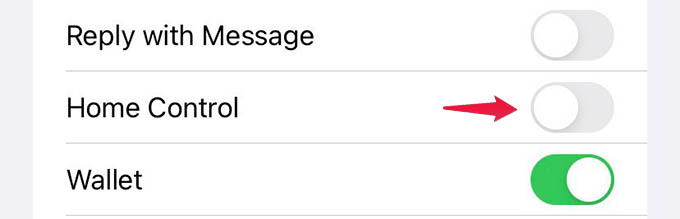
Once you turn this option off, you will not see the buttons to control your HomeKit accessories when the iPhone is locked. You will need to unlock your iPhone first in order to get the smart home controls on the iPhone control center.
Turn Off Control Center Access While Locked
Control Center is the one-stop go-to place from where you can switch on or off cellular data, WiFi, Bluetooth, timer, notes, and much more. By default, you can access the iPhone control center from the lock screen.
If you want to entirely close all the doors to access the quick options like note creating, you can simply turn off the control center access from the lock screen using the Settings. Check out our guide to turn off control center access on your iPhone.
Enable Require Attention for Face ID Unlock
If your iPhone has a Face ID, someone who tries to forcefully open your iPhone can do it easily by holding your iPhone against your face. By default, your iPhone will unlock when it detects your face. It won’t know if it is really you or someone trying to steal your data. To avoid any such incidents, you should enable “Require Attention for Face ID” on your iPhone.
While this is enabled, your iPhone will check for your eyeball movements. It will then unlock only if it confirms that you are looking at the phone itself. In any case of someone forcing you to unlock your iPhone, simply look away and it will not unlock. Let’s see how to switch it on.
To do this, open Settings and head to the Face ID & Passcode option.
Toggle on the “Require Attention for Face ID” option.
Lock Apps on Your iPhone with Face ID
Even if you secure your iPhone with a Face ID and passcode, there are chances you forget to lock your phone before leaving the table. Even if you have auto-lock enabled, somebody who gets hold off of your iPhone before auto-lock can still go through your photos and apps.
To prevent others from looking through the apps, pt a screen lock for them as well. You can set a Face ID locking with a passcode in many apps like WhatsApp, Telegram, Signal, Google Drive, and much more. For unsupported apps, you can use the Screen Time trick to lock them with a passcode on iPhone.
Temporarily Disable Face ID for Safety
It can be really annoying when your partner or a friend tries to unlock your iPhone by putting it against your face. With Face ID, there is a higher chance they can unlock the iPhone by doing so. To prevent this, you should discretely disable Face ID on your iPhone.
Instead of turning off Face ID, which might take minutes, there is a quick way to temporarily disable Face ID unlocking your iPhone.
To do that, press and hold the side button and any volume button until the power off menu appears. Now tap cancel and your iPhone will ask for a passcode to unlock. The face ID will no longer work until you enter the passcode.
Set Your iPhone to Self Destruct
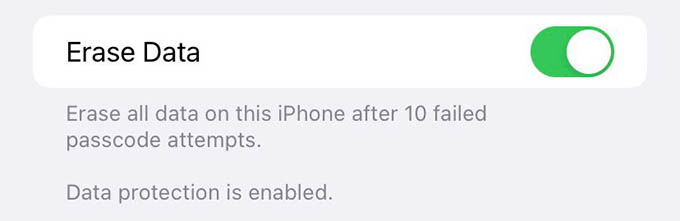
Did you know that your iPhone has a self-destruct mode when the passcode is entered wrong? If you think that somebody might access your iPhone after trying a few passcodes, you can set it to self-destruct once anyone attempts to unlock iPhone more than 10 times. When this is enabled, your iPhone will clear all the data and reset itself when someone enters the wrong passcode 11th time.
To enable this, open iPhone Settings > Face ID & Passcode.
On the next screen, scroll down to the bottom and enable “Erase Data.”
Remove Unauthorized Cars from CarPlay
With the Apple CarPlay, you can get the messages and apps from the iPhone on the car multimedia screen while driving. Once you accept and approve a car, it will automatically connect and mirrors the notification on your car itself. If somebody has already done this to your iPhone, or your iPhone has their car authorized, they can get the app data and messages just by plugging the cable in.
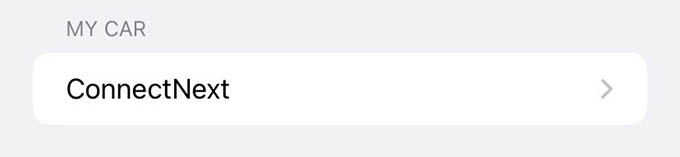
If you do a crosscheck in the iPhone settings, you can find any connected cars list. You can simply remove them or else, people can connect your iPhone to their car and access your messages without even unlocking it. Here is how to do that.
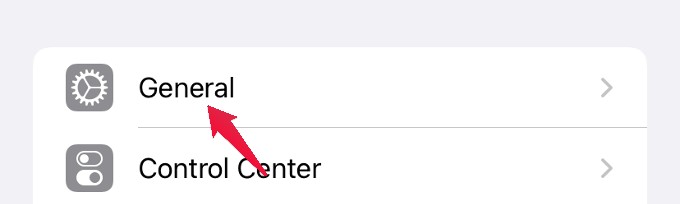
Open iPhone Settings > General.
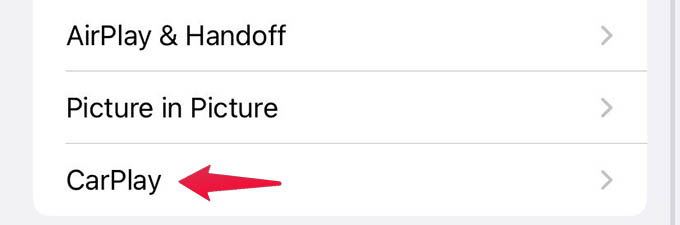
Tap on CarPlay.
If you see multiple cars on the list, tap the ones you want to remove.
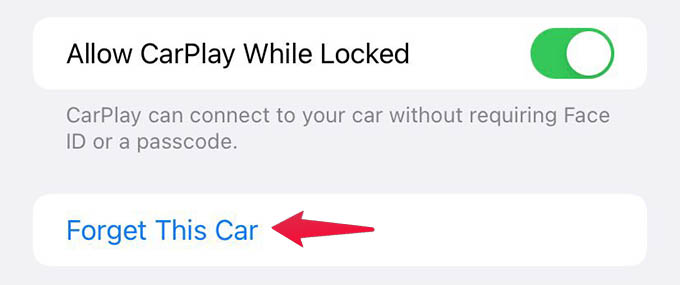
Select the “Forget This Car” option from the next screen and confirm removing.
Use Privacy Screen Gaurds to Safegaurd From Prying Eyes
No matter how much you make your iPhone secure, there are people who peep onto your screen when you are texting someone important or going through some sensitive content. Privacy screen protectors are the best answer to this.
These privacy screen guards will ensure no one other than you sees anything on your iPhone screen. This blocks any vision to the screen when looked at from the sides, which gives you extra protection. Check out some of the best privacy screen protectors for your iPhone.
![[2 Pack] Privacy Screen Protector for iPhone 11/XR, YMHML Tempered Glass Anti-Spy Bubble...](https://mashtips.com/wp-content/plugins/aawp/public/image.php?url=YUhSMGNITTZMeTl0TG0xbFpHbGhMV0Z0WVhwdmJpNWpiMjB2YVcxaFoyVnpMMGt2TkRGWmJWVXdjbVp6TFV3dWFuQm58MTc4NDExOTM0Mg=)


These are some minor things you may not notice on your iPhone but can be harmful to your privacy. Most of these are features built for the sake of convenience, but the same becomes a tool against you. Make sure you understand the usage and possibility of being tricked by con-men before tweaking with any settings we recommended.