
If you’re old enough, you’ll remember the days of Windows XP and Windows 7 where the system would noticeably slow down with time, and a quick format would fix things, but only for some time. These days, at least if you’re using SSDs, this isn’t much of a problem. But Chrome, which is pretty much like an operating system for the web, can still feel sluggish. There are a few ways to speed up and make Chrome faster, too.
Google Chrome, like most modern browsers, is a lot more than a simple web browser. It acts as a platform for extensions and web apps to be built on top of as well. These apps, websites, and chrome itself, take resources on your system. As a result, over time, things can start to feel slightly slow.
Update to the Latest Version
One of the first things you can do to speed up Chrome might be to make sure you’re on the latest version. Chrome regularly updates itself and the updates are installed automatically. When you restart the browser, you’re already brought to the latest version. As a result, most users never realize when Chrome has been updated. There is a possibility that a new update may have caused some issues, resulting in a slowing down.
By the same token, if Google has released a fix, it will also be automatically downloaded and installed. However, you can still manually check to make sure you are on the latest version of Chrome. Especially if you’ve had Chrome open for a long time, and it hasn’t had time to update.
- To do this, open Chrome and click on the three-dot menu button.
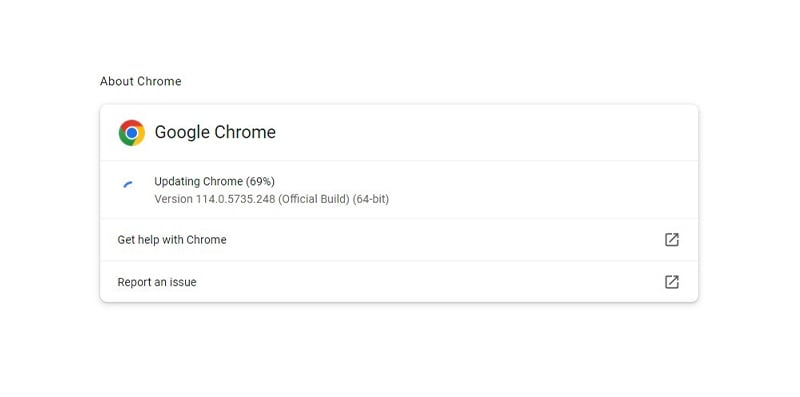
- Go to Help > About Google Chrome.
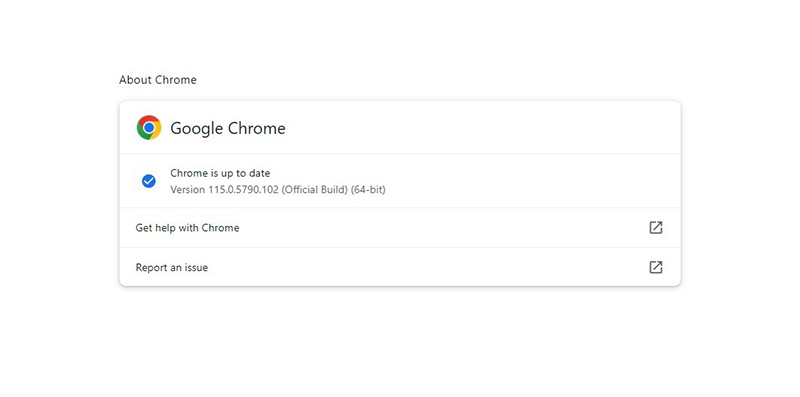
If you are not on the latest version, you will see Chrome immediately begin to update. If you’re already on the latest version, you will see Chrome is up to date along with the version number.
Check for Malware
Since Chrome commands such a huge share of the browser market, most malware, spyware, and adware target Chrome. If you’re not careful, you may end up installing unwanted extensions and toolbars that change the way Chrome looks and behaves.
So before you go digging into Chrome, make sure your slowdown is not due to a malware. You can use any malware removal tool of your choice. If you don’t have an antivirus or malware scanner, Malware Bytes is my personal favorite. Now, this is not paid promotion. There have been a few times when I’ve had a malware that nothing else could detect. Malware Bytes has always gotten rid of it for me. More importantly, it does so for free. Typically, I also uninstall Malware Bytes right after, ungrateful me.
Preload Pages to Make Chrome Faster
Google has been testing a feature on Chrome that allows the browser to predict pages you might visit before you visit them. Of course, this requires tracking your browsing habits, which is probably why the feature hasn’t been enabled by default. By predicting the links you may visit, Chrome can load them in the background, so that if and when you do visit the page, it only has to partially load the page.
Needless to say, if you feel the page loading times have taken a hit, this feature may show you a significant improvement.
- To enable, go to click on the three-dot menu button and click on Settings.
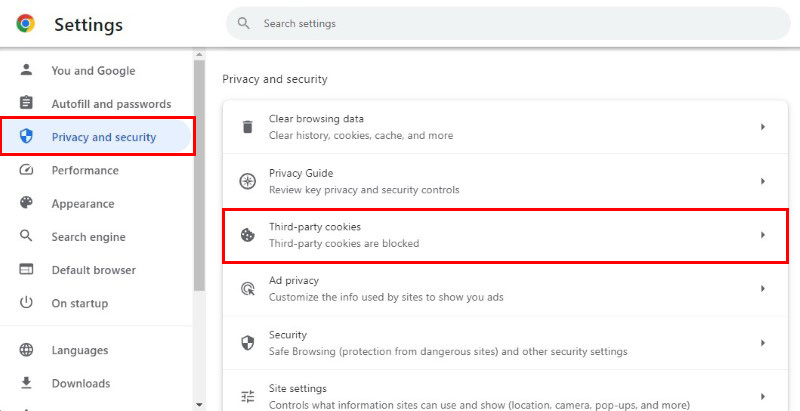
- Navigate to Privacy and security from the left column.
- On the right, go to Third-party cookies > Preload pages.
- Select either Standard preload or Extended preload.
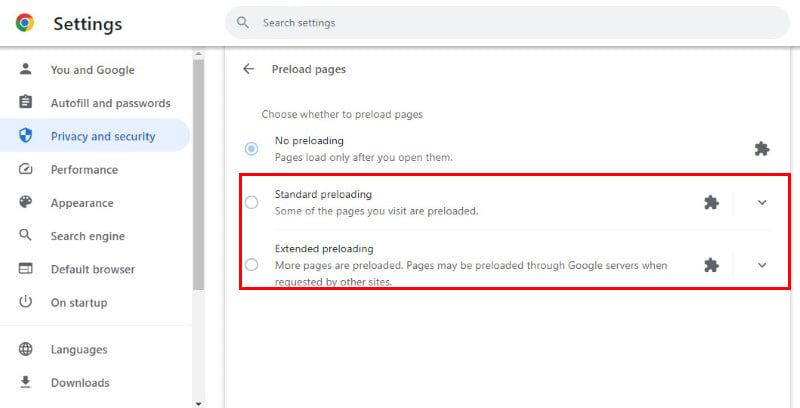
This feature uses cookies but can definitely make chrome faster, or at least, feel faster.
Disable or Remove Unused Extensions
One of the best features of modern browsers is they allow extensions or add-ons that add features to it. This allows everyone who can code to participate in making the browser better for others. However, there are so many useful extensions on Chrome, and they sync to your Google account as well.
As a result, over time, you’re bound to accumulate extensions, many of which you may not even need anymore. For example, there may have been a time when you were in school, and used a lot of extensions of a certain type. Two years later, you may still have them installed, even though you don’t need them anymore.
You can easily view all your extensions by going to chrome://extensions. Alternatively, you can click on the three-dot menu button and go to Extensions > Manage extensions.
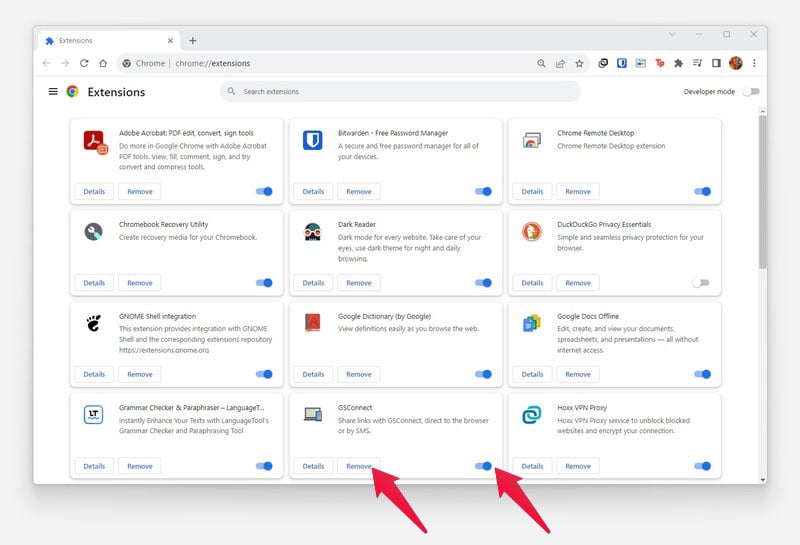
To disable an extension, toggle it off, or click on the Remove button to uninstall it. Every active Chrome extension takes up valuable resources on your hardware. If you have too many extensions, that might be very likely slowing down Chrome as well as your PC in general. Removing unwanted extensions is one of the best ways to make Chrome faster.
Turn on Memory Saver
If you work with a lot of open tabs and refuse to close them, of course, that has a big impact on your device’s memory consumption. Chrome has already become infamous for being a memory hog. It’s good practice to close tabs you don’t need. But if you absolutely must have 29 open tabs, there’s a Chrome feature you can use.
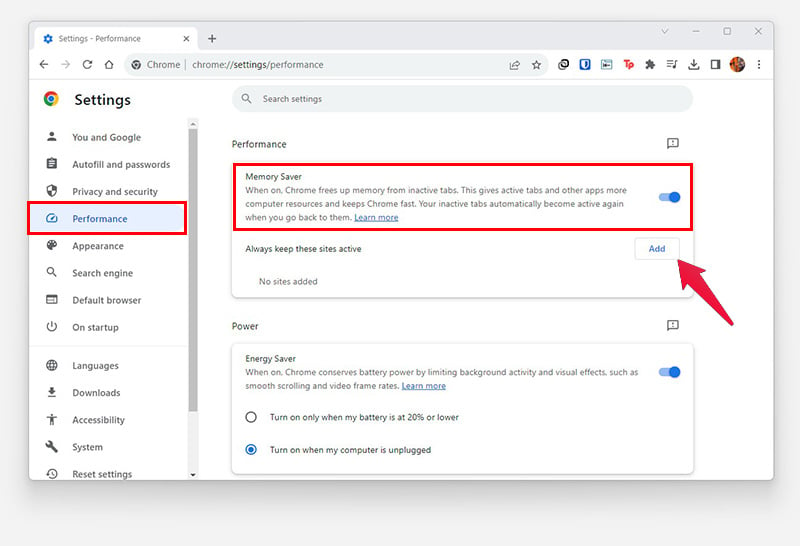
Latest versions of Chrome include a memory saver option. This is basically a clone of Microsoft Edge’s tab freezing feature. As per the official description, “When on, Chrome frees up memory from inactive tabs. This gives active tabs and other apps more computer resources and keeps Chrome fast. Your inactive tabs automatically become active again when you go back to them.”
- Click on the three-dot menu button and click Settings.
- From the left column, select Performance.
- Alternatively, type
chrome://settings/performancein the address bar and hit Enter. - Turn on the toggle next to Memory Saver.
If there are certain websites that you want to keep in memory all the time, you can add them here by clicking on the Add button.
Turn Off Energy Saver
Chrome has an Energy Saver mode as well and unlike Memory Saver, this one is turned on by default. More importantly, it turns on by default when your laptop in unplugged. This isn’t a problem on desktop PCs. However, if you’re on a laptop and not connected to power, Chrome’s Energy Saver mode will cut down on the smooth scrolling animations and lower the video frame rates.
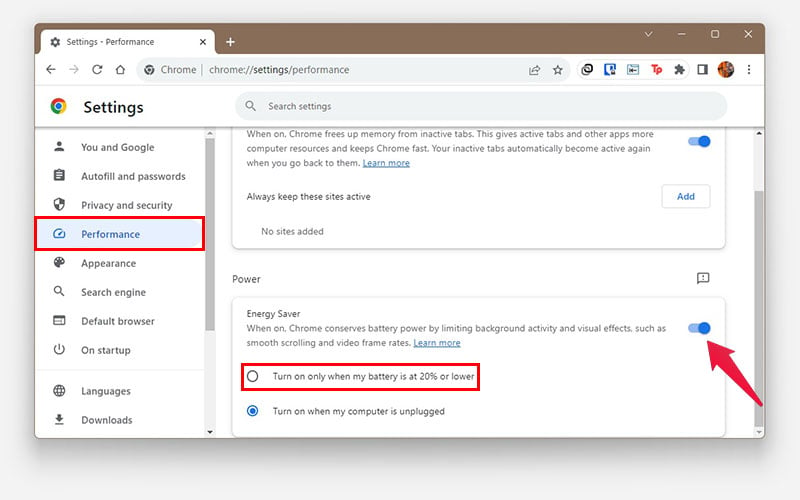
If you’re experiencing lag when unplugged, this might be to blame. Turning it off, obviously, will drain your laptop’s battery faster. So, there’s a give and take involved. If you are okay with it, you can find the option in Settings > Performance. Toggle off Energy Saver here or choose the option Turn on only when my battery is 20% or lower.
Clear Browsing Data
As you use your browser to visit different websites, log in to them, etc., your browser collects and keeps some data about it. Some of it is noticeably useful, such as you being able to see your browsing history. Some of it, such as cache and cookies, are used to make your browsing experience better.
If you have limited memory, however, you might want to clean up the cache and cookies, especially, from time to time. This data is stored on your RAM for easy and fast access, and can slow down your system as well as Chrome. Moreover, sometimes, the stored cache or cookies may get corrupted due to any reasons. This will cause certain websites to not load properly.
Clearing your browsing history, more importantly, the cache and cookies can help make Chrome faster in such cases.
- Point your browser to
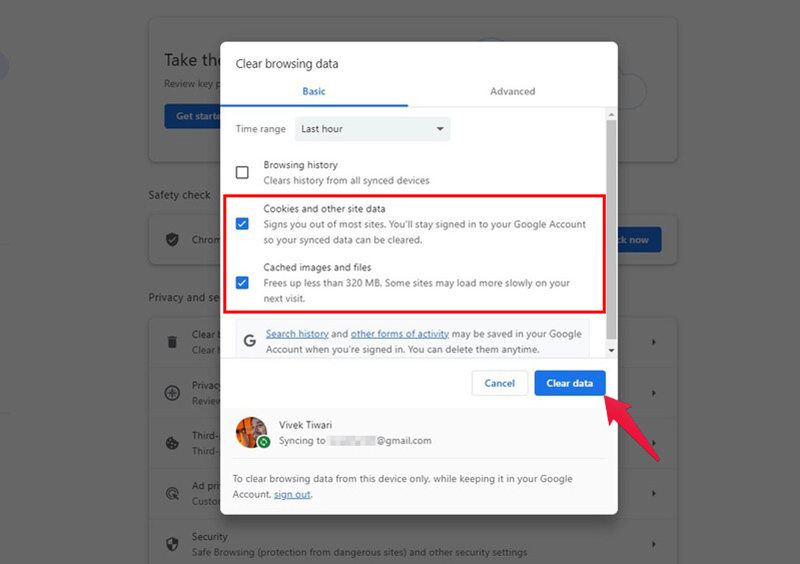
chrome://settings/privacyor click on the menu button and navigate to Settings > Privacy and security. - Click on Clear browsing data.
- From the drop-down menu at the top, select All time.
- Select Cookies and other site data and Cached images and files. You can also select Browsing history if you want.
- Click Clear data.
Enable Hardware Acceleration
Modern CPUs have a built-in graphics processing unit as well. It’s not as powerful as a dedicated GPU, but it’s just enough to get basic things done, such as rendering animations, handling video playback, etc. This wasn’t the case in the beginning, until AMD started doing this with their processors.
However, that will, of course, drain your battery faster. Chrome has a built-in toggle to enable it to use your GPU for certain tasks. This is called hardware acceleration and many apps today use it. When enabled, Chrome will use your GPU to handle rendering graphics, animations, video playback, etc. Thus, there is less load on your CPU and it performs better. Not only that, your GPU is much better at handling these tasks because it was designed for this. This, of course, works even better if you happen to have a dedicated GPU.
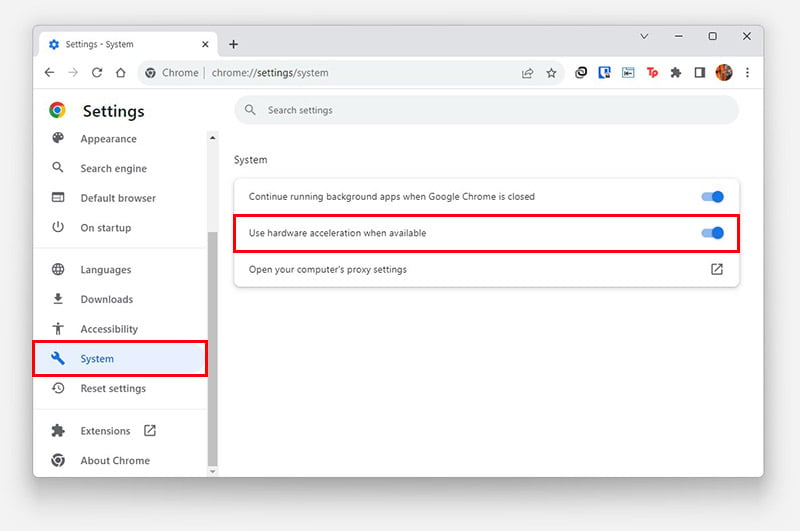
- To enable hardware acceleration, go to Settings > System or type
chrome://settings/systemin the address bar and press Enter. - On the right, toggle on Use hardware acceleration when available.
Enable GPU Rasterization
Consider this pretty much an extension to the hardware acceleration above. Rasterization is the process of converting vector graphics into viewable pixels on your screen. This includes HTML elements, CSS, SVGs, etc. And again, by taking this load off the CPU and putting it on the GPU, you will see better performance. The GPU is made specifically for these tasks, after all. Chrome uses the CPU for rasterization by default, though, even if you turn on hardware acceleration.
Google has been experimenting with GPU Rasterization, however. We may soon see it enabled by default on future stable versions of Chrome. For now, it’s hidden as a Chrome flag. But before you go running to enable it, keep in mind that this is an experimental feature. It may lead to crashes, although, it rarely ever does unless you’re on Chrome Canary or Dev versions.
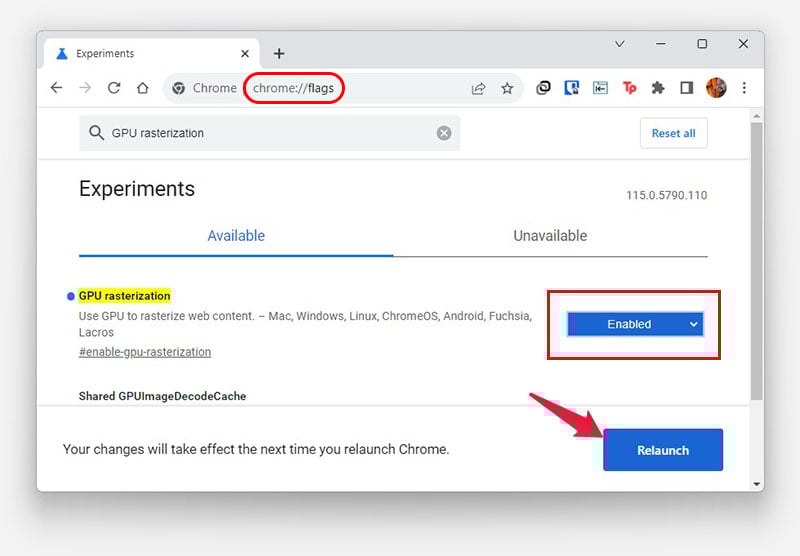
- Type
chrome://flagsin the address bar and press Enter. - In the search bar, type
GPU Rasterization. - Click the drop-down next to GPU Rasterization on the search result.
- Select Enabled.
- Click on the Relaunch button that appears at the bottom.
Last Resort: Reset Chrome
If you’ve tried all of the above and then some and Chrome is still struggling, you may want to try resetting it. This will remove every single bit of your data, extensions, configurations, etc. So, Chrome will revert to the way it was when you first installed it.
Before you sign in to your Chrome account and sync your data, though, you should try using it a little. If Chrome works fine like this, and starts to suffer once your data is synced, you know the problem probably in one of your extensions.
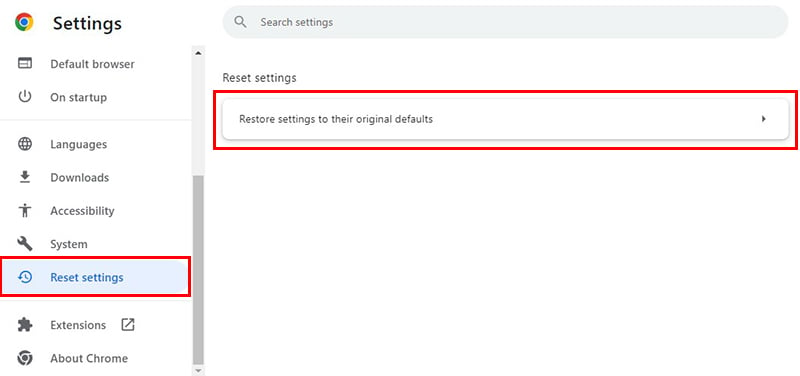
- To reset Chrome, click on the three-dot menu button.
- Select Settings.
- Navigate to Reset settings from the left column.
- Click on Restore settings to their original defaults.
- Click Reset settings on the pop-up that appears.
If you’re experiencing problems with Chrome’s speed, these solutions above should help you with it. Even if you aren’t some of these would actually help speed up Chrome even more.
Implementing the tips and techniques mentioned above, you can bid farewell to sluggish browsing and welcome a faster, smoother Chrome performance on your desktop. From optimizing extensions and clearing clutter to fine-tuning settings, these solutions empower you to take control of your browsing speed. Embrace these strategies and unlock the true potential of your web experience as you navigate the online realm with newfound speed and agility.