
Windows 11 is here and you can even upgrade your ineligible PC to Windows 11 for free. If you’re already on Windows 11, you should change these Windows 11 privacy settings right now. While you’re at it, you might also want to block ads on Windows 11.
Let’s begin.
Sign in With Local Account
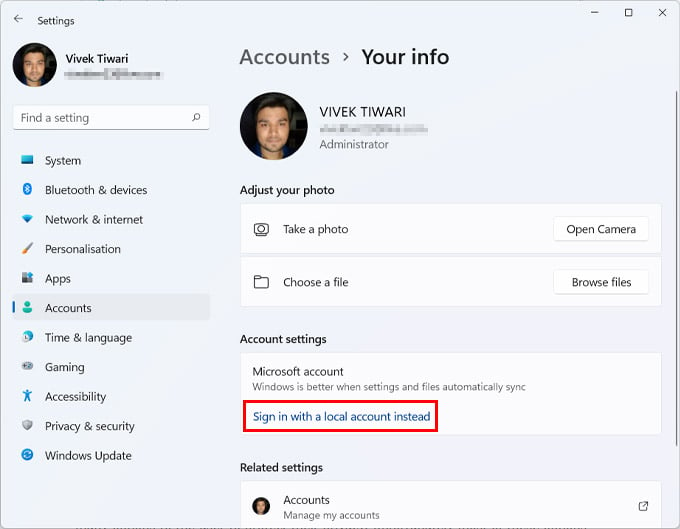
If you really don’t want to send Microsoft any personal data, you might as well sign in with a local account on Windows 11 instead. Windows 11 does not allow you to set up without a Microsoft account. You can go ahead and check our complete guide to set up and use Windows 11 without Microsoft account here.
Turn Off Suggestion Notifications
Notifications are already a big problem on our smartphones. There are just too many of them. Now with more and more apps on your Windows PC that want to send you notifications, it will be getting messy if it hasn’t already. Windows itself adds to these by sending “suggestions” and “tips” notifications. These are basically Microsoft ads, urging the user to use more Microsoft products on Windows.
Fortunately, the company also provides an easy way to block ads disguised as suggestions in Windows 11 within the Settings.
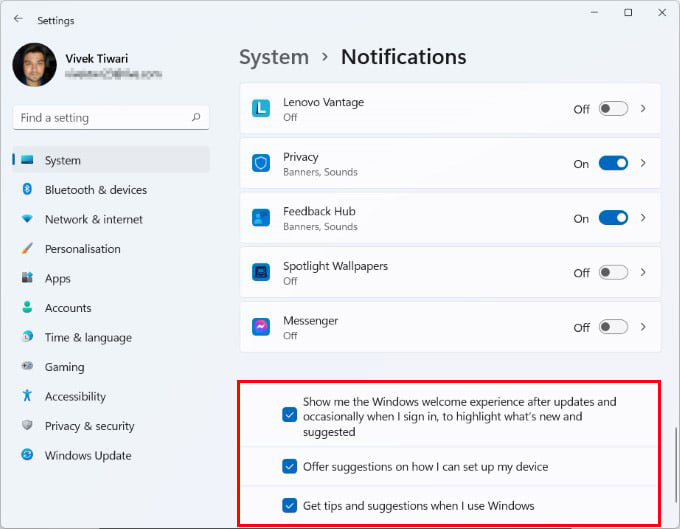
- Press Windows + I on the keyboard to open the Settings app.
- With System selected on the left, click on Notifications section on the right.
- Scroll down to the bottom of your app list and uncheck all three options:
- Show me the Windows welcome experience after updates and occasionally when I sign in, to highlight what’s new and suggested.
- Offer suggestions on how I can set up my device.
- Get tips and suggestions when I use Windows.
Disable Personalized Ads in Windows 11
Whether you’re using iPhone, Android, macOS, or Windows, personalized ads are a way for platform companies to make some money. Windows also serve you personalized ads using your search history and browsing history. These ads can appear in your search results, on the web, or as “suggestions”.
You can block personalized ads on Windows 11 from Windows 11 privacy settings.
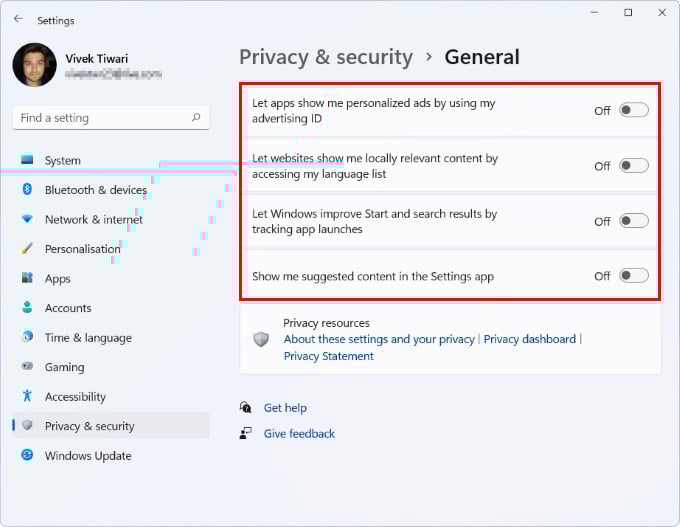
- Launch the Settings app by pressing Windows + I on the keyboard.
- Select Privacy & security on the left navigation column.
- Under Windows permissions, head to the General section.
- Toggle off all the four options here:
- Let apps show me personalized ads by using my advertising ID.
- Let apps show me locally relevant content by accessing my language list.
- Let Windows improve Start and search results by tracking app launches.
- Show me suggested content in the Settings app.
Related: 11 Things to Do After Installing Windows 11 on Your PC
Remove Recommended Start Menu Items
The new Windows 11 Start menu only has two features. It lets you pin your favorite apps and folders on the Start menu, and it shows recommendations based on recently added apps and recently opened files and folders. Windows 11 tracks your movements to show these recommendations, which you might not want. You can turn them off in the Settings app on your PC.
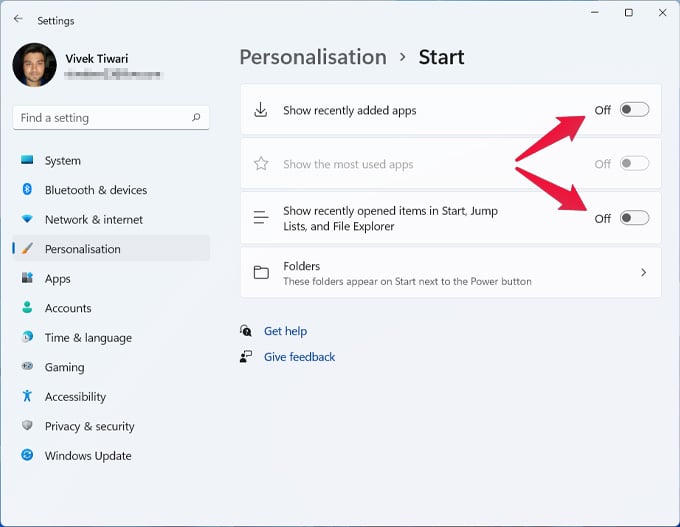
- Open the Settings app by pressing Windows + I on the keyboard.
- Navigate to Personalization from the left column.
- Scroll down on the right until you find Start, and click on it.
- Turn off toggles for these two options:
- Show recently added apps
- Show recently opened items in Start, Jump Lists, and File Explorer
Turning off the second option will also turn off suggestions from the Quick Access section in File Explorer, as well as the right-click context menu when you click on the File Explorer icon in the taskbar.
Disable Clipboard syncing
Clipboard syncing was introduced with a bunch of other continuity features on Windows 10. If you have more than one Windows device on the same Microsoft account, you can sync your clipboard across these PCs. By default, it is turned off but if you had it on when using Windows 10, it will stay on in Windows 11.
The way the clipboard syncs data is by sending that data to Microsoft’s servers. This can be concerning if you’re dealing with sensitive data. Anything you copy goes to Microsoft’s servers. If that concerns you, it is easy to turn off clipboard syncing.

- Launch the Settings app. You can press Windows + I on the keyboard to do that.
- Click System on the left column if it isn’t already selected.
- On the right, scroll down to find Clipboard and click on it.
- Toggle off Sync across your devices.
If you do enjoy the convenience but would still like some privacy, you can simply select Manually sync text that I copy instead of turning the feature off altogether. On the other hand, if you would like even more privacy, you can go ahead and turn off Clipboard history as well. Your clipboard history stays on your device, however, so keep that in mind.
Turn Off Diagnostics Feedback
When installing Windows from scratch, the setup offers you the option to turn certain settings on or off. Diagnostics data is one of those options. But if you accidentally turned it on or have changed your mind since then, you can turn it off in Windows 11 privacy settings. If the diagnostic feedback is enabled, your PC will send your usage behavior and history to the Microsoft server “to serve you the best experience.” Let’s see how to disable it.
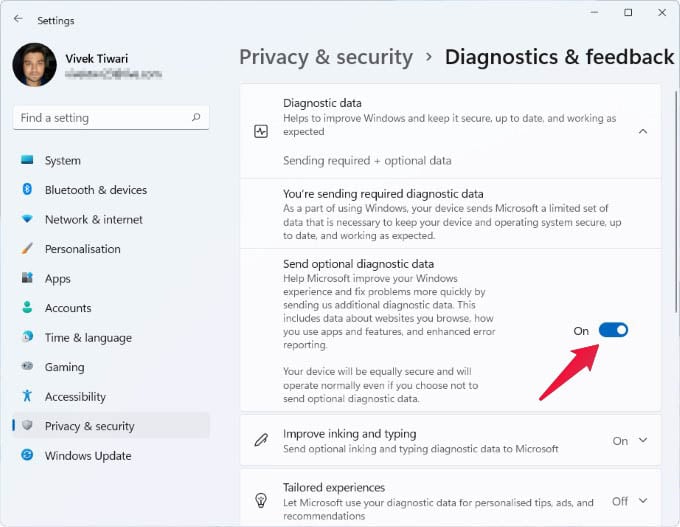
- Launch the Settings app and head over to Privacy & security on the left column.
- Select Diagnostics & feedback from the right.
- Click on Diagnostic data to expand it.
- Click on the toggle to turn it off.
Related: Taskbar Height Too Much in Windows 11? Change Taskbar Size in Windows 11 PC with This Trick
Delete Diagnostics Data
If you had your diagnostics data sharing on for a while, Microsoft probably has quite a lot of data already on their servers. To be fair, diagnostics data is anonymous and simply contains information about your system. But if you are privacy-conscious, you might want to delete the data Microsoft already has as well.
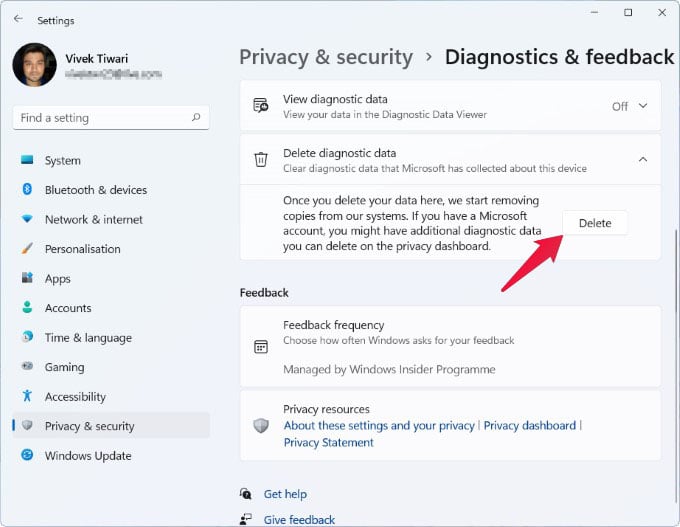
All you have to do is click on the Delete button under Delete diagnostic data. This is located on the same page where you turn off the Diagnostic data toggle (Settings > Privacy & security > Diagnostics & feedback).
Disable Shared Experiences
The shared experiences in Windows 11 let you continue working on the apps on other PCs you already signed in with. This syncs your app activity between your PCs through your Microsoft account. You won’t find the option to turn this off in Windows 11 privacy settings, because it’s hidden in the Apps section.

- Open the Settings app.
- From the left column, click Apps.
- Next, select Apps & features on the right-hand side.
- Click on the Shared across devices box to expand it.
- Select Off.
Disable And Delete Activity History
Microsoft announced a Timeline feature for Windows 10 a while ago. They dropped it and is not a part of Windows 11 anymore. The Timeline, basically, kept a record of your recent activities, kind of like browser history but for your system. The idea was that you could click on any item on your timeline, and it would take you back not only to your recently used app but also to the file you were working on.
Of course, this also requires sending all that data to Microsoft’s servers. The timeline might be dead, but Microsoft has kept activity history on Windows 11, and it is turned on by default. Windows 11 privacy settings do offer an option to turn it off and delete collected data.
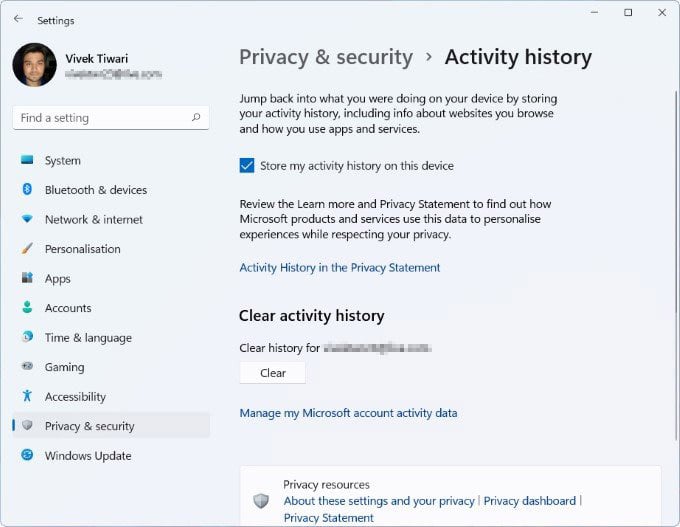
- Open the Settings app from the Start menu or by pressing Windows + I on the keyboard.
- Select Privacy & security on the left navigation column.
- Select Activity history on the right under Windows permissions.
- Uncheck Store my activity history on this device
- Towards the bottom, click on the Clear button under Clear history for <Your account>.
Microsoft is now more focused on privacy-related features than it did with Windows 10. The Windows 11 OS does offer many options to the user to protect their privacy. Unfortunately, most of these options to share data with Microsoft are turned on by default. At least, now you know where to find these Windows 11 privacy settings, as well as block Windows ads.
One of the major changes happened in Windows 11 from Windows 10 is privacy, finally Microsoft is more concerned about privacy, One of the best feature that I love in Windows is Windows hello! Hope it will continue!
Microsoft is not more concerned about privacy Techy Jeev. They’re only concerned about collecting more of your data and selling it to advertisers who then spam you with ads. This isn’t more privacy. It’s less
Google
The time to read or go to the material or internet sites we have linked to below.
How do I do these things from a batch file (registry edits, etc.)? I set up dozens of computers; I can’t be doing all these things manually on each one.
Great nuggets of knowledge here .. but since MS decided to do this update w/o me and subsequently do my first W11 update; some of the settings have changed. An update here is needed 😉