
Google Maps is the preferred navigation app, even for iOS users. It consistently adds new features to enhance user experience, such as live traffic updates, access to historical street images and more. To further improve your experience, create a personalized map using Google Maps. In this article, let’s see how to create a custom map in Google Maps.
Table of contents
How to Create Custom Map in Google Maps
A custom map doesn’t mean you can create a new location or a landscape and add that to Google Maps. However, you can add multiple pins, routes, or locations to plan your journey more effectively.
At the time of writing, you can create a custom map only from a computer, as the Google Maps app doesn’t have that option. However, you can view the custom map from your smartphone. Let’s jump to creating a personalized Google Map.
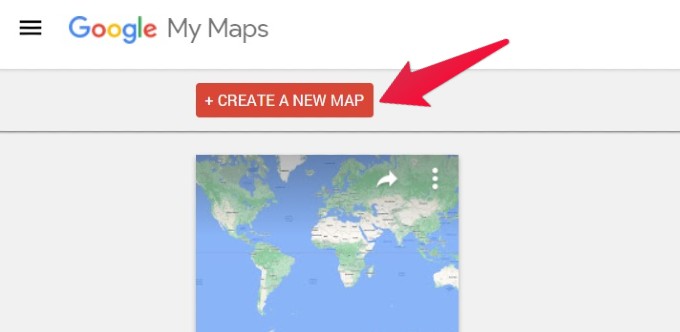
- On any browser on your PC, log in to your Google account. Then, go to https://www.google.com/maps/about/mymaps/ and click the GET STARTED button.
- Click CREATE A NEW MAP on the left side of the screen.
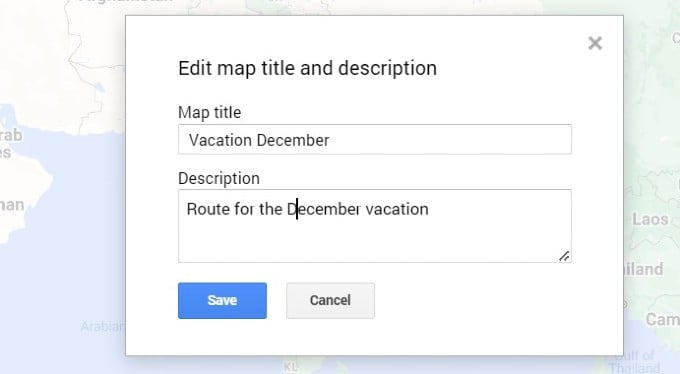
- In the new screen, click Untitled map. Add a Map title and description in the pop-up and click Save.
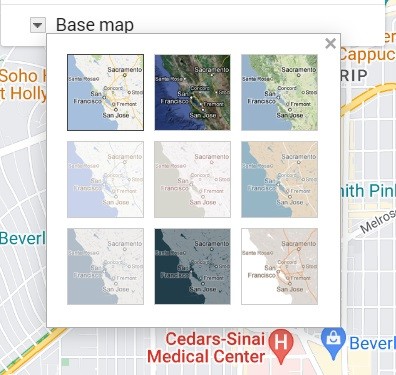
- To create your custom map, you need to understand that it is comprised of layers. The “Base Map” layer is the primary view of Google Maps and is located at the bottom. If you want to customize the appearance of your “Base Map” layer, you must select the options arrow adjacent to “Base Map” and pick a different map theme that suits your preference.
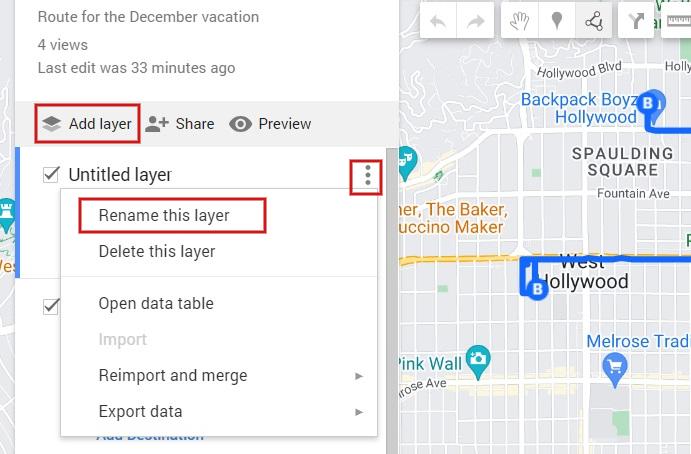
- Below the map title, you can see a checkbox for Untitled Layer. The custom Google Map is composed of multiple layers, with the first layer created by default. To rename the layer, click the three-dot icon and click Rename this layer. After adding the layer name, click Save to save the new name.
- By clicking the Add layer option, you can add as many layers to your personalized Google Map.
Now, let’s see how to add different types of components to your custom Google Map.
Add a Marker or Point of Interest in Google Map
A custom marker point is a precise point that appears on the map. You can use it to provide extra information about a particular area or to direct map users to a location or an area not shown on the “Base Map” layer.
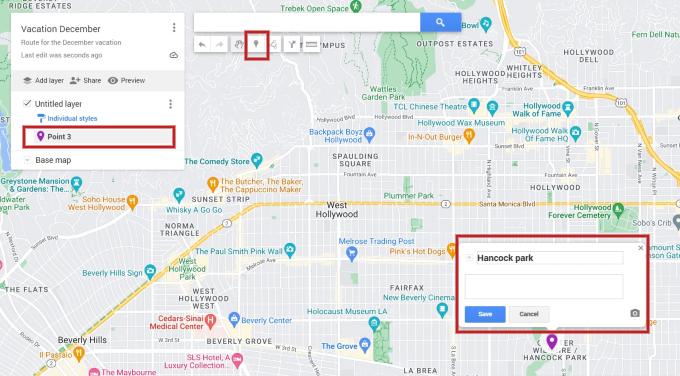
- Before adding a marker, make sure you have located an area in the Base map. Then, click the upside-down teardrop icon below the search bar.
- Click the place you want to add, type in a name for the point, and click Save. By default, the pin will be marked in blue color. You can change the color and style of the icon by clicking the marker.
Add Routes in Google Map
You can add walking, biking, or driving routes between any two points in your custom Google Map.
Click the line and dot icon (next to the teardrop icon) and select the route you want to add from the drop-down menu.
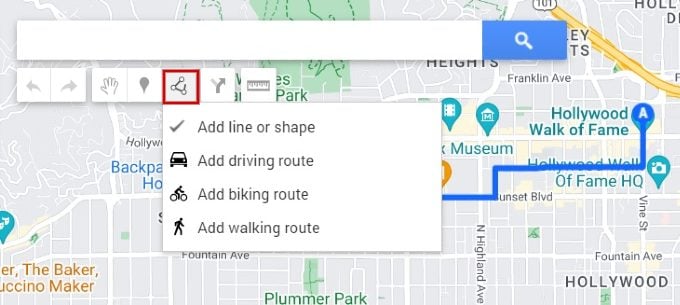
For example, if you want to add a walking route, click Add Walking Route and select the start and end points to add the route.
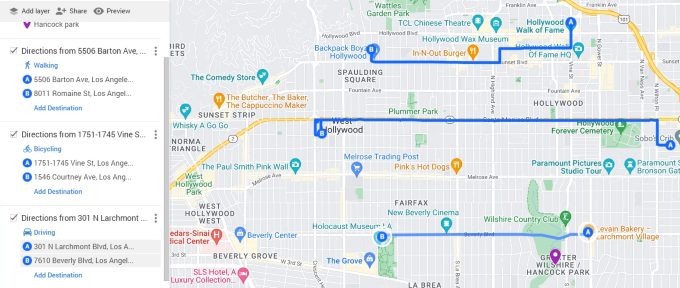
Add Directions in Google Map
Next to the line and dot icon, you will see an arrow icon. It is used to share directions from one point to another by creating a directions layer. After you click the directions icon, a new layer will be added in the left pane with two points A and B. Once you fill in the two points, the route between them will be updated.
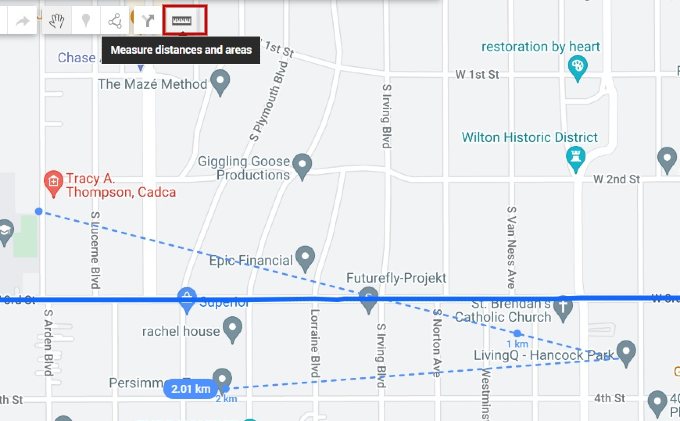
Measuring Distances in Google Map
You can easily measure the distance between any two points by clicking the scale icon.
How to Share Custom Map in Google Maps
When you create a custom Google Map, it is automatically saved in your Google Drive, and only you can access it. However, you can share it with others in the same way as you share a Google Doc or Sheet that is saved on your Google Drive.
- After logging in to the Google My Maps website, click OWNED to view your custom maps. Click the maps you want to share.
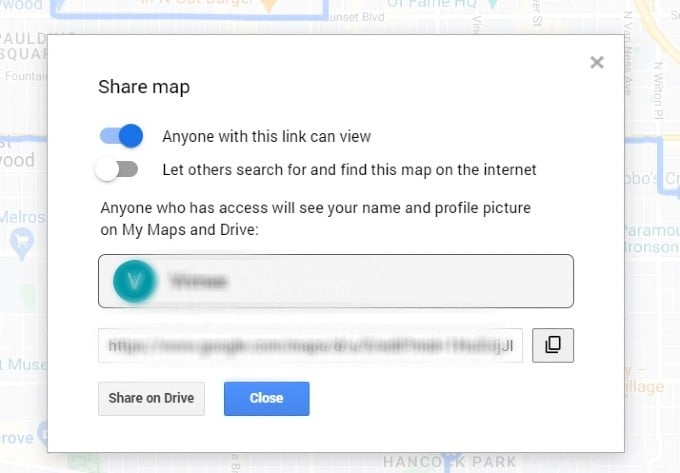
- In the map editor, click the Share icon next to the Add layer icon.
- Select the option Anyone with this link can view and share the link with others. Also, you can select the other two options below this to let others find this map on the internet or see your name and photo on this map.
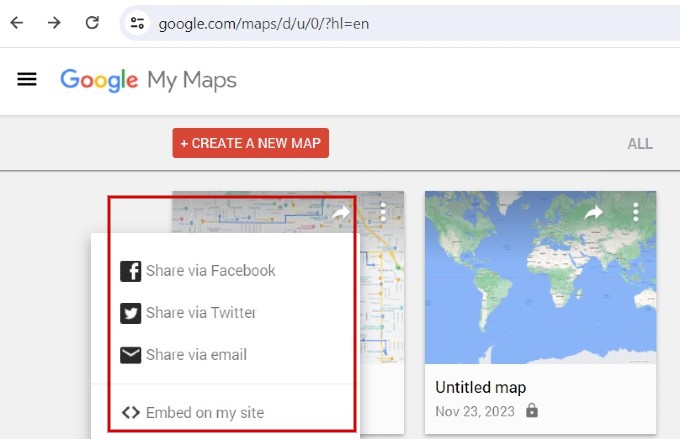
There is one more method to share the custom map with others. From the map editor, click the back button on your browser to go to the main screen of Google My Maps. Click the Share icon on the custom map you want to share. In the drop-down menu, you can see multiple options to share the custom Google Map via Facebook, Twitter, Email, or even embed it on your website.
Creating a personalized Google Map is not just about marking locations; it’s about crafting your own narrative. With the MapMaster guide, you’ve gained the skills to turn a simple map into a masterpiece. Your journey begins now, so go ahead, explore, and let your story unfold on the canvas of Google Maps
Next time you are planning a long road trip, you can create a personalized Google Map and all the places so that you can drive without any hassles.