
Apple officially announced the new macOS Catalina with loads of new features, and facelift to many existing apps and features. With the recently ported Screen Time feature from iOS, you can now control your usage behavior with your MacBook or iMac as well. The Downtime on macOS Catalina allows you to block certain apps after a period of time.
In this guide, we will show you how to use the Downtime feature on your Mac, running macOS Catalina.
How to Enable and Schedule Downtime on Mac
The Downtime feature was initially brought for iPhones and iPads. It was the time when companies like Apple and Google started thinking about the digital wellbeing of the users. Google also pushed a feature similar to Screen Time and Downtime for Android users.
With the Downtime, you can set your MacBook or iMac to automatically go “down.” Which is in terms of app availability, display brightness, and so on. When the Downtime is running within the scheduled timeframe, all the apps (except the ones opted out) will be blocked. You will need to confirm to open the app again in order to access all the blocked apps. In order to use the Downtime on Mac, you need to enable it from Screen Time feature on macOS Catalina. Here is how.
- Update your Mac to the latest macOS Catalina release.
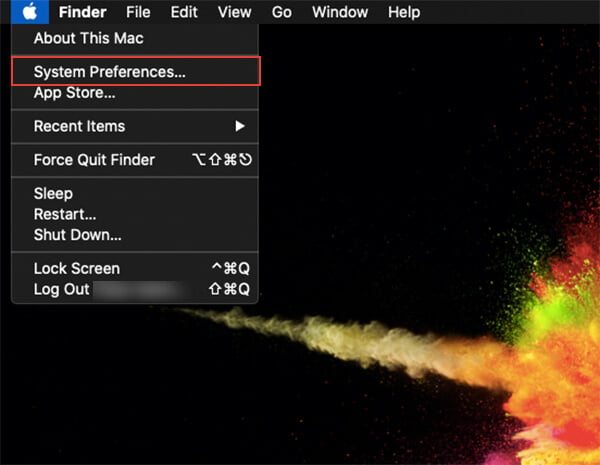
- Click the Apple icon from the Menu bar.
- Choose System Preferences.
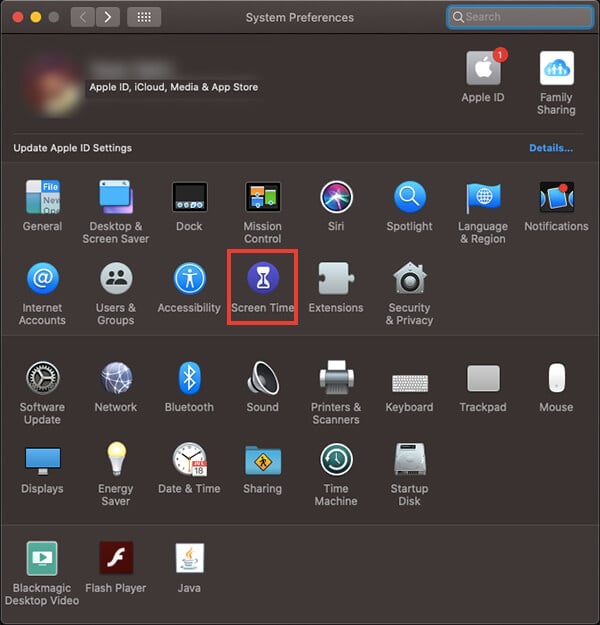
- Click “Screen Time” from the Preferences window.
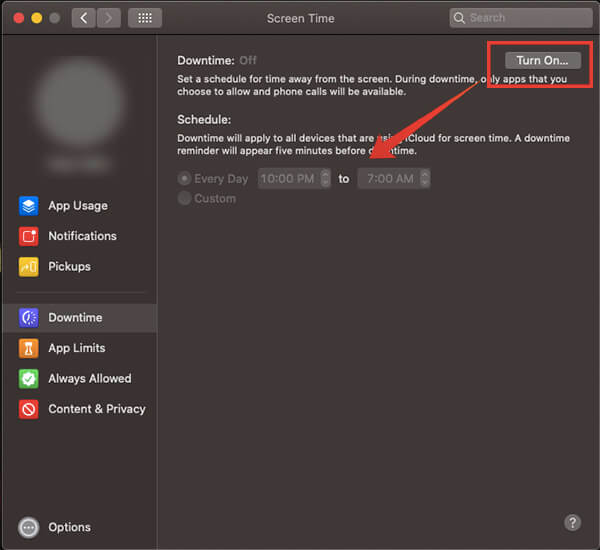
- From the left pane, choose “Downtime.”
- Click the “Turn On” button at the top right corner of the window.
- After enabling the feature, you have to schedule the Downtime on Mac from the same window.
- If you want the Downtime to run on every day as scheduled, choose “Everyday” and set starting and ending time.
- If you do not want it on every day, but specific days of the week, then choose “Custom,” and then select the days you want to run the Downtime feature on your Mac.
The Downtime on Mac will hit at the exact time you preferred while setting up. During Downtime, you will not be able to use any apps. And, you will have to wait until the Downtime ends. However, it is possible to open the blocked apps during Downtime. But when it prompts the Ontime, you can choose to use the app for 1 more minute, 15 minutes, an hour or the full day. But if you are using a Child’s account, you can only get 1 minute more and the rest is up to the parent.
Also read: Meet The 6 New Digital Wellbeing Apps from Google
How to Allow Apps During Downtime on Mac
When the Downtime on Mac is on and is running on the scheduled time, all the apps that fall under every category will get blocked from using. So, whenever you open an app, it will show you the Downtime warning window, but you can choose to opt-out of the Downtime for a limited period of time. But if you want to exclude an app and allow it during the Downtime, here is how you can do it.
- Click Apple Logo and open Preferences on your Mac.
- Click Screen Time.
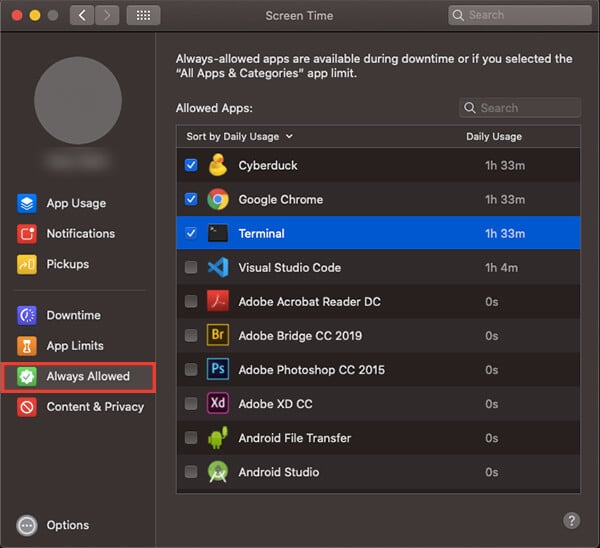
- Choose “Always Allowed” menu from the left side pane.
- From there you will find the entire list of apps on your Mac.
- Click on “Sort by” and choose “Daily Usage” to list the apps based on your usage time per day.
- Check the apps from the list, whichever you want to exclude from being blocked during downtime.
- You can uncheck the apps anytime when you want to remove the app from the exception list.
After choosing the apps you want to exclude during Downtime on Mac, you can continue using them at any time of the day without being affected/blocked by the Downtime/Screen Time warning.
Also Read: iOS ScreenTime: Set Time Limits for Apps on the iPhone?
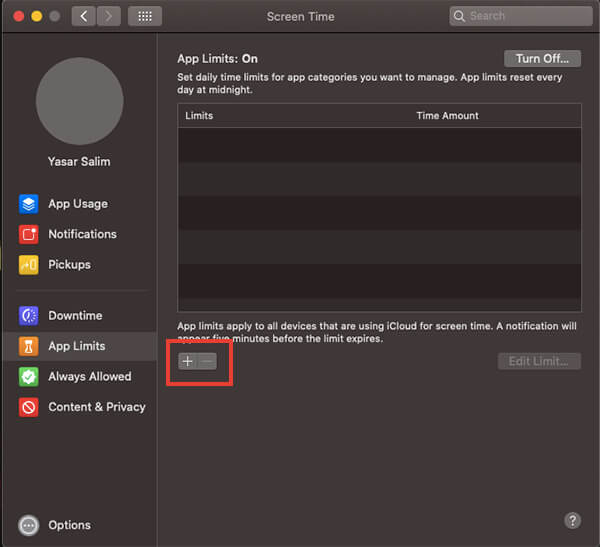
Set App Limits on Mac
The Downtime feature on Mac allows you to block all the apps (or even the chosen ones) after a certain time of the day, for healthy system usage. The Downtime aims at decreasing the system usage time after a certain point. However, if you only want to block certain apps after using for certain minutes or hours, App Limits is there.
The App Limits can simply let you set the time limit for each app. The apps will be blocked after the usage time. Different usage limits can be set for each app, and it is customizable with each and every app. follow the method to set time limits for apps on your Mac, running macOS Catalina.
- Open Preferences window from Apple Logo > System Preferences.
- Click Screen Time next to Accessibility options.
- Go to App Limits screen from the left pane.
- If the App Limits is disabled, click on Turn On button at the top right corner.
- After enabling App Limits, you can find the empty list. Click the “+” button at the bottom of the list to create a new app limit.
- You will be able to find the apps classified into categories.
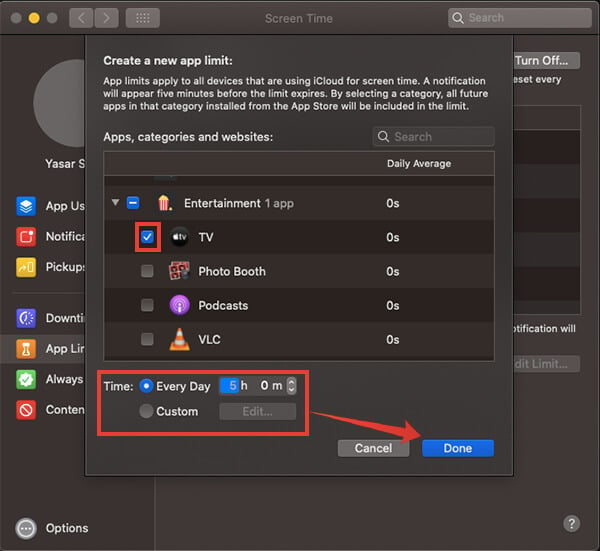
- You can either choose an entire category or expand the list and choose individual apps.
- Choose the time limit.
- Select Everyday and set a time limit for setting the same usage limit for all days in the week.
- If you want to set different app limits for different days, choose Custom and create a separate time limit for each day.
- Click Done.
Follow the steps to edit the time limit for an existing App Limit on macOS Catalina.
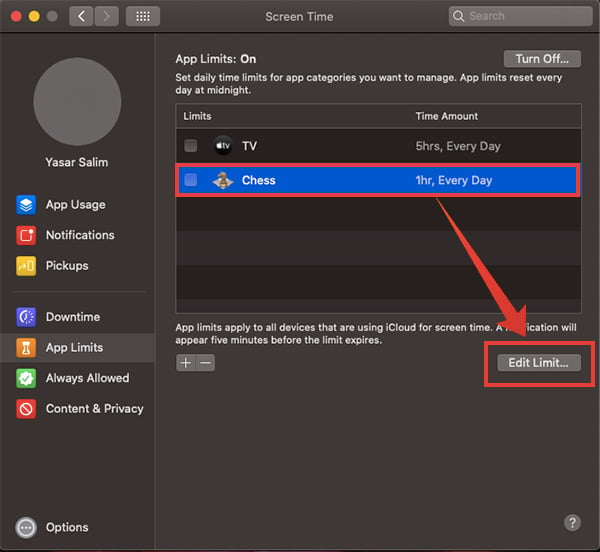
- Select the app from the App Limits window.
- Click the Edit Limit button at the bottom.
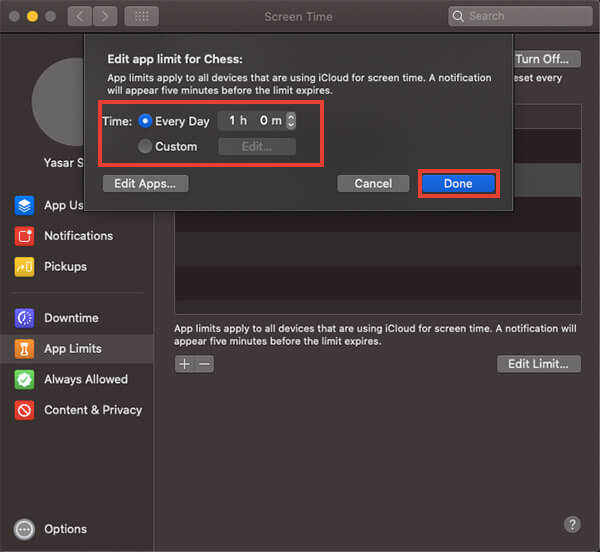
- Choose a time limit from the popup window and click Done.
Similar to the Downtime on Mac, the App Limits will also block you from using apps after a certain time of usage each day. However, you can opt for using the app for 1 minute, 15 minutes, 1 hour, or avoid the limit for the entire day.