Quick Look on macOS has been revamped into a new look with the new version macOS Mojave. If you were using the Quick Look feature on the previous versions, the new one has changed a little bit. This tutorial aims those who have used the feature and ones who have not gotten their hands-on such a feature.
Here is a complete guide to using the Quick Look feature on macOS Mojave.
What is Quick Look?
You can skip this part if you are used to it. This is for the Mac users who need to get to know about the Quick Look feature. Introduced back with OS X 10.5, the Quick Look is a quick file preview app by Apple for their systems (both MacBooks and iMacs). The application package supports numerous file types, which can be previewed without opening them.
The Quick Look feature can even preview the document files, videos, RAW pictures and more. The benefit is that you do not need to open the corresponding supported application in order to find what’s inside the file. For example, a standard photoshop supported file with PSD file format open only on the Adobe Photoshop. It will take time to open and configure Photoshop and preview the file if you are using some less powerful MacBooks. However, using Quick Look, you will get a nearly full-screen view of the image as a pop-up.
The new Quick Look in macOS Mojave Mojave includes many helpful features including editing documents and images, without opening them in third-party manipulating apps.
Related: 12 Things to Customize After Buying New MacBook Pro
How to View and Edit Files Using Quick Look
The basic functions are retained as same as before, with the new Quick Look on macOS Mojave. So, you do not need to worry about Quick Looking at some files using the feature. You can simply tap the Spacebar on your MacBook or iMac to view using Quick Look. This should work with every file.
After Viewing files on the Quick Look mode, simply tap the spacebar itself to close the view. Apart from just previewing the files, it is also possible to edit the files using the Quick Look on macOS Mojave, depend on the file type. The following are some ways to edit certain file types.
Related: How to Set Up and Use Handoff on Mac?
Edit An Image Using Quick Look on macOS Mojave
The new update of Quick Look feature on macOS Mojave allows editing of various file types including PDFs, Images and Videos. Although it does not allow complete editing or manipulation of files, you can add elements like doodles and text over the images or PDFs. It is even possible to crop, trim and add signatures over the images. Here is a guide to editing the images using the Quick Look feature.
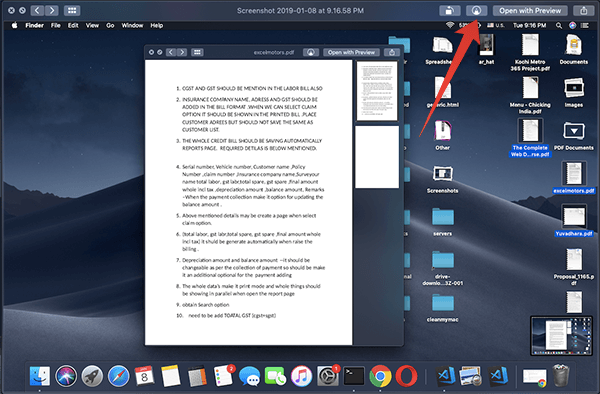
- Tap the spacebar of your MacBook or iMac after clicking a file to preview it using the Quick Look feature.
- There you will be able to see many options including “Open with Preview.” Clicking it will open the file using the Preview app to give you more editing features and room for adding more elements.
- Click the Markup button (Pencil Tip Icon) left to the “Open with Preview” option.
- There you will see various options you can access to edit or manipulate the image.
- After doing enough edits over the image, click “Done” on the Preview pane. This will save the image in the newly edited format.
- Tap Spacebar to exit from the Preview/Quick Look mode.
Image/PDF Editing Tools on Quick Look
Following is a list of options available and their use, which you can utilize to add art on to an image using the Quick Look feature.
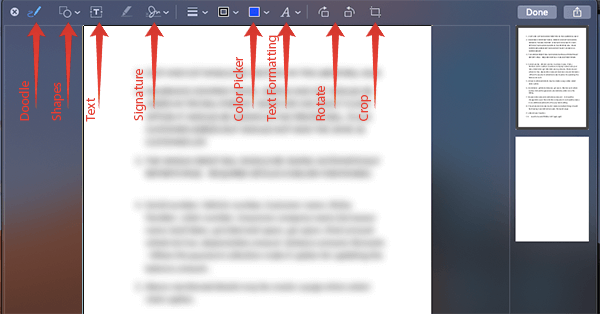
- Doodle/Pen: This option will help you to draw over the image using the freehand pen tool. The color pane is also available to change the color and thickness of the brush.
- Shapes: Every basic shape vectors including straight line, arrow, rectangle/square, rounded rectangle, sphere, star, speech bubble, polygons, etc are available to use. You can also choose the stroke and fill options easily.
- Text: The basic text adding option can add text overwritten to the pictures.
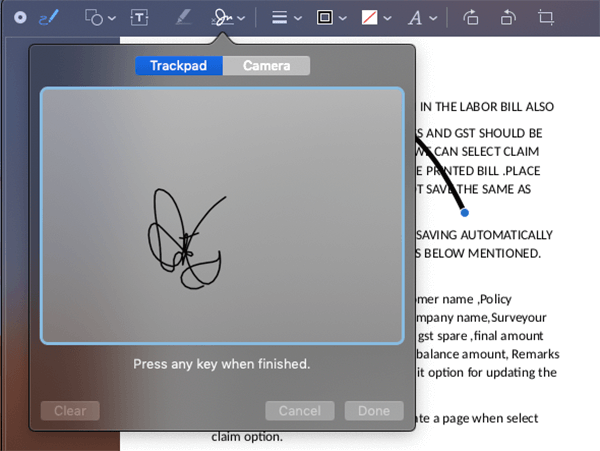
- Signature: The signature feature is very helpful if you are editing a photograph or PDF of a document file. You can add your own signature using this feature. Either you can directly input your signature using the trackpad or use the camera to photograph an official signature of yours.
- Rotate: The rotate options are nothing but help you to rotate the image to both clockwise and counter-clockwise directions.
- Crop: The crop feature only works with the images and you cannot crop a PDF file using this.
Edit A PDF File Using Quick Look on macOS
Similar to editing the images using the Quick Look window, you can also alter your PDF files with markups on the top. When you click the markup button, it will switch to the editing/writing interface where you can add elements over the file as same as in the images. Here, editing the PDF does not mean you can edit the content of the PDF file. You can only add the doodles, text, signature, and shapes over PDF files.
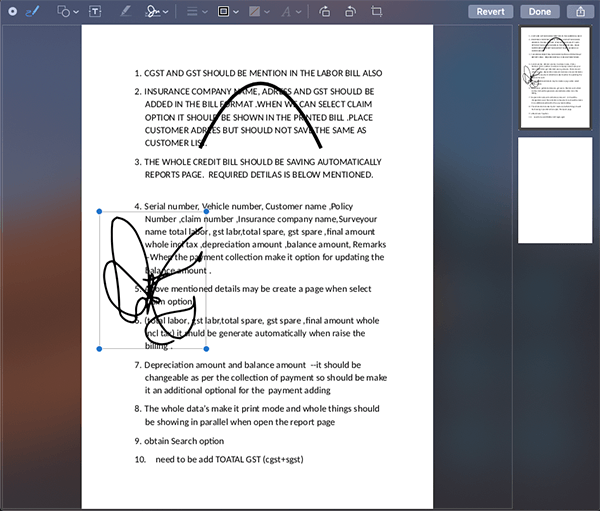
The Markup interface of PDF is just as same as the manipulation window for the images. However, it does not allow you to crop PDFs.
Also Read: How to Create Digital Signature for PDF with Mac
Edit A Video Using Quick Look on macOS
Although the old Mac OS X Quick Look feature shared many similarities with the latest one, it lacked the edit feature. The editing feature on the Quick Look is not only for images and PDFs but for videos as well. Unfortunately, there is no way you can add doodles or signatures on a video. It allows you to trim the length of the video, however.
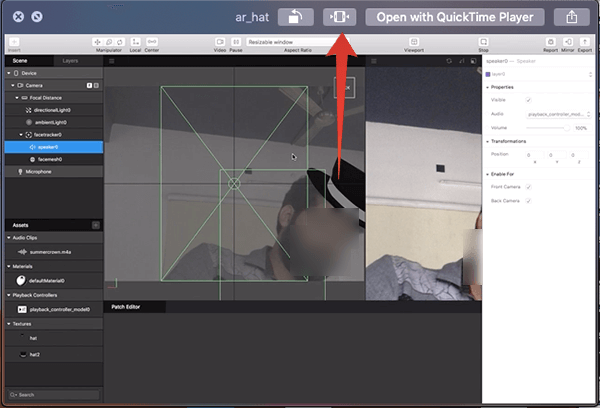
To edit a video (to trim it, to be precise), select one from your desktop or the finder and tap the spacebar. This will preview the video on the Quick Look.
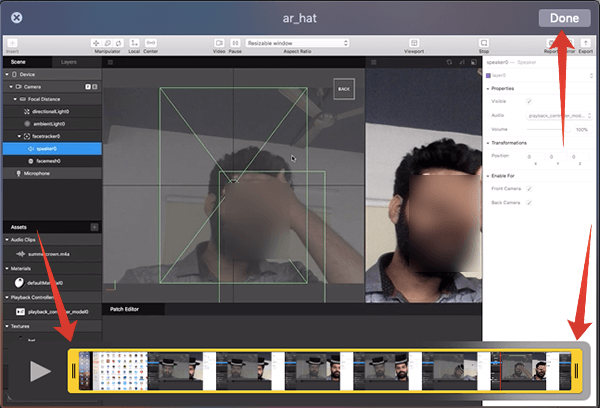
In order to edit, you can tap the trim button aside from the “Open with QuickTime Player” option. Then you can use the slider handles on the window to set the duration of the video and then tap the Done button when you are finished.
Viewing An HTML File Using Quick Look
Since the Quick Look feature supports almost every file type, you can even preview a web page or an HTML file using it. The problem is that you could be able to see it only and, there will not be any editing option. Most of the CSS and additional stylings will be shown to an extent, but editing will be disabled within the Quick Look.
Install Quick Look Plugins
Similar to the previous versions of the Preview’s Quick Look option, the newer version does support the addition of plugins. By default, the Quick Look supports a limited list of file types. But if you want to preview the unsupported file types, with their contents shown correctly, follow the steps.
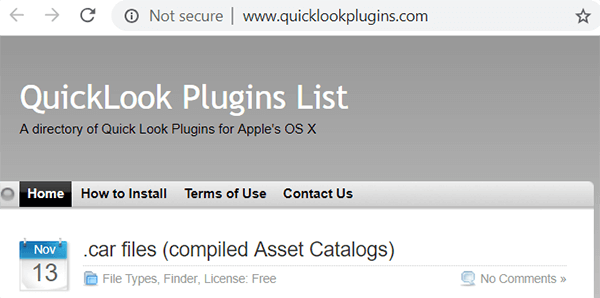
- Download Quick Look Plugins that support corresponding file types you need to open, from any website. QuickLookPlugins.com is a good option.
- Unzip the file and copy the *.qlgenerator format file to the directory /Library/QuickLook.
- Now right-click the Finder icon on the Launchpad and choose Restart.
- You can also run the following command to activate the new plugins:
qlmanage -r.
After then, you will be able to preview the unsupported file formats.
Extra Tips for Quick Look
If you are new to the Quick Look feature on macOS or OS X, here are some golden tips to use the feature at its best.
- To Preview a file, you simply need to tap the spacebar on your keyboard after selecting the file.
- Tapping the spacebar again will exit the preview mode.
- Click and Drag the corners of the Quick Look preview window to resize the view space.
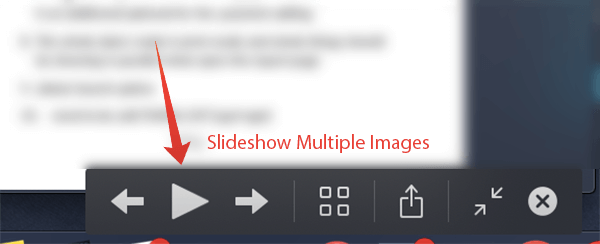
- Click the Full-Screen icon at the top and tap the Play button to slideshow multiple items in the Quick Look.
- Choose the six-grids-icon (or Command + Enter/Return) to show the multiple selected items in a grid.
- To Zoom in/out, press Command + (+)/(-).
- Enter a letter to preview the file starting with the letter when you are on the Quick Look window.
- Double click on the Quick Look window to view the file within the Preview app.
- You can Quick Look a folder to find the details including created date, size and number of files contain instantly.
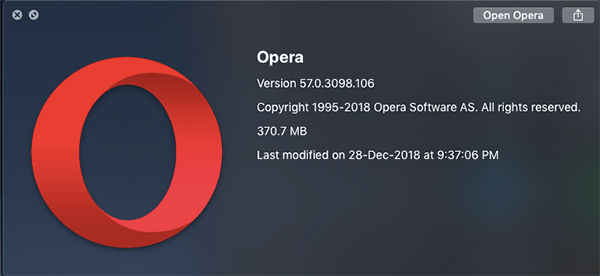
- When you Quick Look an application, the details are revealed.
This is it with the Quick Look feature on the macOS Mojave. There are many to come with the next versions of the macOS and if you find anything more else, do let us know. We hope that you have found this article very helpful.

Missing the possibility to zoom when in full screen mode 🙁