
Notion has taken the note-taking world by storm thanks to its modular approach. In Notion, each note is called a Page which can be customized as you like. You can then share this Notion page with others or invite them for collaboration, communication, and teamwork. But how do we do that?
Notion is a versatile tool with many roles and permissions to choose from. These will depend on the plan you have selected. We will begin with the Personal plans that come in two flavors — free and paid. And then explore Team and Enterprise sharing functions.
- Notion Roles and Permissions Explained
- How to Share Notion Pages in Personal Plans
- How to Copy Link to Notion Page
- How to Publish Notion Page to the Web
- How to Remove Someone From Notion Page or Change Permissions
- How to Share Notion Pages in Team/Enterprise Plans
- How to Manage Members and Groups in Notion
- How to Move Pages and Members to Change Permissions
- How to Change Permissions of Child Page
- Wrap Up: Sharing Notion Pages With Roles, Permissions
Notion Roles and Permissions Explained
Here is a handy list of roles that you can assign to the people and permissions that can be granted to them. This will help you understand the rest of the guide better.
Notion Roles:
- Admins: they have full control over who can be added and removed from a workspace or group including some advanced options like security settings.
- Members: these are your team members who work with you and are part of the same workspace. They are allowed to create, edit, and share Notion pages but cannot edit Workspace settings itself or add new members.
- Guests: they are people who do not work with you but maybe be important for the inner workings. Some examples can be contractors, clients, etc. They can only access the page to which they are invited.
Notion Permissions:
- Full access: a feature reserved for paid plans, members are allowed to both edit and invite other members to the Notion page.
- Can edit: members can view, comment, and edit the page but cannot share with other people.
- Can comment: members can only comment, for example provide feedback, but cannot edit or invite someone.
- Can view: members can only view and do nothing else that we covered above.
Related: A Complete Guide to Microsoft Outlook Spaces AKA Project Moca
How to Share Notion Pages in Personal Plans
Note that Personal plans have different share settings than Team and Enterprise plans. We will begin with Personal plans. The primary difference is that Team and Enterprise plans allow creating a company and adding multiple team members that can be then managed, added, or removed quickly from pages and groups.
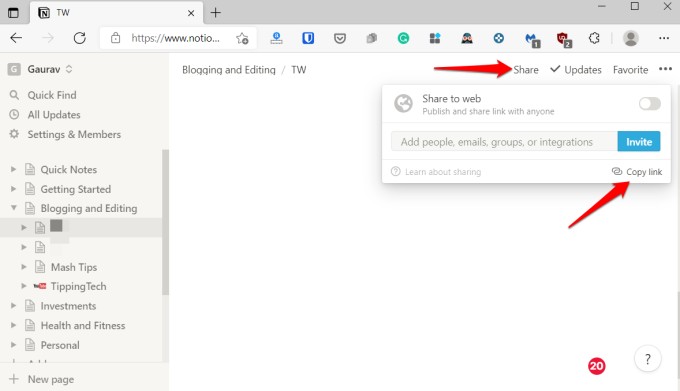
How to Copy Link to Notion Page
It is easy to share Notion pages internally by linking to them via another page. You can also share the link on social media or messaging apps. Simply click on the Share button at the top and select the Copy link.
How to Publish Notion Page to the Web
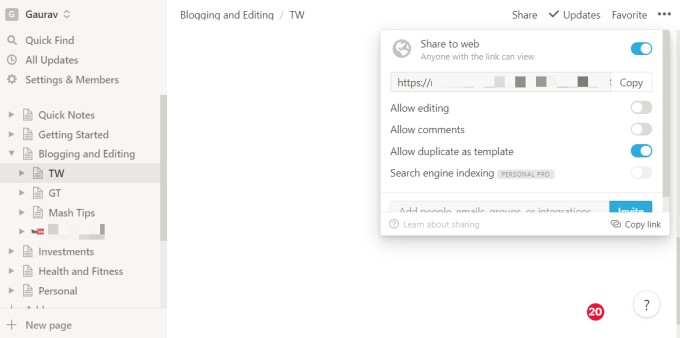
Notion allows users to publish a Notion page to the web, like a website. Now, anyone with a link to the Notion page can access, view, edit, and comment on it. All they need is a link that we saw how to copy in the previous section.
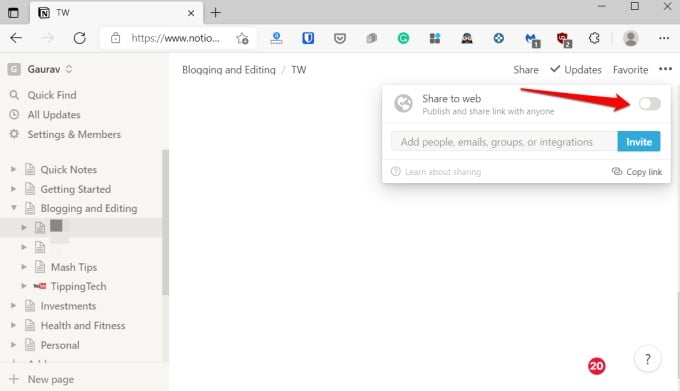
Simply enable the toggle next to the Share to web option. As you do so, you will notice some more options appear that are self-explanatory. Enable each option as you see fit if you want others to be able to edit, comment, copy your Notion page layout and use it as a template, or let Google index your page to display in search results.
Here is a neat trick. You can first publish the Notion page with only view rights so no one can edit or comment or maybe just comment but not edit. Then, click on the Invite button below and invite some individuals who can edit the page. Just enter the email address in the pop-up that follows to control settings and send invites.
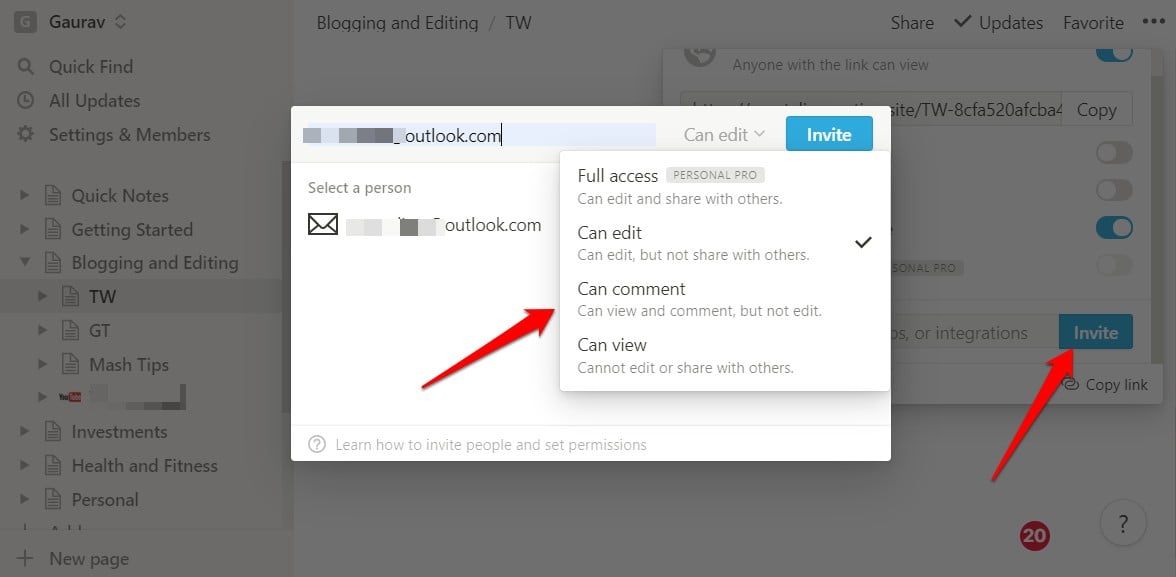
That way, you can keep the page clear of spam and in order. One example can be a Company Wiki page where some team members can update the company page published but everyone else can only view and comment to, for example, provide feedback.
Related: How to Use Signal App as a Note-Taking App
How to Remove Someone From Notion Page or Change Permissions
It is equally easy to remove someone from a Notion page or even change permissions from, say, Can Edit to Can Comment later.
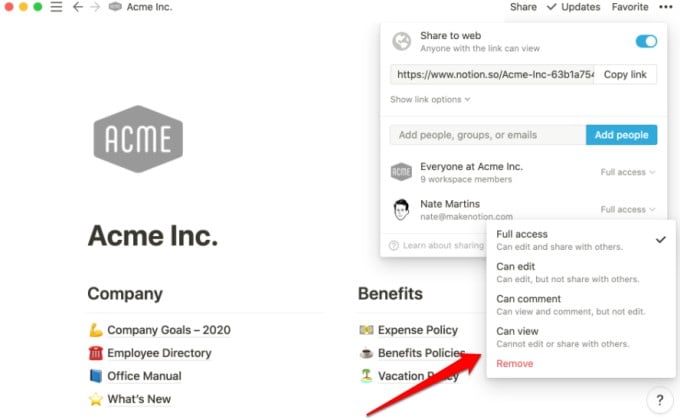
Go back to the Share menu and click on the dropdown menu next to the name of the member you want to remove or change permissions.
Select the correct permission or simply choose Remove to remove him/her from the page.
How to Share Notion Pages in Team/Enterprise Plans
We saw how easy it is to publish a Notion page and invite others to these pages individually. We also noticed how we can control permissions so as to avoid unwanted changes to the document.
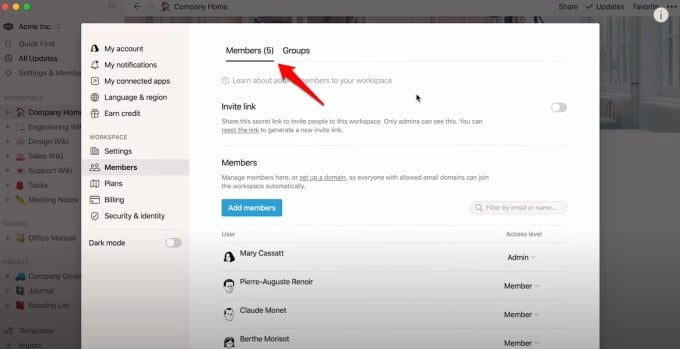
How to Manage Members and Groups in Notion
Each workspace has its own members and these members can be then divided into groups like sales, technical, HR, etc. allowing you to add, remove, members in one go, or give the same permissions to all members of the same group.
Click on Settings & Members to manage members.
Click on the Groups page to create new groups and add/remove new members to them.
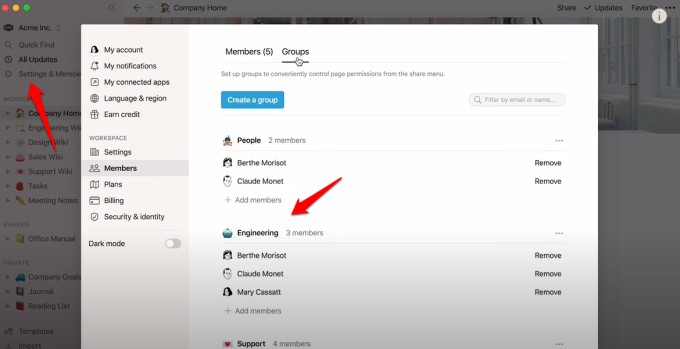
By assigning members to groups, you can control who has only view access and who can edit a particular Notion page.
How to Move Pages and Members to Change Permissions
Another neat trick is where you move a page from one section to another to quickly give the respective permissions to all the members in the section.

For example, when you move a page from the Private section, where only you have access, to Workspace where now everyone can see what you have prepared. You can do it from the sidebar using the mouse. Just drag-n-drop.
Related: 7 Best Note-Taking Apps for Android Phone and Tablet
How to Change Permissions of Child Page
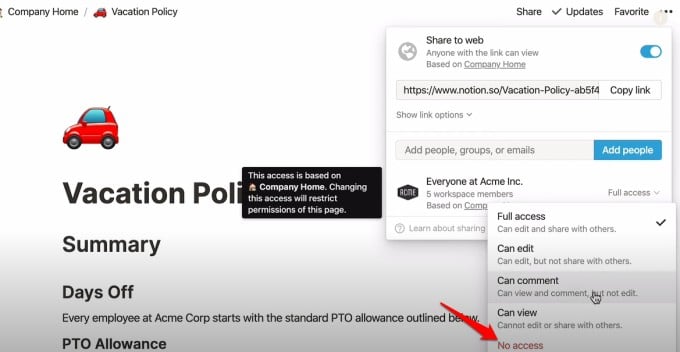
The final piece of the puzzle. By default, all pages nested inside the parent page inherit the same permissions as the parent page. But you can control it.
Open the child page and click on the Share button. You will notice the permission level along with the name of the parent Notion page, in this case, Company Home.
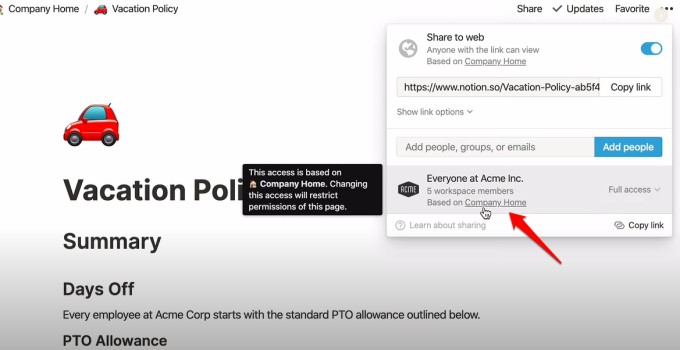
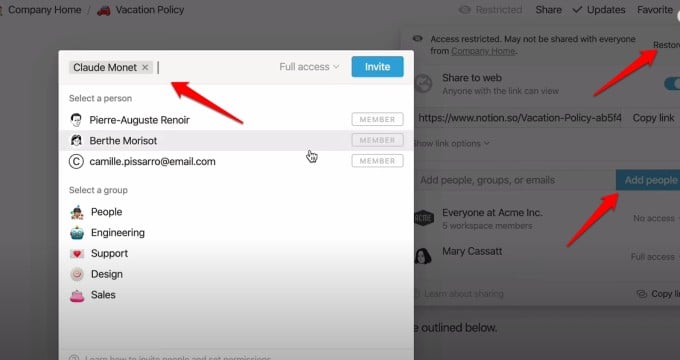
To hide the page from the rest of the team members, click on the permission level and select No Access. Now, this child page has a different permission setting than all other child pages under the parent page.
Click on Add people button to add select members to the Notion page and control their permissions individually. Click on the Restore button at the top to restore permissions to the way they were.
Wrap Up: Sharing Notion Pages With Roles, Permissions
Notion has expanded upon the traditional sharing capabilities of note-taking apps that we grew up using. It is much more flexible but at the same time, easy to use. Everything you need under a single menu, easy to find and use, and manage. Notion has made some videos explaining the various permissions and sharing options in more detail. You will find them on YouTube.