
There are multiple options to transfer files between an iPhone and Windows PC. From iCloud Drive to iTunes connection with a cable, there are many options. But there is nothing matching like AirDrop to share files between iPhone and Windows. What if you can “AirDrop” files between iPhone and PC like everyone else does with their Mac? Yes, you can share files wirelessly from iPhone to PC and back.
Using your WiFi network, it is possible to AirDrop between your iPhone and Windows PC using SMB. Before thinking too much, let’s get started with the guide and know more about SMB.
What is SMB?
SMB is basically a network file sharing protocol that allows applications on a computer to read and write to files and to request services from servers or devices on the same network. Using the SMB protocol, you can access data and share it between iPhone and PC over WiFi.
If your iPhone runs on iOS 13 or later, you can use the Files app for AirDropping to your Windows PC using the SMB. Now, let’s see the step-by-step procedure of file transfer between iPhone and PC.
Related: How to Change DNS Settings on Windows 11 PC
AirDrop Between iPhone and Windows over WiFi
To AirDrop photos or files from iPhone to Windows or from Windows to iPhone, you need to set up an SMB server first. Before getting started, make sure your iPhone and Windows PC is connected to the same WiFi network.
Here are the steps you should follow to share files between iPhone and Windows PC wirelessly:
- Step 1: Find IP Address of Your PC
- Step 2: Create a Shared Folder on PC
- Step 3: Make SMB Connection from iPhone to PC
- Step 4: AirDrop Files Between iPhone and PC
Step 1: Find IP Address of Your PC
First, you need to find out the IP address of your PC to establish a connection with iPhone. For that, you need to open the Windows PowerShell or Command prompt.
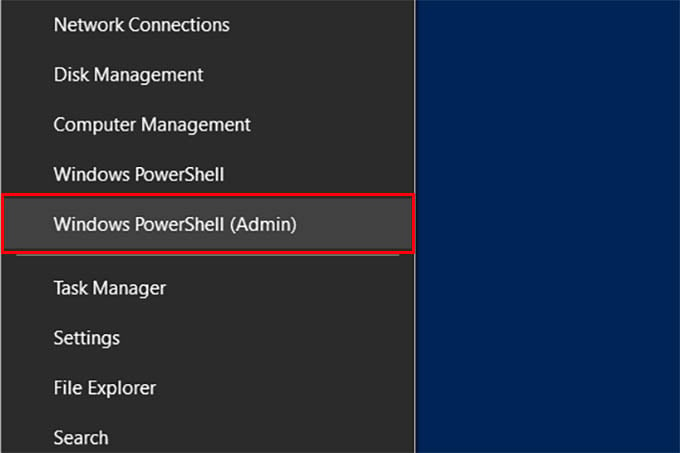
If your PC is running Windows 10 or 11, press Windows Key + X and click on Windows PowerShell (Admin) from the opened Windows Start hidden menu.
Now, a new Windows PowerShell window will be displayed on your screen with a blinking cursor. Go ahead and type ipconfig on the window and hit enter.

Here, you will see a lot of information related to your Wireless Network. Look for the text “IPv4 Address” under Wireless LAN Adapter Wi-Fi or a similar title. The numeric data displayed on that row is your IP address. Note down that address on your computer or on a piece of paper to use later on your iPhone.
Related: How to Reset Network Settings on Windows 11
Step 2: Create a Shared Folder on PC
The next step is to create a folder on your Windows PC that will contain all the files you AirDrop from your iPhone. Though you can create the folder anywhere, it will be easy to access from the desktop.
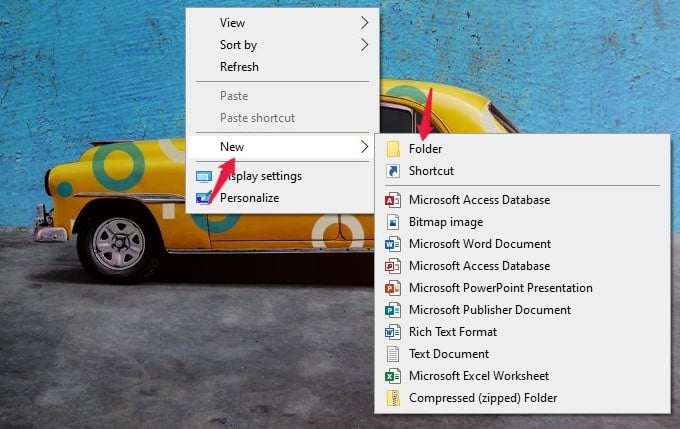
Go to the desktop on your computer and right-click anywhere on the blank screen. In this context menu, select New > Folder.
Now, a new folder has been created on your desktop. Let’s name the folder “iPhone File Transfer“.
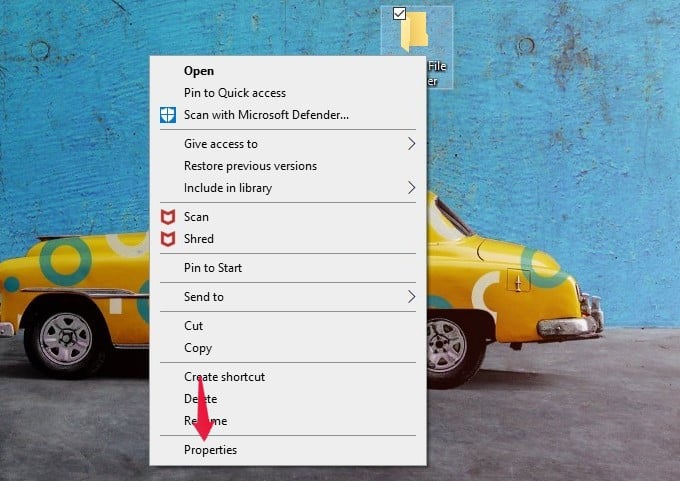
Next, you need to make the folder a Shared one AirDrop between your iPhone and PC. For that, right-click the folder iPhone File Transfer and select Properties from the menu.
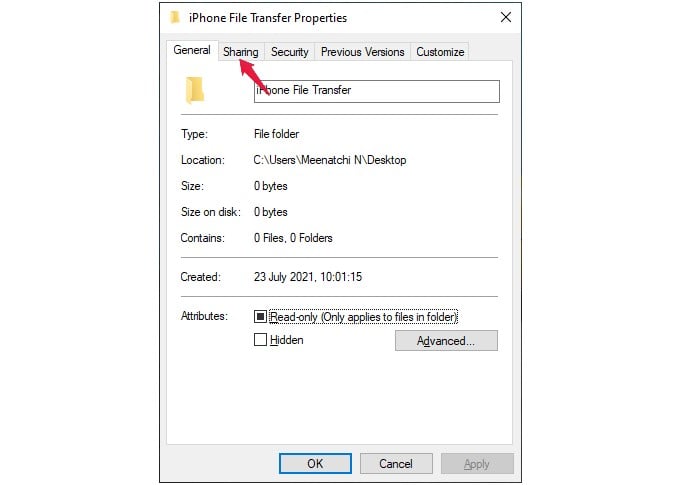
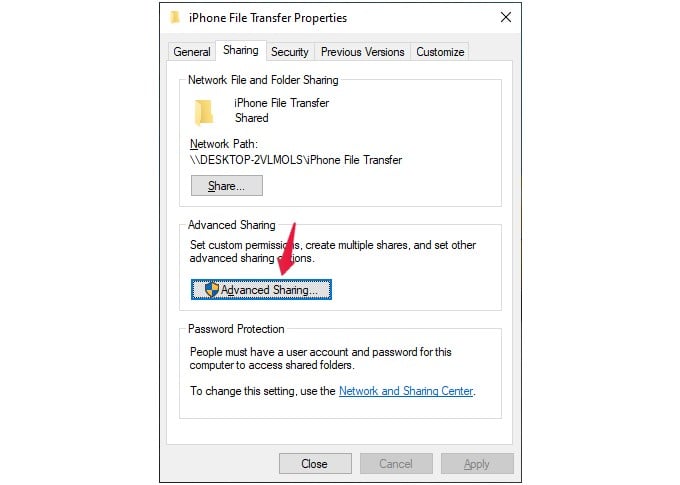
Here, you will see a new window with multiple tabs. Click on the tab titled Sharing.
In the Sharing tab, click on the button titled Advanced Sharing.
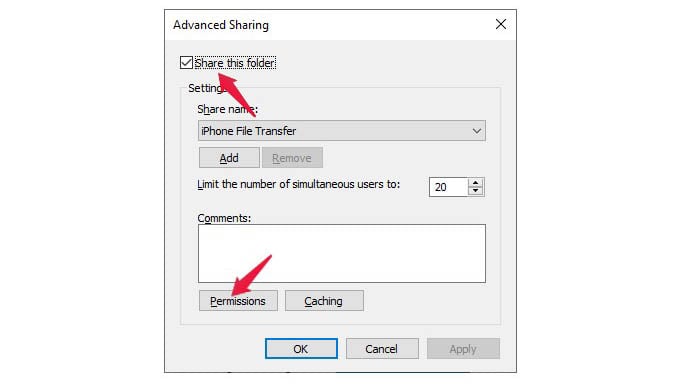
In the new dialog titled Advanced Sharing, check the option “Share this folder“. (By default, this check box is unchecked). Then, click on the button “Permissions” that is displayed below the “Comments” box.
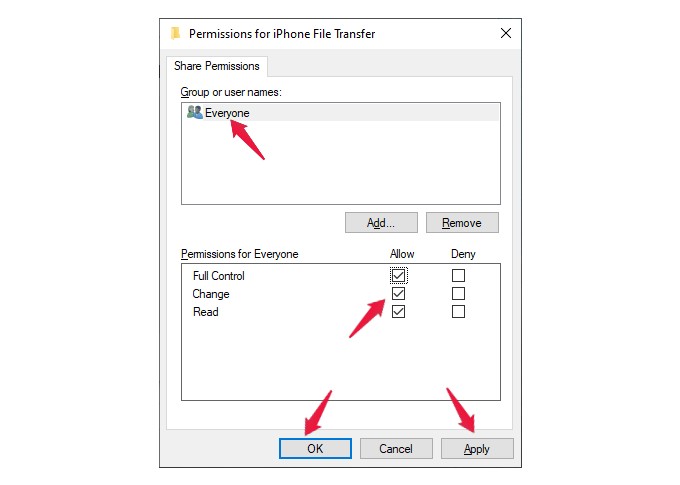
On the new dialog displayed, you can set all the permissions. Here, under the heading “Share Permissions“, make sure you have selected the value “Everyone” for Group or user names. Then, under the heading “Permissions for Everyone“, select all the checkboxes listed under Allow and click Apply. Then, click the OK button and close the window.
This step will make the folder on your PC a shared one so that it can be accessed from your iPhone from the same WiFi.
Related: How to Add Google Drive to File Explorer in Windows 10
Step 3: Make SMB Connection from iPhone to PC
So far, we have completed all the actions needed on the PC to AirDrop files between iPhone and Windows. Now, let’s move on to iPhone and connect the phone with the PC using SMB.
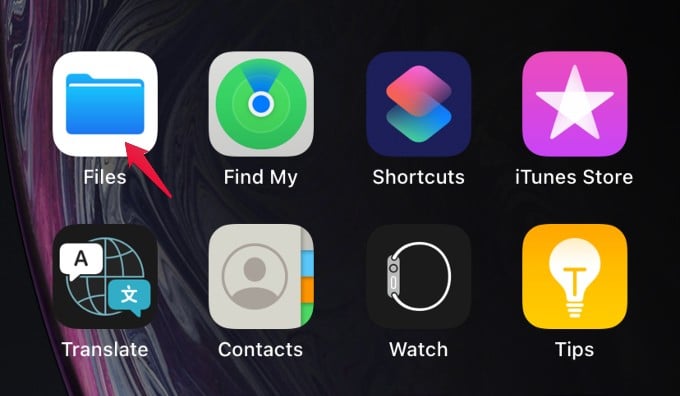
On your iPhone, launch Files app from the App Library or Home Screen.
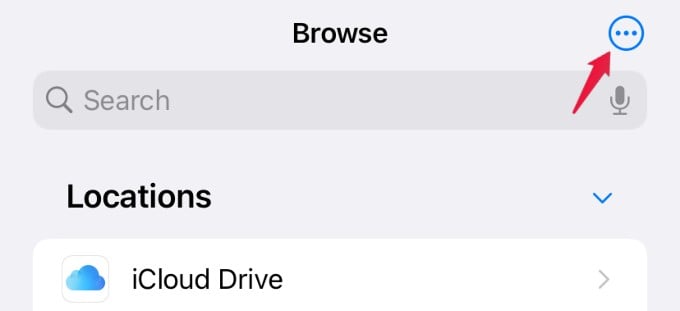
In the Files app, tap on the three-dots icon shown at the top right.
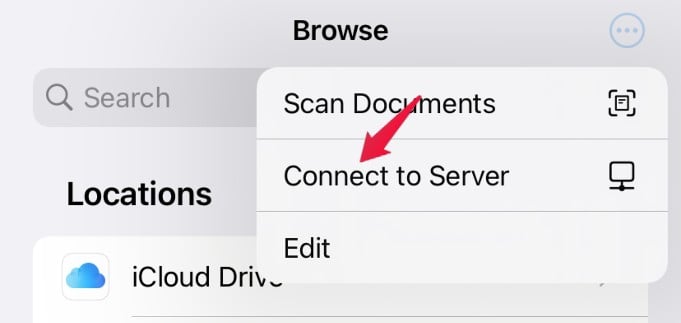
From the list of options shown, tap on Connect to Server.
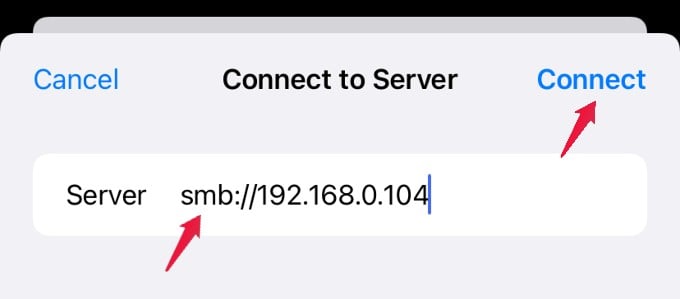
In the new screen, type smb:// followed by the IP address of your Windows PC you had noted down in Step 1. Then, tap Connect on the top right. See the screenshot below to get a clearer idea.
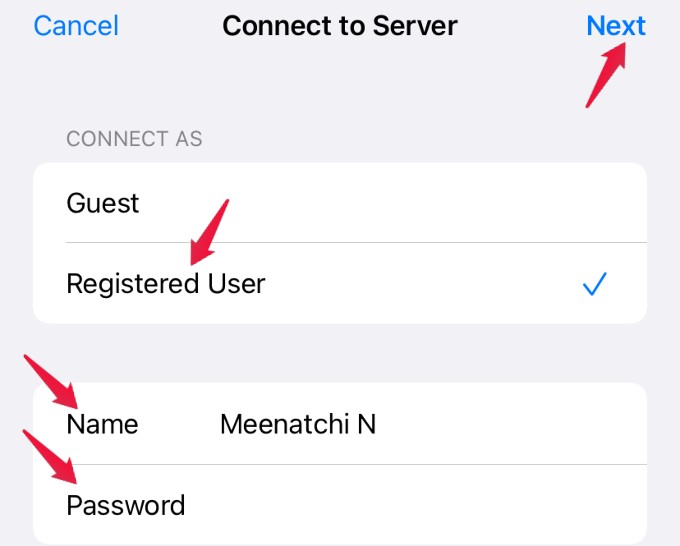
From the next screen, select the option Registered User and enter your Windows username and your Microsoft account password in the respective fields.
If you don’t remember your username, you can find it by opening the command prompt. (Step 1). In the command prompt, the folder path will be displayed as
C:\Users\USERNAME\Desktop
The name that is displayed after Users is your Windows username.
After you enter your username and password, tap on Next located on the topmost right of the screen.
That’s it. Now, the connection between your PC and iPhone has been established and you should be able to see the name of the shared windows folder we created (iPhone Files Transfer) on your iPhone like below.

Related: How to Copy Files from iCloud Drive to Google Drive on iPhone
Step 4: AirDrop Files Between iPhone and PC
Now, it’s time to AirDrop between iPhone and Windows PC using the shared folder we have on the Files app. Let’s say that you need to transfer a bunch of photos from your iPhone to your PC. Let’s see how to do that.
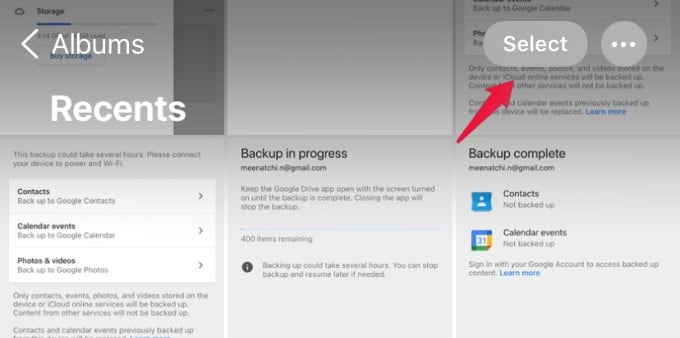
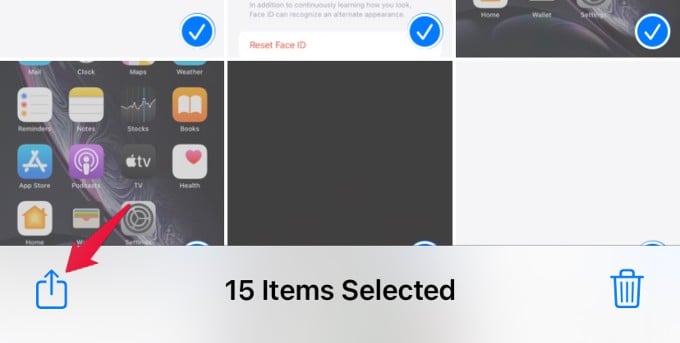
Launch Photos app on your iPhone, tap Select on the right and select the photos you want to AirDrop to the PC.
Then, tap the Share icon located on the bottom left of the screen.
In the Share Sheet, scroll down and tap on Save to Files. On the new screen, you will see a list of locations to save the files. Just tap on the item that shows the IP address of your PC.
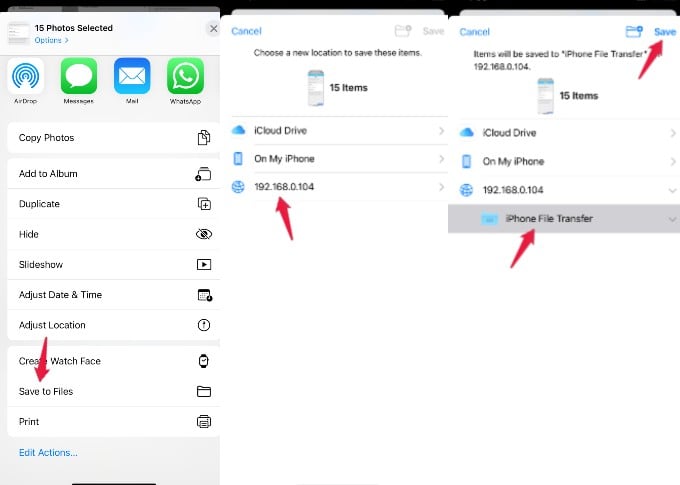
Then, you will see the Windows folder name (iPhone File Transfer) displayed as a subfolder. Select that folder and tap on Save located on the topmost right.
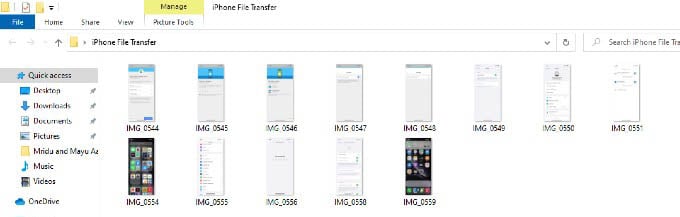
This will instantly transfer the selected photos to the Windows PC like AirDropping. Now, open the folder on your Desktop (iPhones File Transfer). You will see all the files transferred from the iPhone there.
The best part about this method is that you can AirDrop files from Windows PC to iPhone by simply dropping the files or folders into the Shared folder. You can access the same from the iPhone Files app as we mentioned above.
Related: How to Get Airdrop on Android & Windows
Share Files Between iPhone and Windows Using Third Party Apps
Apart from the SMB method, you can also make use of a third-party app to wirelessly transfer files between iPhone and PC. Like the SMB method, iPhone and PC need to be connected to the same Wi-Fi network share files using third-party apps.
AirTransfer is a free app that seamlessly transfers different types of content like Text, Bookmark, Image, Music, Movie, Documents, etc. between iPhone and PC. The good thing is that it works in background mode so that you can easily switch to other apps without disturbing the transfer.
Download: AirTransfer
Apart from this, there are plenty of other apps that support file sharing between iPhone and Windows including Zapya, SHAREit, and Xender.
FAQ: AirDrop Between iPhone and Windows
Since Windows laptops do not have the AirDrop feature unlike MacBooks, you cannot directly AirDrop photos and files to a PC. Alternatively, you can AirDrop between iPhone and Windows using the SMB file sharing method.
There are plenty of ways to transfer files from iPhone to Windows and vice-versa without iTunes including the wireless sharing methods. You can make use of third-party apps like Zapya or SHAREit. But if you prefer more privacy and a quicker method, you can share files from iPhone to PC using the SMB method.
You can use several methods to copy photos from iPhone to PC. Here are some of them:
1. iTunes
2. Direct file access (wired)
3. Wireless file sharing (SMB)
4. Third-party app file sharing
You always do not need a cable to share files between iPhone and Windows computers. With the SMB method, you no longer need to install third-party apps or connect iPhone to PC using a USB cable. This method will give you an almost AirDrop like experience in sharing files between iPhone and Windows PC.
Thanks for your effort to put together a very clear article with helpful annotations etc.
From what I gather, older devices like the iPad Touch are “up to date” at iOS 12.5.5 and so will never get the Connect to Server option to be able to add smb:\IPADDR. Any suggestions?
Thanks, worked 1st time, excellent communication.
I followed all the steps and then go into the ios folder I created on my laptop. It then asks for a HEVC Video Extension for regular photos (non videos)
This was so helpful! Worked wonders! Thank you so much!
how do i get my password for user/password. i cant seem to log into my folder because it says invalid password
Great guide! I always struggled with transferring files between my iPhone and Windows PC. The step-by-step instructions were really helpful. Looking forward to trying out the tools you recommended!
Great article! I had no idea it was possible to AirDrop files from my iPhone to my Windows PC. The step-by-step instructions were really clear. Thanks for sharing this handy guide!