
Taking a screenshot is like a regular thing for most of us, whether we are sharing what we see on the screen with others or saving something important as a screen capture. If you are new to Apple devices, whether it is your iPhone or the MacBook Pro, there are certain ways you can take screenshots.
This guide will explain how you can take a screenshot on any Apple device you own, from iPhone, iPad, Mac, Apple Watch, Apple TV, or even Apple CarPlay.
- Take a Screenshot on iPhone with Home Button
- Take a Screenshot on iPhone Without Home Button
- Screen Record on iPhone
- Take a Screenshot on iPad with Home Button
- Take a Screenshot on iPad Without Home Button
- Screen Record on iPad
- Take a Screenshot on Mac
- Screen Record on Mac
- Take a Screenshot on Apple Watch
- Screen Record Apple Watch
- Take a Screenshot on Apple TV
- Screen Record on Apple TV
- Take a Screenshot on Apple CarPlay
- Screen Record on Apple CarPlay
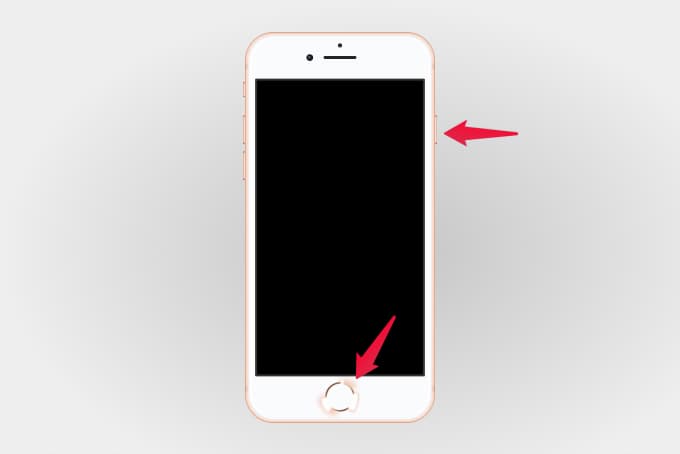
Take a Screenshot on iPhone with Home Button
The newer iPhone models do not have a home button, unlike the old ones. If you still own one of those iPhones, whether an old-school iPhone 4s or the latest iPhone SE 2, here is how you can take a screenshot on your Touch ID iPhone.
While the screen is on, press and hold the Side/Top button and Home button together for a second and release. Your screen is now captured and is saved in your camera roll.
You can see the saved screenshots under the “Screenshots” album in your iPhone Photos app.
Related: How to Take Scrolling Screenshots on iPhone
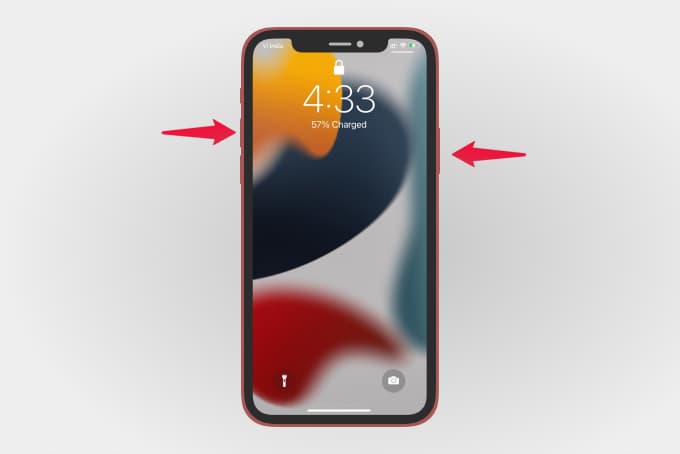
Take a Screenshot on iPhone Without Home Button.
Let’s say you are using a newer iPhone that does not have a home button. The Face ID iPhone models do not have a physical home button, so taking screenshots is slightly different on your device.
To take a screenshot on your iPhone X or newer, instantly press and release the side button and volume up button together without delay.
The captured screen will be previewed at the bottom left corner of your iPhone screen. Although the preview is there, you can take another screenshot without having the previous one’s preview on the new screenshot.
If you want to crop or annotate the screenshot, tap the screenshot preview on your iPhone. You can also take long scrolling screenshots on your iPhone with this preview screen.
Screen Record on iPhone
If you don’t want a single screen but the whole things happening on your iPhone, the best way is to screen record your screen. Unless your device is restricted by certain parental controls or organizational profiles, you should be able to record the screen immediately.
To record your iPhone screen, you can first open the Control Center. For iPhones with the home button, simply swipe up from the bottom edge. If you are using a Face ID iPhone, swipe down from the upper right corner of the screen.
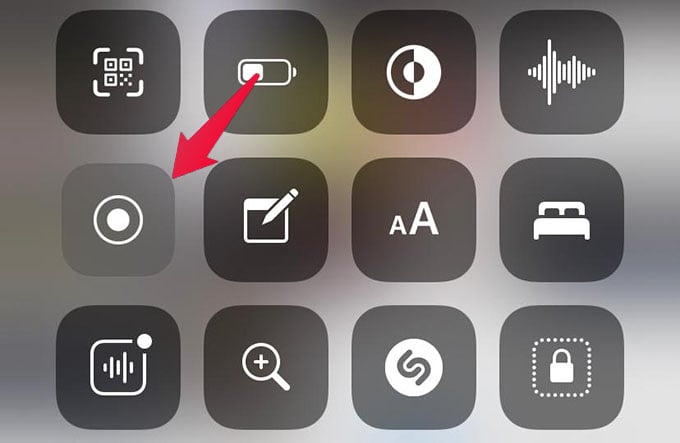
There you will see a circular icon with a white dot inside it. That’s the screen record option. Simply tapping it will start the screen record in 3 seconds if you want to record with the sound from your microphone, long-press the icon and enable the “Microphone” option.

To stop screen recording on your iPhone, you can simply tap the red line at your screen’s top or top-left corner. Then tap the “Stop” option from the menu.
Related: How to Screen Record Locked iPhone Screen
Take a Screenshot on iPad with Home Button.
If you use an iPad or iPad Mini, you know it has a Touch ID home button like the older iPhones. Taking screenshots on your iPad with a home button is as easy and the same as taking one on the Touch ID iPhones.
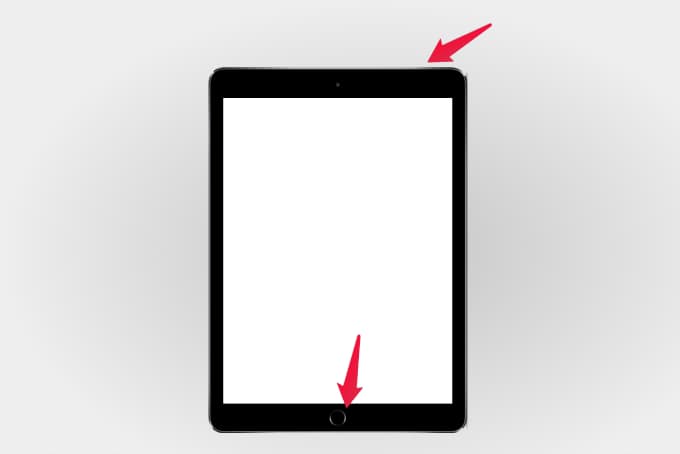
Press the home button and the top button on your iPad simultaneously to capture your screen. his will also save the screenshot on your Photos app, and you can access them from other devices if your “iCloud Photos” are enabled.
Related: How to Use iPad As A Second Screen for Mac and Windows?
Take a Screenshot on iPad Without Home Button.
An iPad without the home button has a Face ID, like the newer iPhones. Taking screenshots on your newer iPad is similar to the iPhone X or iPhone 12.

On your iPad, press the top button and the volume up button at the same time and release quickly to take the screenshot. You can find the capture screen from the Photos app or edit it before saving it.
Screen Record on iPad
Screen recording on both the Touch ID and Face ID iPads is pretty much the same. It is similar to screen recording on iPhones.
First, pull down the Control Center on your iPad, iPad Mini, iPad Air, or iPad Pro. Then, look for the record icon (circle with a dot in it) and tap on it to start the screen recording. Wait for three seconds for the iPad to start recording your screen.
Like on iPhone, you can enable or disable the microphone before recording. To stop and save the screen recording, you can tap on the red icon on the status bar at the top of your iPad screen.
Related: How to Mirror iPhone/iPad to Windows Screen for Free with AirPlay?
Take a Screenshot on Mac
Macs or MacBooks are quite different than PC laptops in many ways, and the screenshot is one of them. You will not find a dedicated screen capture or screen print key on any of your Mac computers. There are some other shortcuts you should use on your Mac to capture what’s happening on the screen.
Unlike the iPhone, iPad, or other Apple devices, you have many options to capture your screen on Mac. You can take a screenshot of the whole screen, a single window, or any selected portion you like. Here are those Mac keyboard shortcuts to take screenshots.
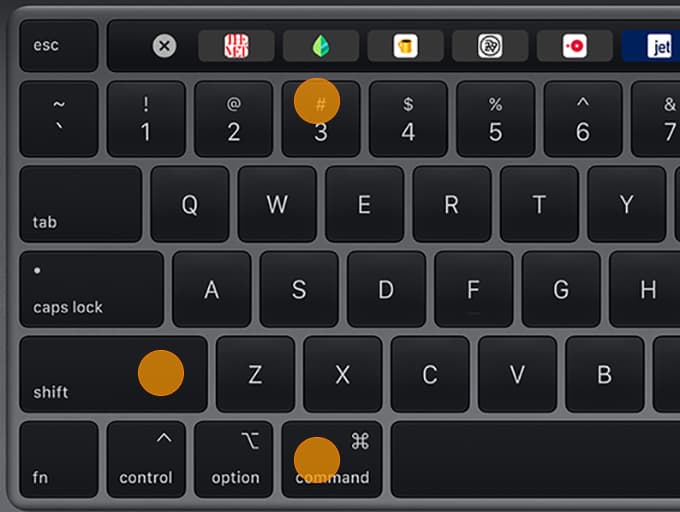
- Capture full screen: Shift + Command + 3
- Capture a window: Shift + Command + 4 + Spacebar
- Capture a selected area: Shift + Command + 4
Related: How to Take Screenshots on Mac Touch Bar
Screen Record on Mac
Mac has an advanced screenshot tool to capture screens based on your preferences and timing. The same is where you can find the screen recording options.
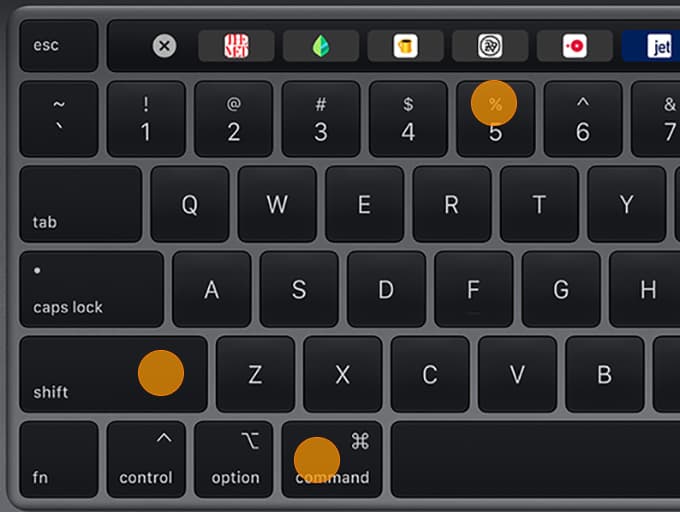
To screen record on your Mac, open the screenshot tool by pressing Shift + Command + 5 on your Mac keyboard.
You will see many icons on the toolbar. The rectangle boxes with a circular icon are for the screen recording on your Mac. The dotted icon lets you record the selected area, and the full rectangle icon allows you to record the entire screen.
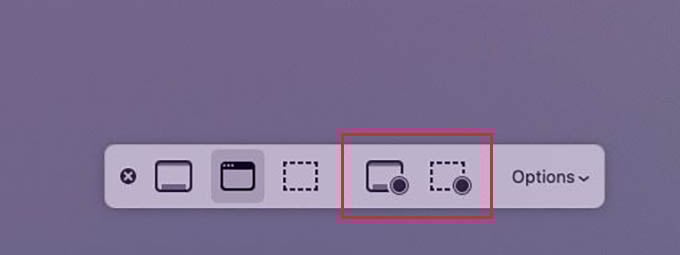
Once you choose the screen recording preferences, click on the “Record” button or click the mouse pointer that has turned to a camera icon on any screen to start recording.
Take a Screenshot on Apple Watch
You might have ever given it a thought – taking screenshots on the Apple Watch on your wrists. But it’s possible and easy to do. Like your iPhone or iPad, it has a dedicated key combination that works to capture the screen on your Apple Watch.
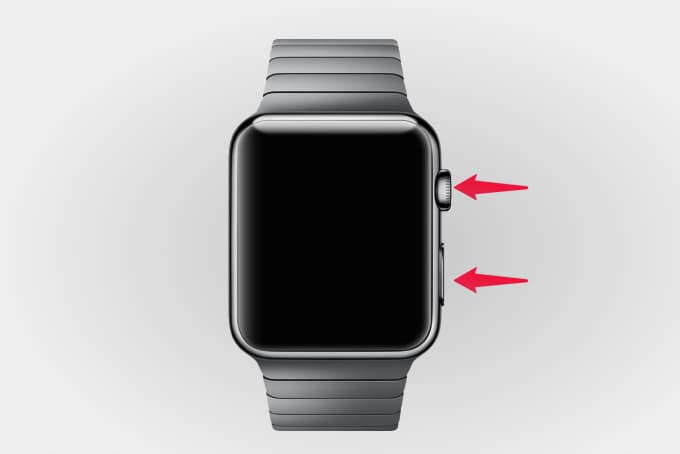
To take a screenshot of your Apple Watch, press the digital crown button and the side button of your Apple Watch together. Like in iPhone, it will suddenly capture the screen and let you know by flashing the screen.
You can head into the Photos app on your iPhone to find the Apple Watch screenshots you took. You will find them under the “Screenshots” album. Ensure your iPhone and Apple Watch are connected and synced to get the screenshots quickly.
Related: How to Create Apple Watch Faces Using Photos on iPhone
Screen Record Apple Watch
Apple Watch is too tiny to take screenshots, but they allow it. However, when it comes to screen recording, Apple might have thought it would be unnecessary to record the Apple Watch screen.
As of now, you cannot screen record your Apple Watch activities. The only way is to record your Apple Watch by using the iPhone or any professional camera that will get you better results.
Related: How to Use Apple Watch as a Live Viewfinder for iPhone Camera
Take a Screenshot on Apple TV
This is kind of odd, but sometimes you want one or two screenshots from your Apple TV. In that case, Apple leaves you no choice but to go with your Mac if you own one. There are certain workarounds but let’s see how we can use the QuickTime player to take a screenshot from the Apple TV using your MacBook.
First, ensure your Mac and Apple TV are connected to the same WiFi network. Then open the QuickTime Player app on your Mac. If you can’t find it, you can press Command + Spacebar to open the spotlight and search for QuickTime.
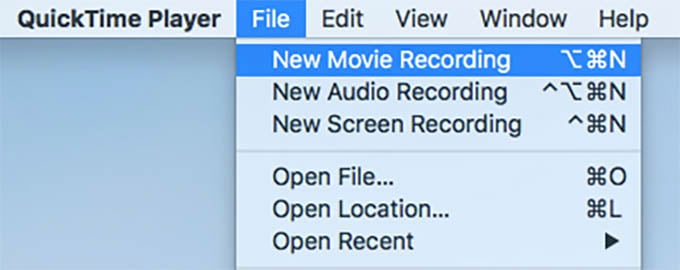
From the app, go to File > New Movie Recording from the menus at the top.
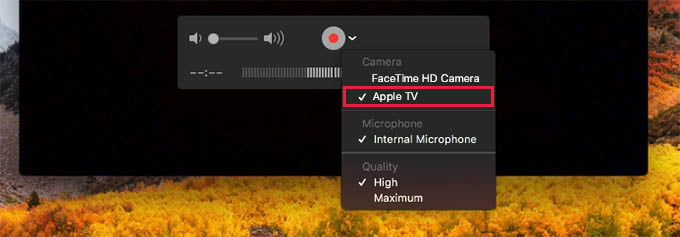
When the “Movie Recording” window opens, click the dropdown arrow near the record icon and choose “Apple TV” instead of FaceTime HD Camera.
Now you will see your Apple TV screen on your MacBook. Now the thing is pretty simple. You have to take a screenshot on your Mac to get the Apple TV screen capture.
Related: How to Watch Apple TV+ on Roku & Fire Stick
Screen Record on Apple TV
As we discussed, you can record your Apple TV screen by using the QuickTime Player on your Mac. You need to go to the QuickTime Player and select File > New Movie Recording.
Now for the source, click the down arrow near the recording icon and choose “Apple TV.” Then click on the record button to screen record your Apple TV.
Although you can record the Apple TV screen, it is limited to the tvOS interface and not any streaming apps. Screen recordings or screenshots are blocked on any content related apple-like Apple TV+, Disney+, or Netflix.
Take a Screenshot on Apple CarPlay
Apple CarPlay allows you to access apps from your iPhone and see maps, calls, and notifications while driving. All you need is to connect your iPhone to your car’s media player using the lightning cable and then set up the CarPlay.
If you think an app looks cooler on your car’s screen or want to capture the CarPlay screen, it is easy with your iPhone. Take a screenshot on your iPhone by pressing the Side Button + Volume Up Button (or Side Button + Home Button), and it will also capture the CarPlay screen.
If you get into the Photos app and check under the “Screenshots” album on your iPhone, you will find the iPhone screen and the CarPlay screenshot.
Related: How to Turn Off Apple CarPlay on iPhone and Car
Screen Record on Apple CarPlay
Like you can capture the Apple CarPlay screen by taking screenshots on your iPhone and screen recording too. Any screenshot or screen record action on your iPhone will do the same with CarPlay if the iPhone is connected and running.
Open the Control Center on your iPhone and tap on the screen record option. In three seconds, your iPhone will start recording your iPhone screen as well as the CarPlay screen at the same time.
Once you finish recording, you can find the screen-captured video from the iPhone’s Photos app. Go into the “Screen Recordings” album to see both the iPhone and CarPlay screen recording videos.
New users often complain about Apple devices and that taking screenshots is more complex than other phones or PCs. In fact, some Apple devices show you pretty easy ways to take screenshots or record the screen, and I hope we have explained them all here.
You cannot screen record while connected to CarPlay. It immediately stops the screen record function when connected to CarPlay.